Usage Guide
Loading Code
To enter the bootloader, hold down the bootloader-activation button, then press and release the reset button, then release the bootloader-activation button. The bootloader should appear to your computer as an USBasp programmer, so you may now use it as though you were using an USBasp with AVRDUDE.
A typical AVRDUDE command would start with "avrdude -c usbasp -p atmega328p", and to load a hex file into flash memory, it looks like "avrdude -c usbasp -p atmega328p -U flash:w:filename.hex". You will not be able to modify any fuse-bits, which prevents you from "damaging" the bootloader.
Note: you will see an error similar to "avrdude: error: usbasp_transmit: usb_control_msg: sending control message failed, win error: A device attached to the system is not functioning.", please ignore this error. This always happens after the bootloader has completed its task and jumps to the user application, without acknowledging the command that told it to perform the jump as it happens instantly. It is not possible to acknowledge the command before jumping because of the limited code size available for the bootloader memory section.
If you are not that familiar with AVRDUDE, check out some of the general AVR tutorials I've gathered (see under "tutorials").
There's a good chance that you'll require the USBasp drivers in order for the USBaspLoader bootloader to work. The drivers can be found here.
Switching Power Bus Voltage
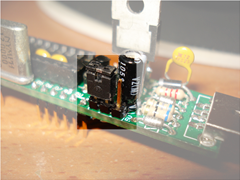
A jumper shunt block is used on the a 3 pin jumper to switch between powering the USnooBie with 5V or 3.3V. The voltage corresponding to the location of the block is labelled on the PCB.

Important Note
Are you using PORTD2 or PORTD7? Those pins are used by the USB bus (please see schematics in download page). PORTD2 is connected to USB D+ and PORTD7 is connected to USB D- (make sure "usbconfig.h" has these settings if you are using V-USB). If you connect something to them, you might interfere with the USB bus.
Getting Starting Making USB Devices
Please visit the tutorial page.
Using USnooBie with Arduino
Please visit the "Using USnooBie with Arduino" page.