Using USnooBie with Arduino
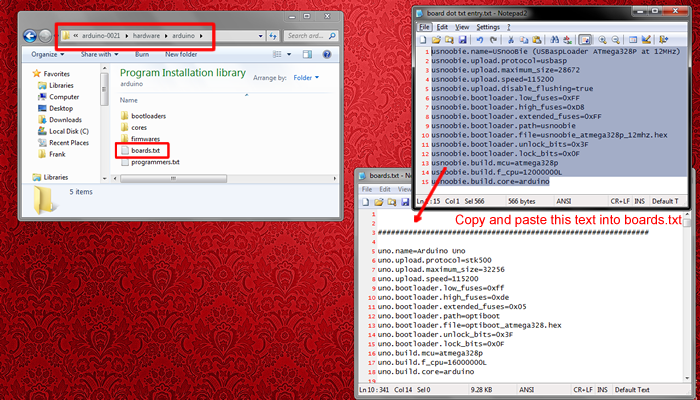
All you need to do is copy this text below into “/arduino-####/hardware/arduino/boards.txt”
usnoobie.name=USnooBie (USBaspLoader ATmega328P at 12MHz)
usnoobie.upload.protocol=usbasp
usnoobie.upload.maximum_size=28672
usnoobie.upload.speed=115200
usnoobie.upload.disable_flushing=true
usnoobie.bootloader.low_fuses=0xFF
usnoobie.bootloader.high_fuses=0xD8
usnoobie.bootloader.extended_fuses=0xFF
usnoobie.bootloader.path=usnoobie
usnoobie.bootloader.file=usnoobie_atmega328p_12mhz.hex
usnoobie.bootloader.unlock_bits=0x3F
usnoobie.bootloader.lock_bits=0x0F
usnoobie.build.mcu=atmega328p
usnoobie.build.f_cpu=12000000L
usnoobie.build.core=arduino
usnoobie.build.variant=standard
Then just select the new "USnooBie" board from within the Arduino IDE's menus.
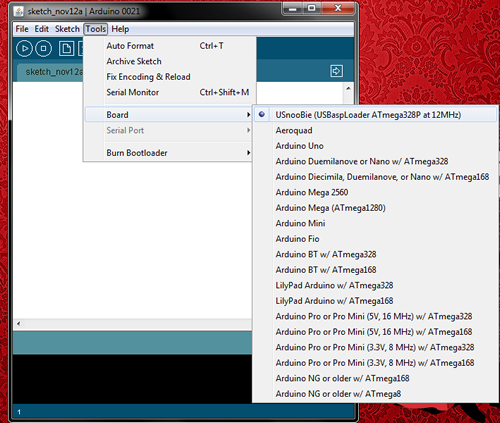
To upload a sketch, just activate the bootloader (press and release the reset-button while holding down the bootloader-activation-button, see the usage guide) and then press the "Upload" button in Arduino.
To know which pin is which, refer to the pin mappings of the ATmega328P.
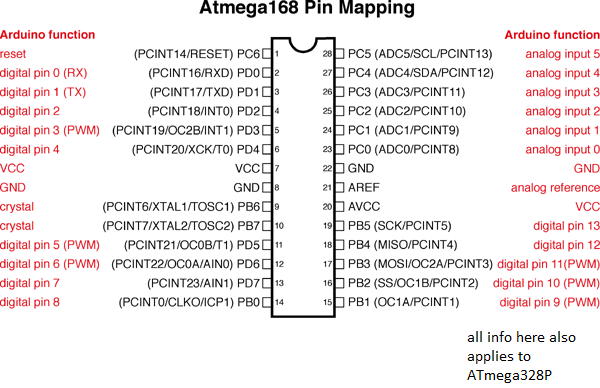
Are you using PORTD2 or PORTD7? Remember, 2 pins are used for USB connectivity, digital pin 2 (PORTD2) and digital pin 7 (PORTD7) are already connected to the USB bus, see the schematic diagram of USnooBie. Using these pins can cause USB stuff to fail.