This is something I really wanted to like. I really want to get behind a product that breaks down a barrier to entry of a hobby. But alas it’s not the miracle product that I hoped it to be.
For only $55, it is a RC transmitter that runs open source software, particularly, EdgeTX and ExpressLRS. This is basically the lowest priced transmitter that can run official EdgeTX firmware, and this is important for the hobby of combat robotics. In my opinion, this offers a slight competitive advantage (see appendix) to beginners with a radio that costs much less than the equipment that more seasoned competitors are using, potentially leveling out the playing field.
I was very excited that this new radio transmitter was up for preorder. I don’t preorder things often, but I really wanted this with some spare time before my next competition. Radiomaster has made many products that have been praised by many people already so I felt confident. This is supposed to be a scaled down, budget friendly product, that probably borrowed circuitry from their previous Zorro radio.
After a long wait… it finally arrived. Imagine my absolute disappointment when my 18650 batteries did not fit inside! Few things feel worse than getting a new toy and not being able to play with it.
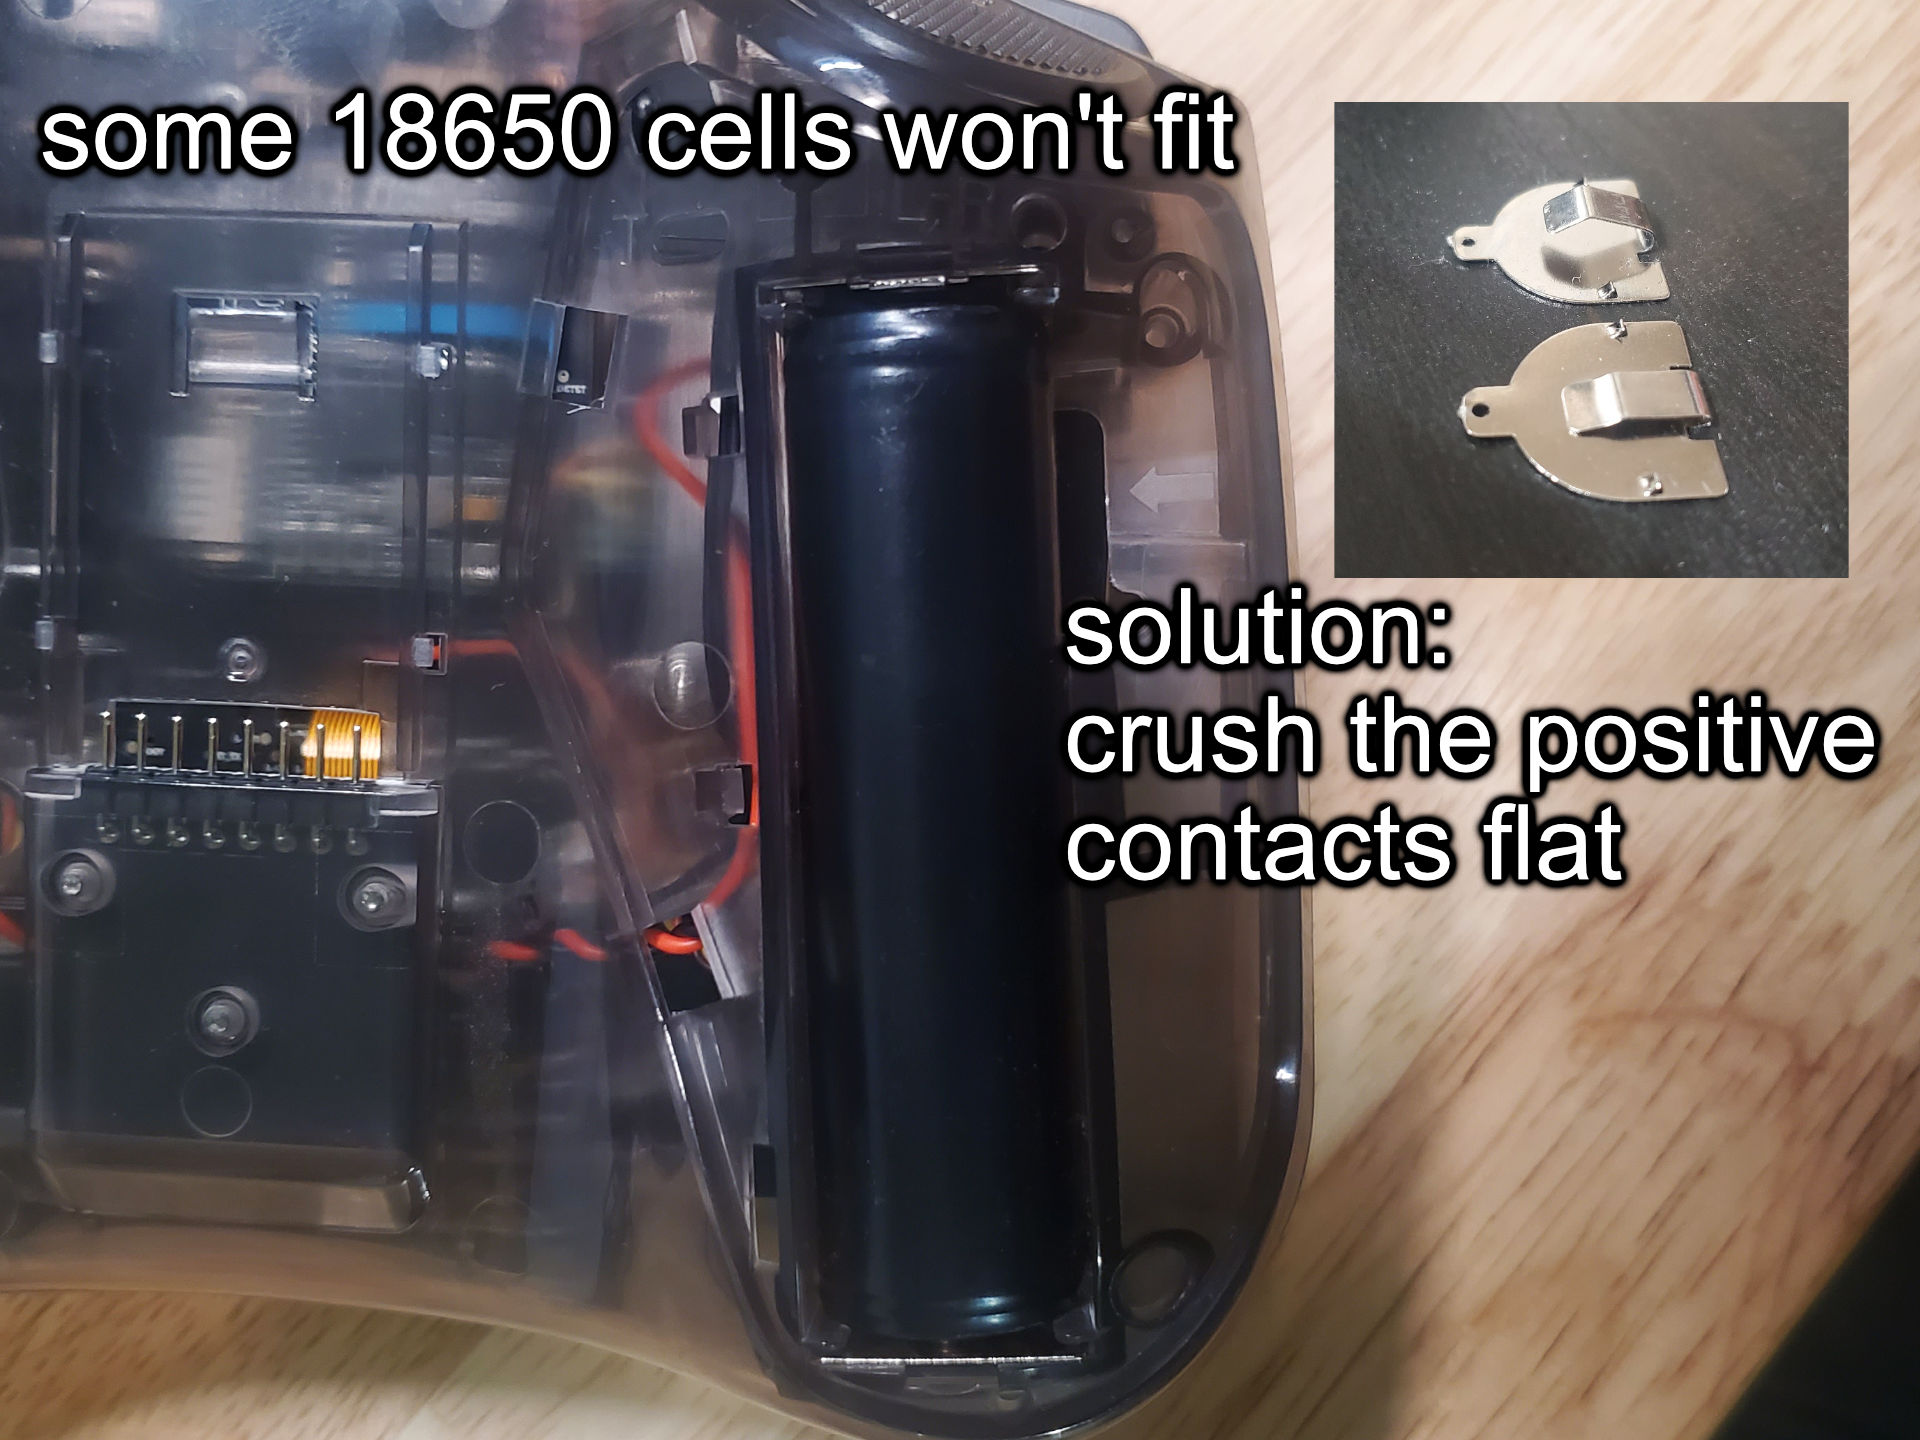
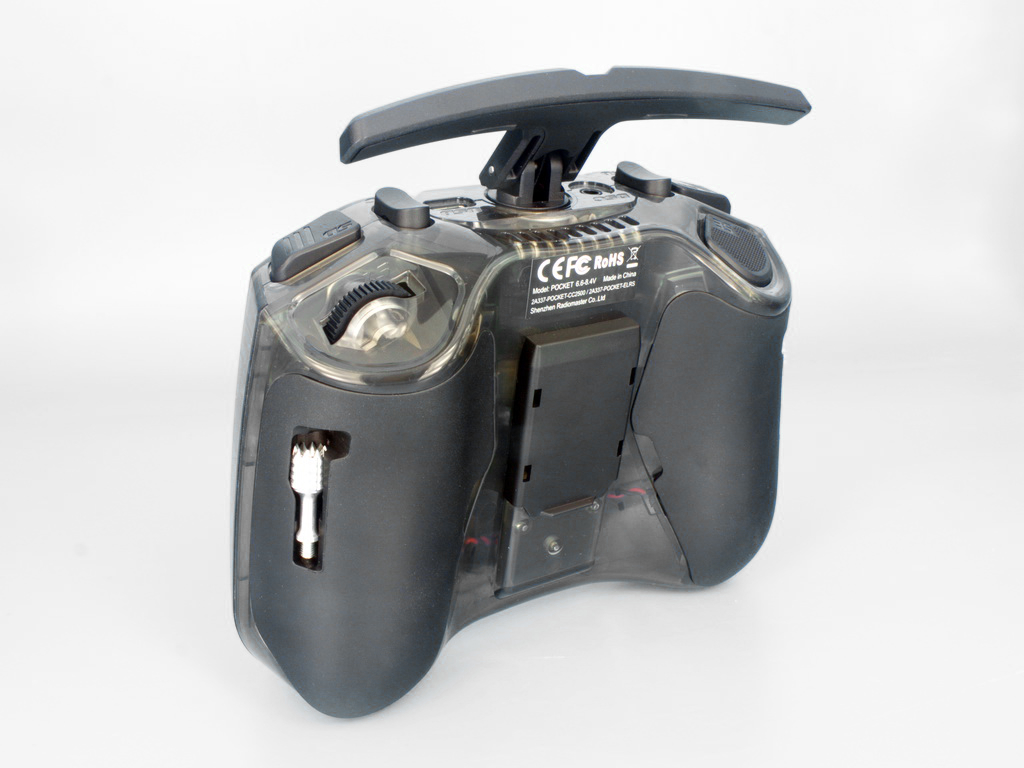
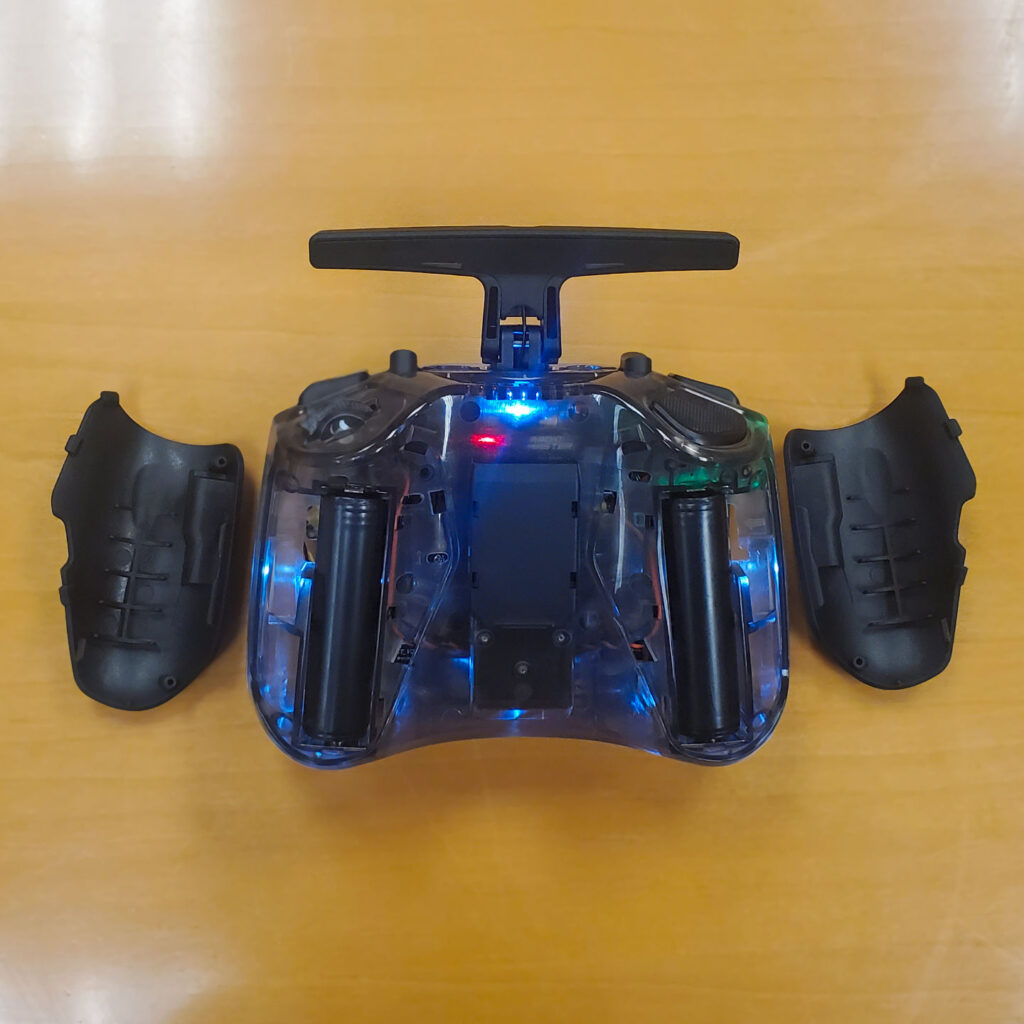
The battery holder is in fact constructed with a negative terminal that has a coil spring, so there’s 5mm worth of travel, so if it was designed correctly, it should have easily accommodated all sorts of 18650 batteries, flat tops, button tops with, or without, protection circuitry. But nope… didn’t fit, none of my batteries fit. The problem, I think, is an inappropriately thick positive terminal. I fixed this by removing the positive battery terminal, and simply crushing it flat until my batteries could fit.
On the bright side, this radio is extremely easy to disassemble and repair, and the stick configuration can be adjusted even without disassembly. The internals are neat, and since this product is extremely optimized for cost, there’s not a lot of different circuit boards. The wiring inside is managed very well, you don’t have to worry about anything breaking while opening the casing. The circuit board is well annotated. Oh, and Radiomaster actually stocks plenty of spare parts on their website store, if you lose a button, $2 will get you a replacement for ALL the buttons. You can also get differently coloured cases! (nothing inside uses threaded inserts, but if you wear out a thread, buy a new case)
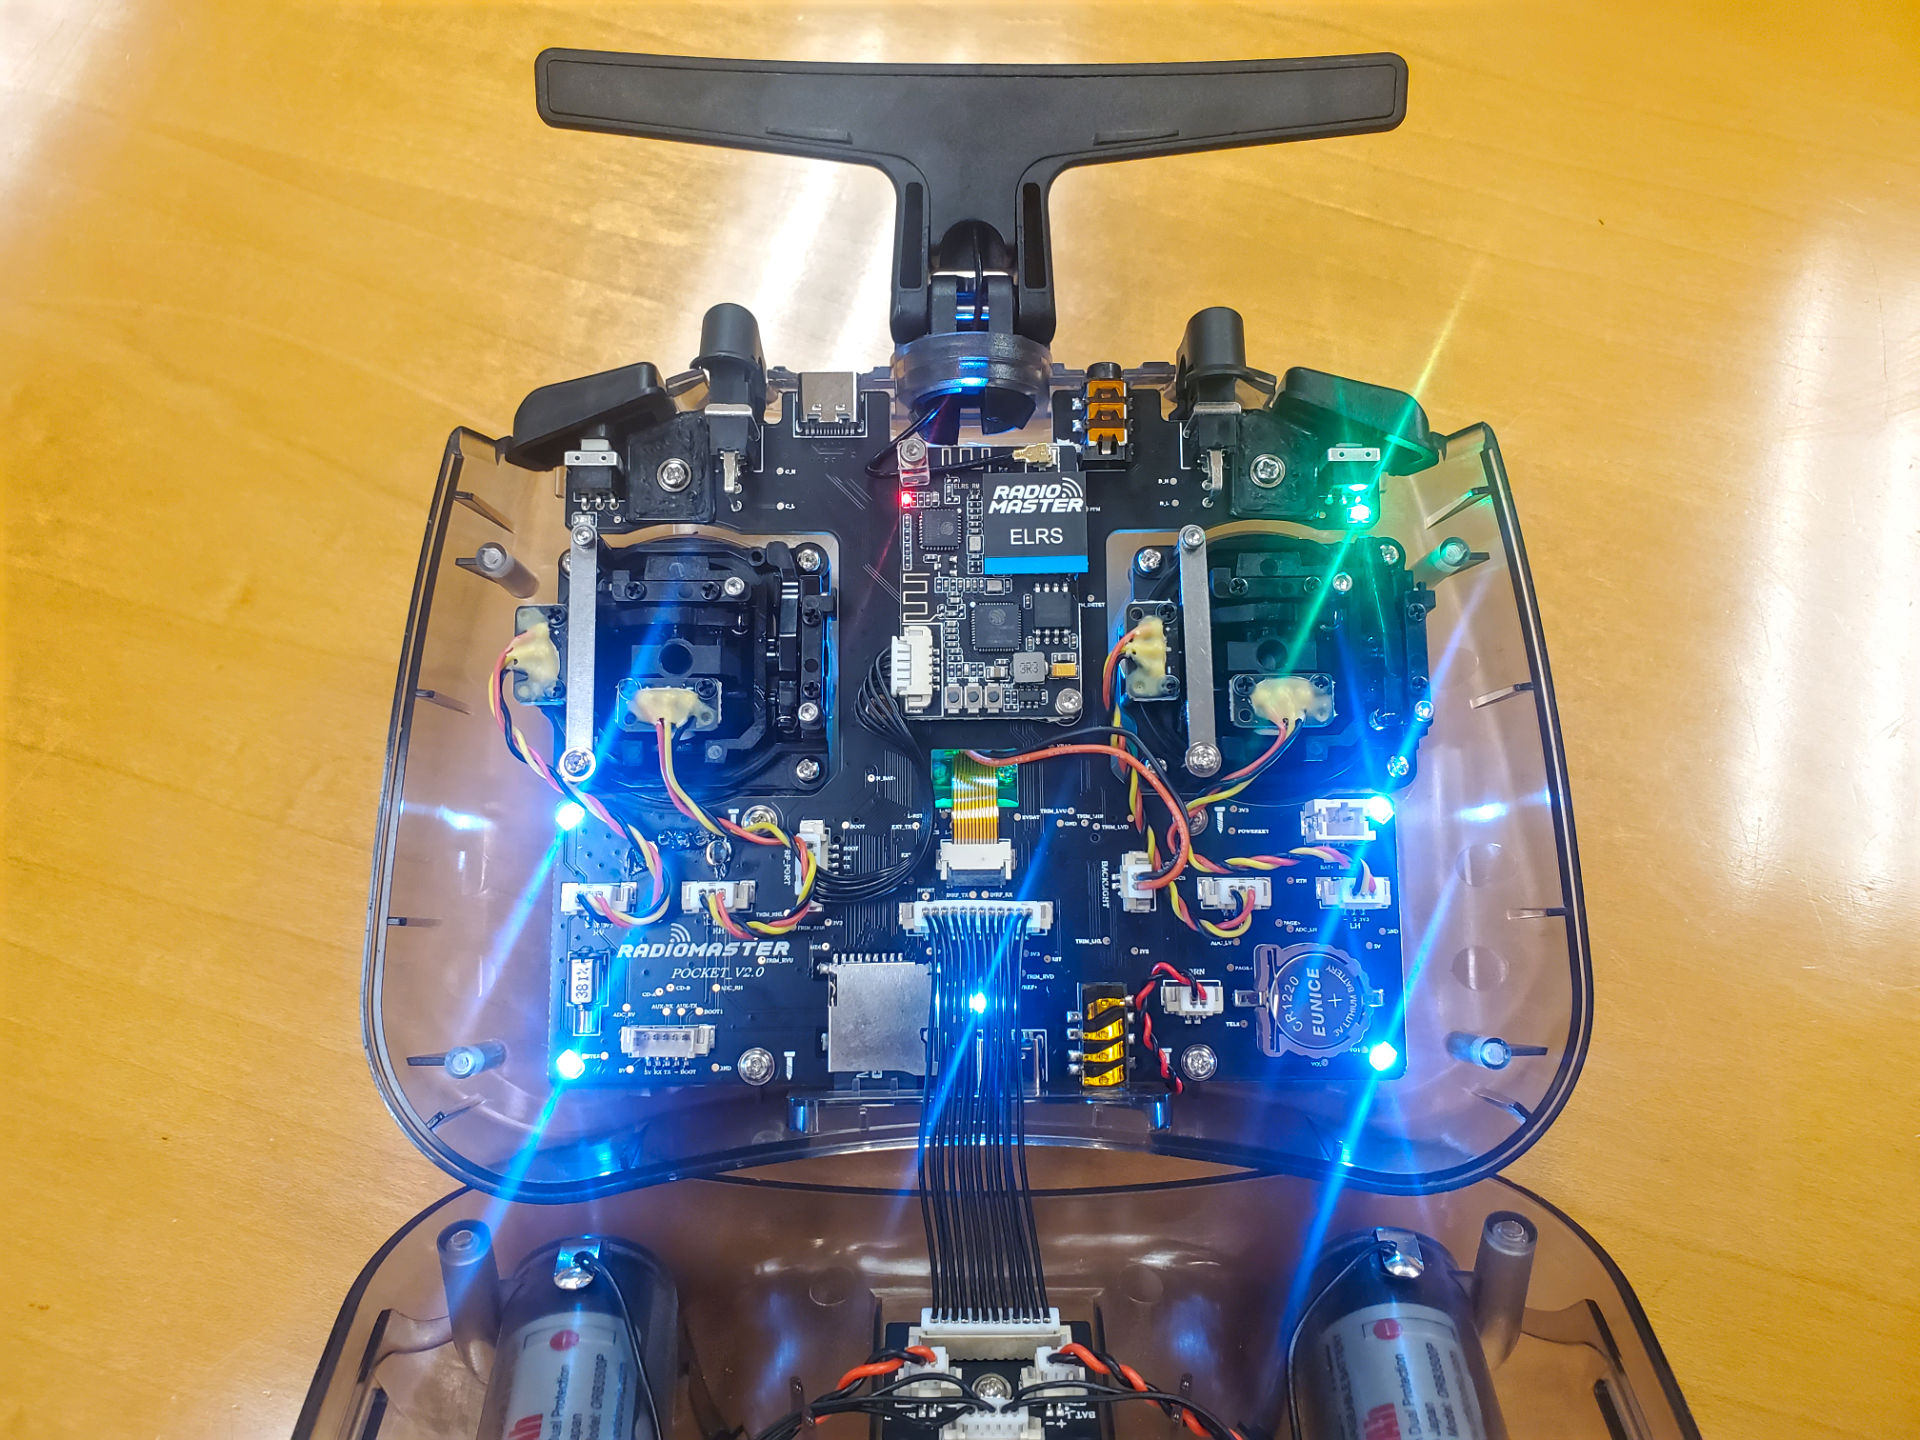
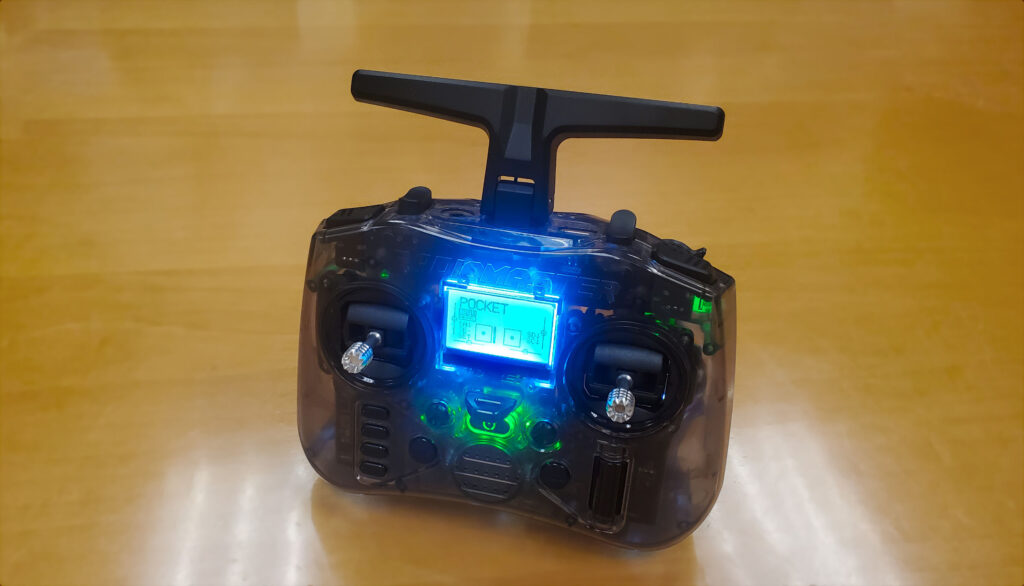
They have added a lot of LEDs inside!
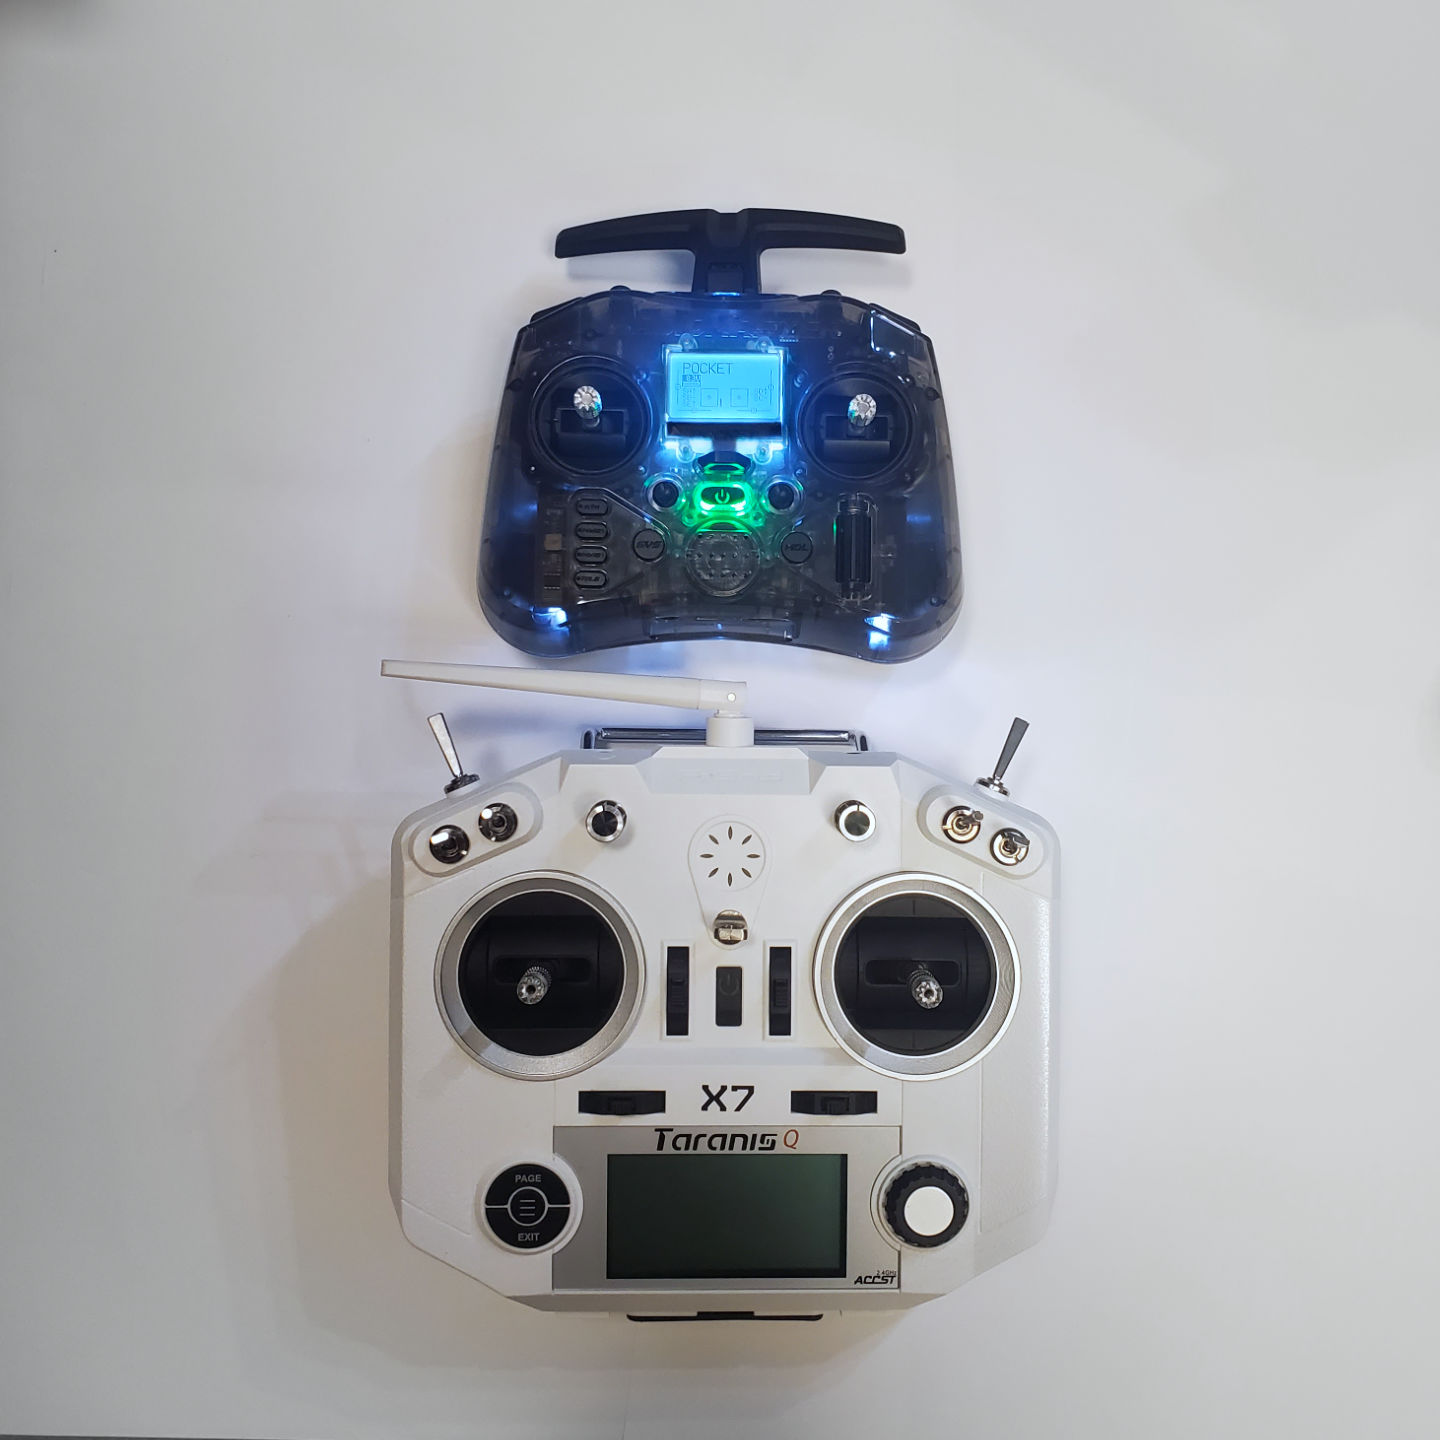
The radio itself is obviously small, but it is thick. While holding it, I don’t feel like I sacrificed anything in comparison to having a full sized radio (I also own a Taranis X9D and Taranis QX7).
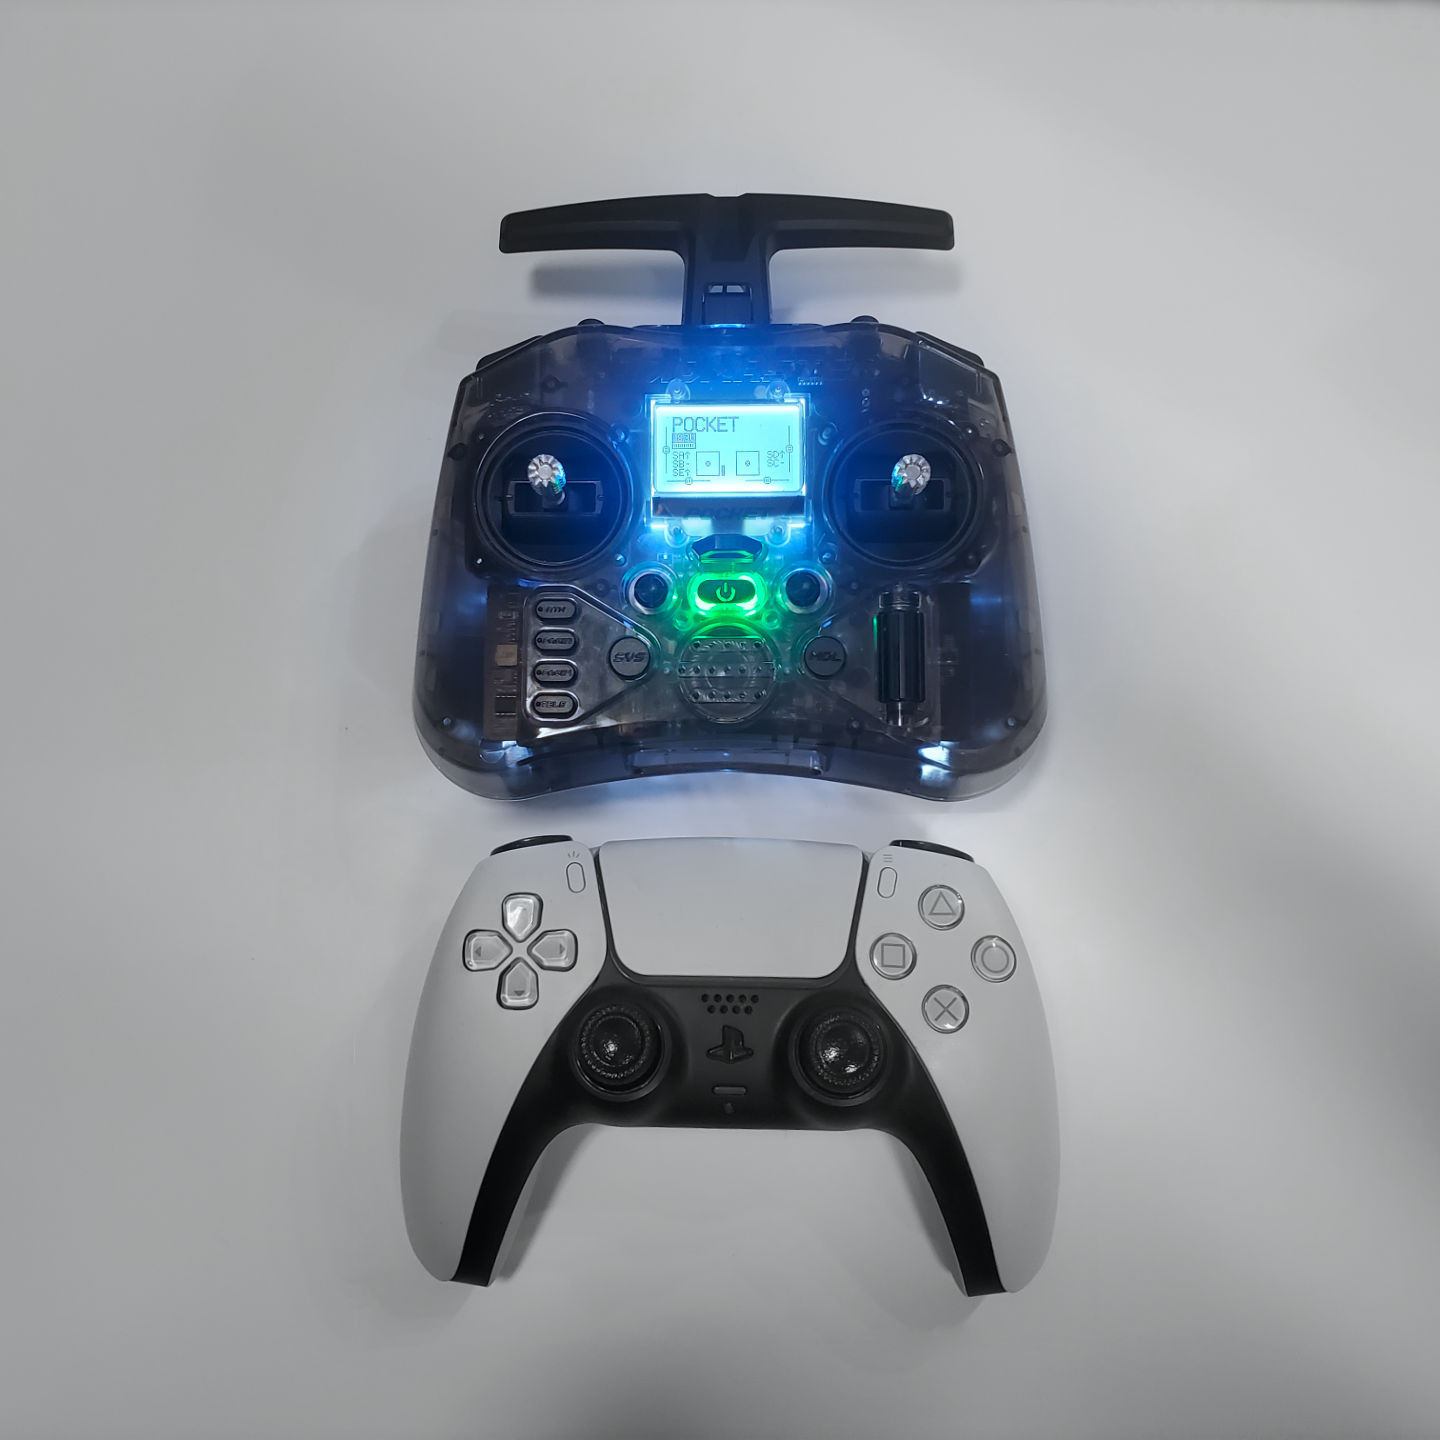

It is definitely NOT small enough for most pockets. It feels great in the hand. The user interface buttons mostly feels great (clicky and solid), except the trim buttons. The trim buttons are a bit loose because they are an extension down to micro-joysticks on the PCB. Note that while all the buttons are held captive by the casing, the trim buttons are not, and can fall off.
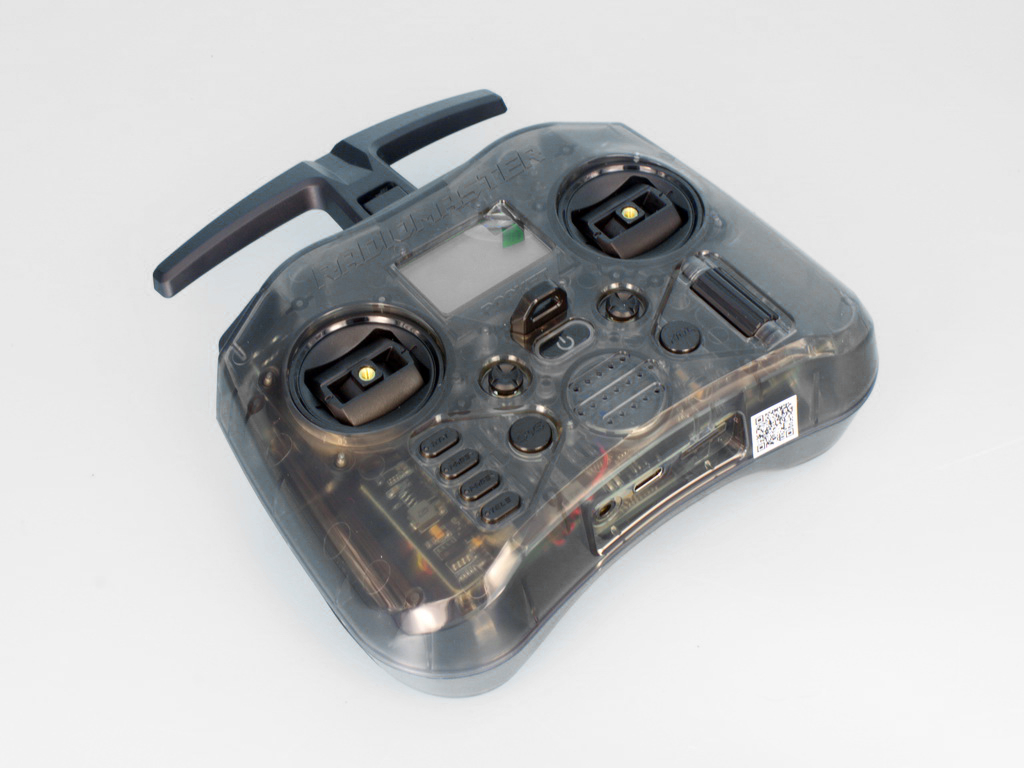
On the top front of the radio are
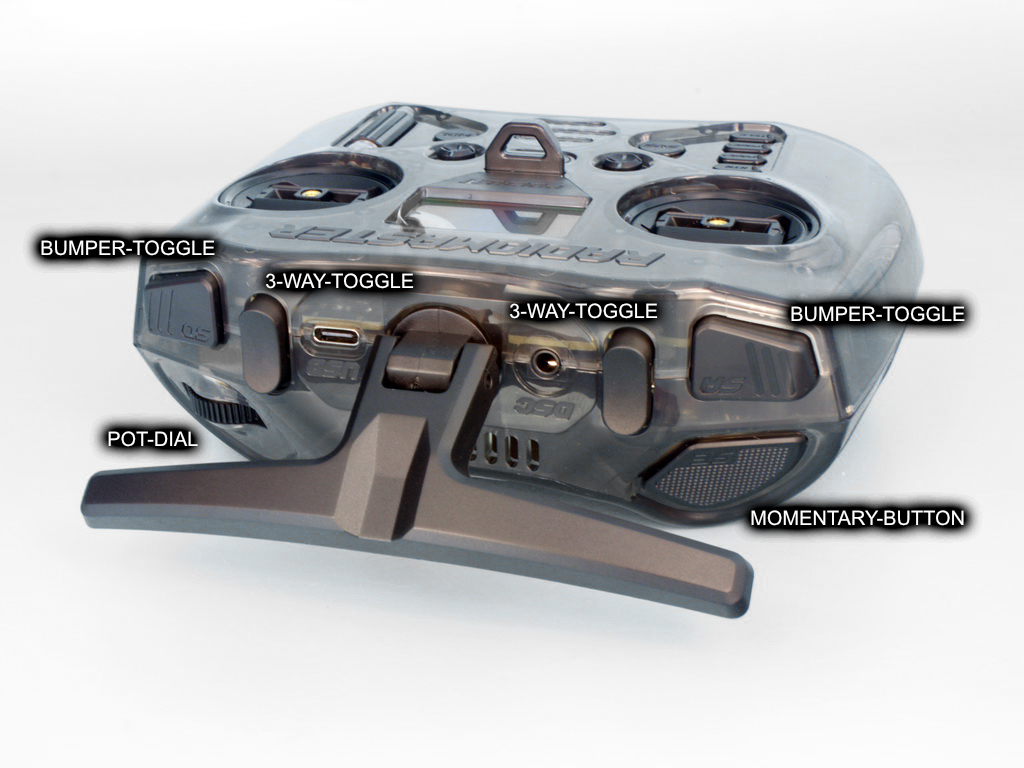
The push-in-push-out buttons (bumper switches) are bad because they are pretty loosely held (large gaps, and the switch stem wiggles). The switch can activate without latching if you press it but not bottom-out the switch, which is a minor annoyance. The bigger annoyance is that, sometimes, if you bottom it out on the inner edge, it won’t latch either, and worse, sometimes it’ll get stuck in that position.
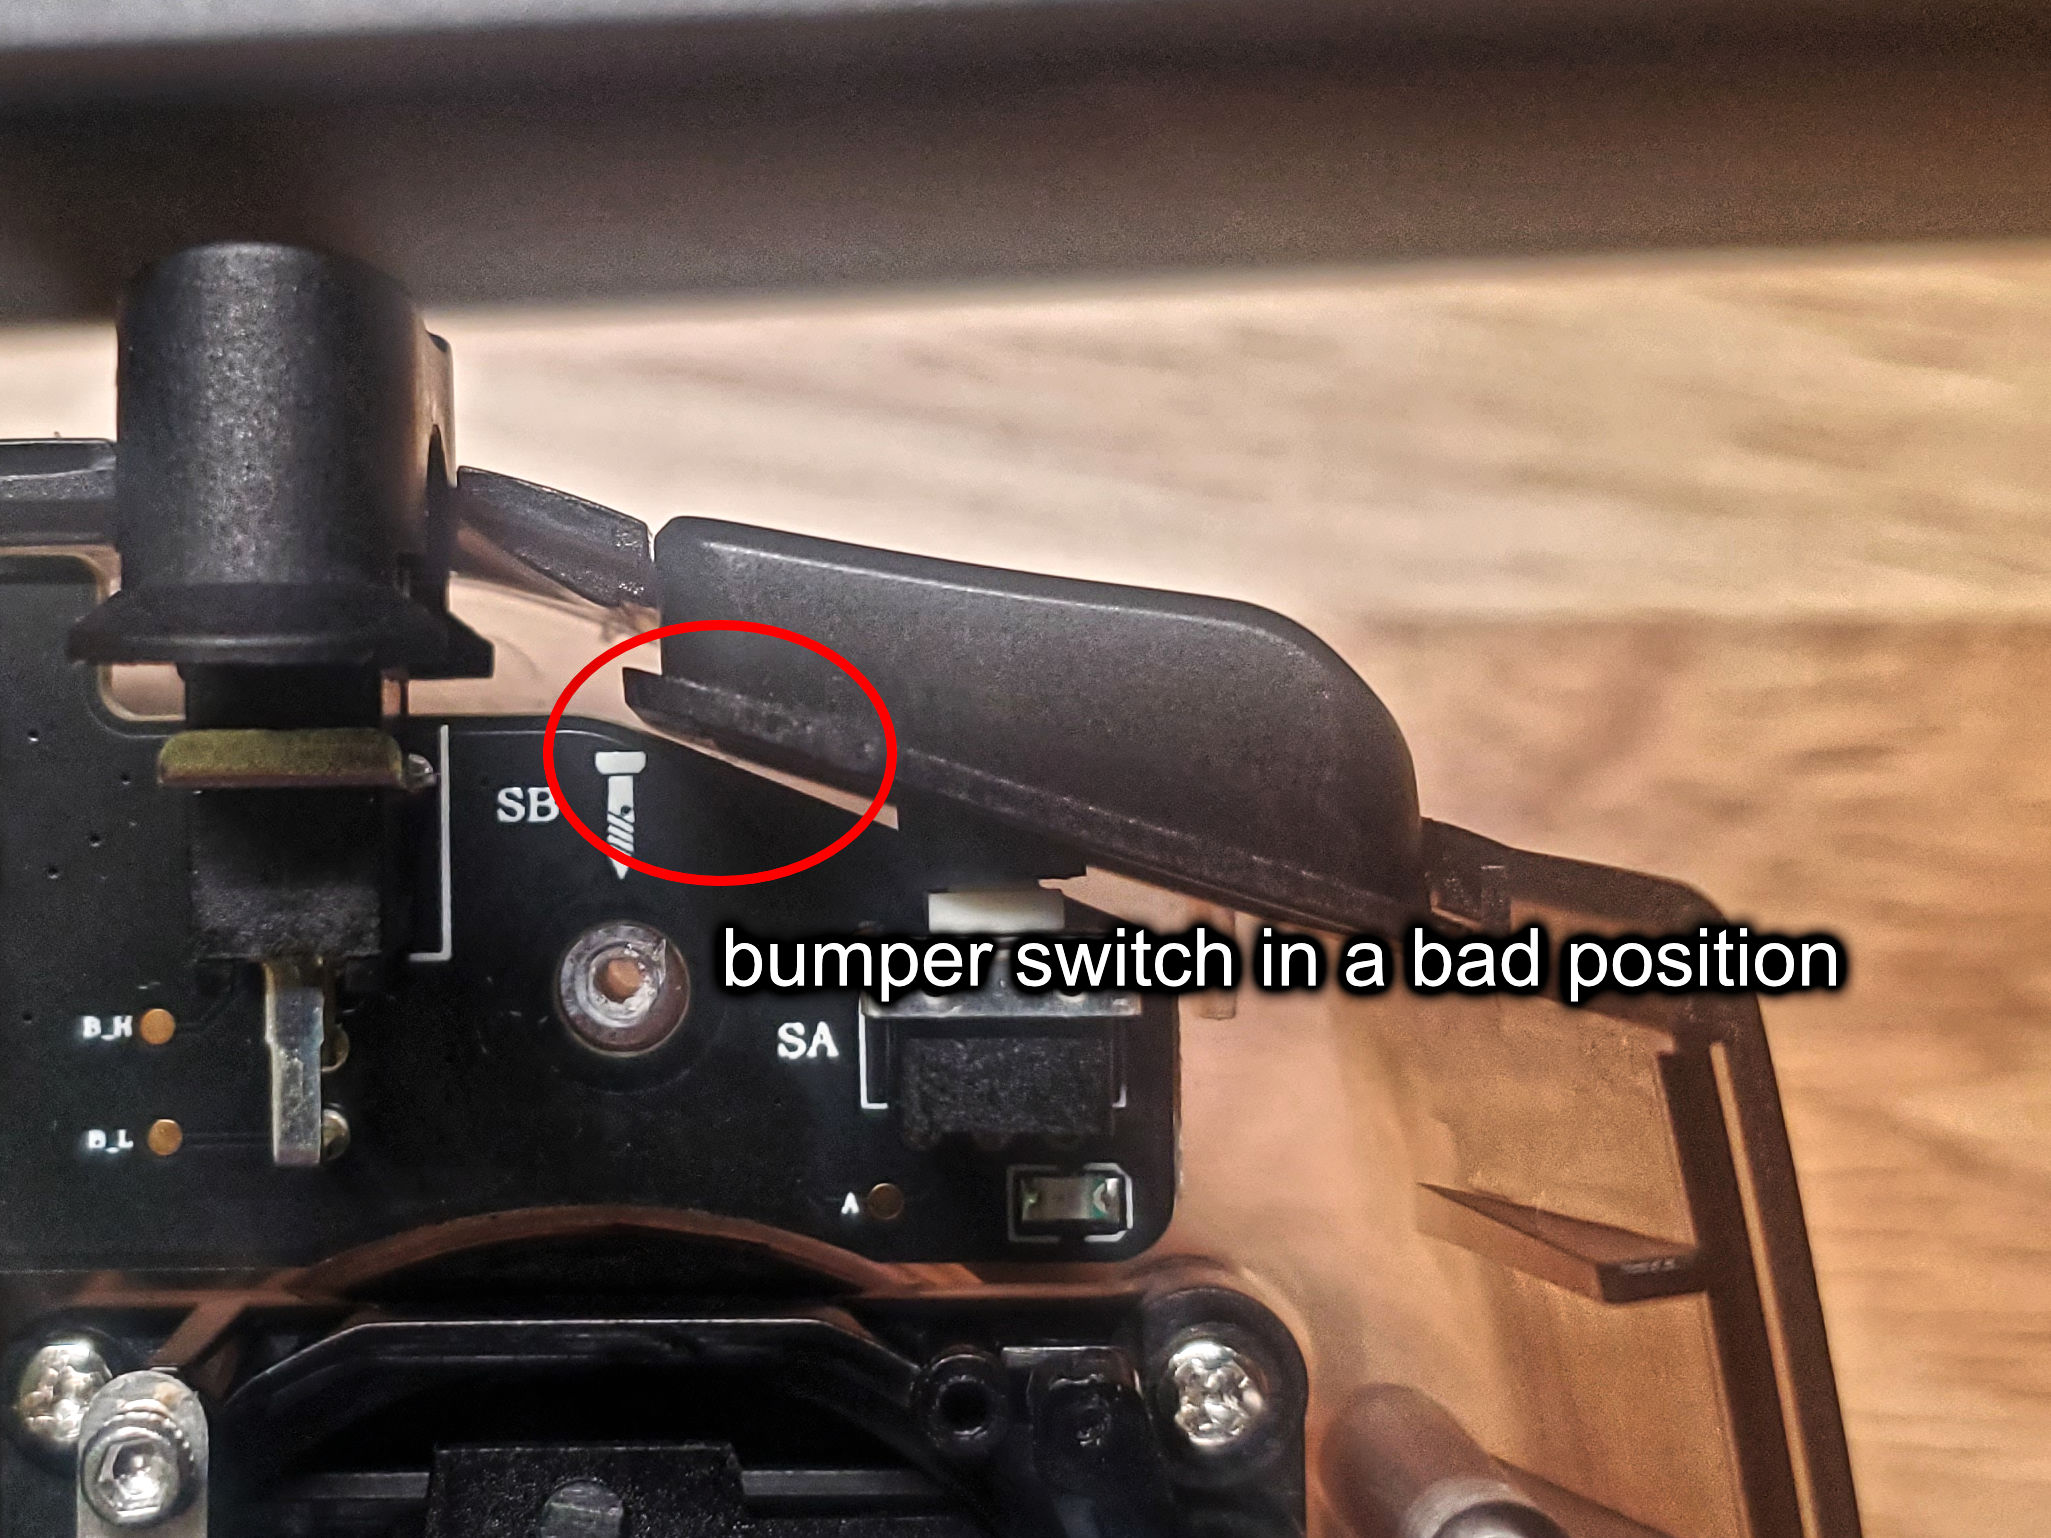

I fixed this problem myself, by intentionally moving the bottom-out point forward slightly on the offending edge. I did this by 3D printing a small piece of plastic that is screwed to the PCB (super lucky that there’s a screw right there). The 3D model is available for download here
The travel of these buttons is extremely short, so to indicate if a button is actually depressed, a LED will light up. The case is transparent so the light will shine through. Also, a circuit board directly beneath the LED is coloured white to reflect the light a bit more, making the light more visible. I still prefer toggle switches though.
The problem I have with the potentiometer is that the dial has no indicator on it, neither visual nor physical, that indicates what position it is in. It would’ve costed them literally nothing to add a little nub in the plastic of the dial, but they didn’t (but they DID on the Zorro radio).
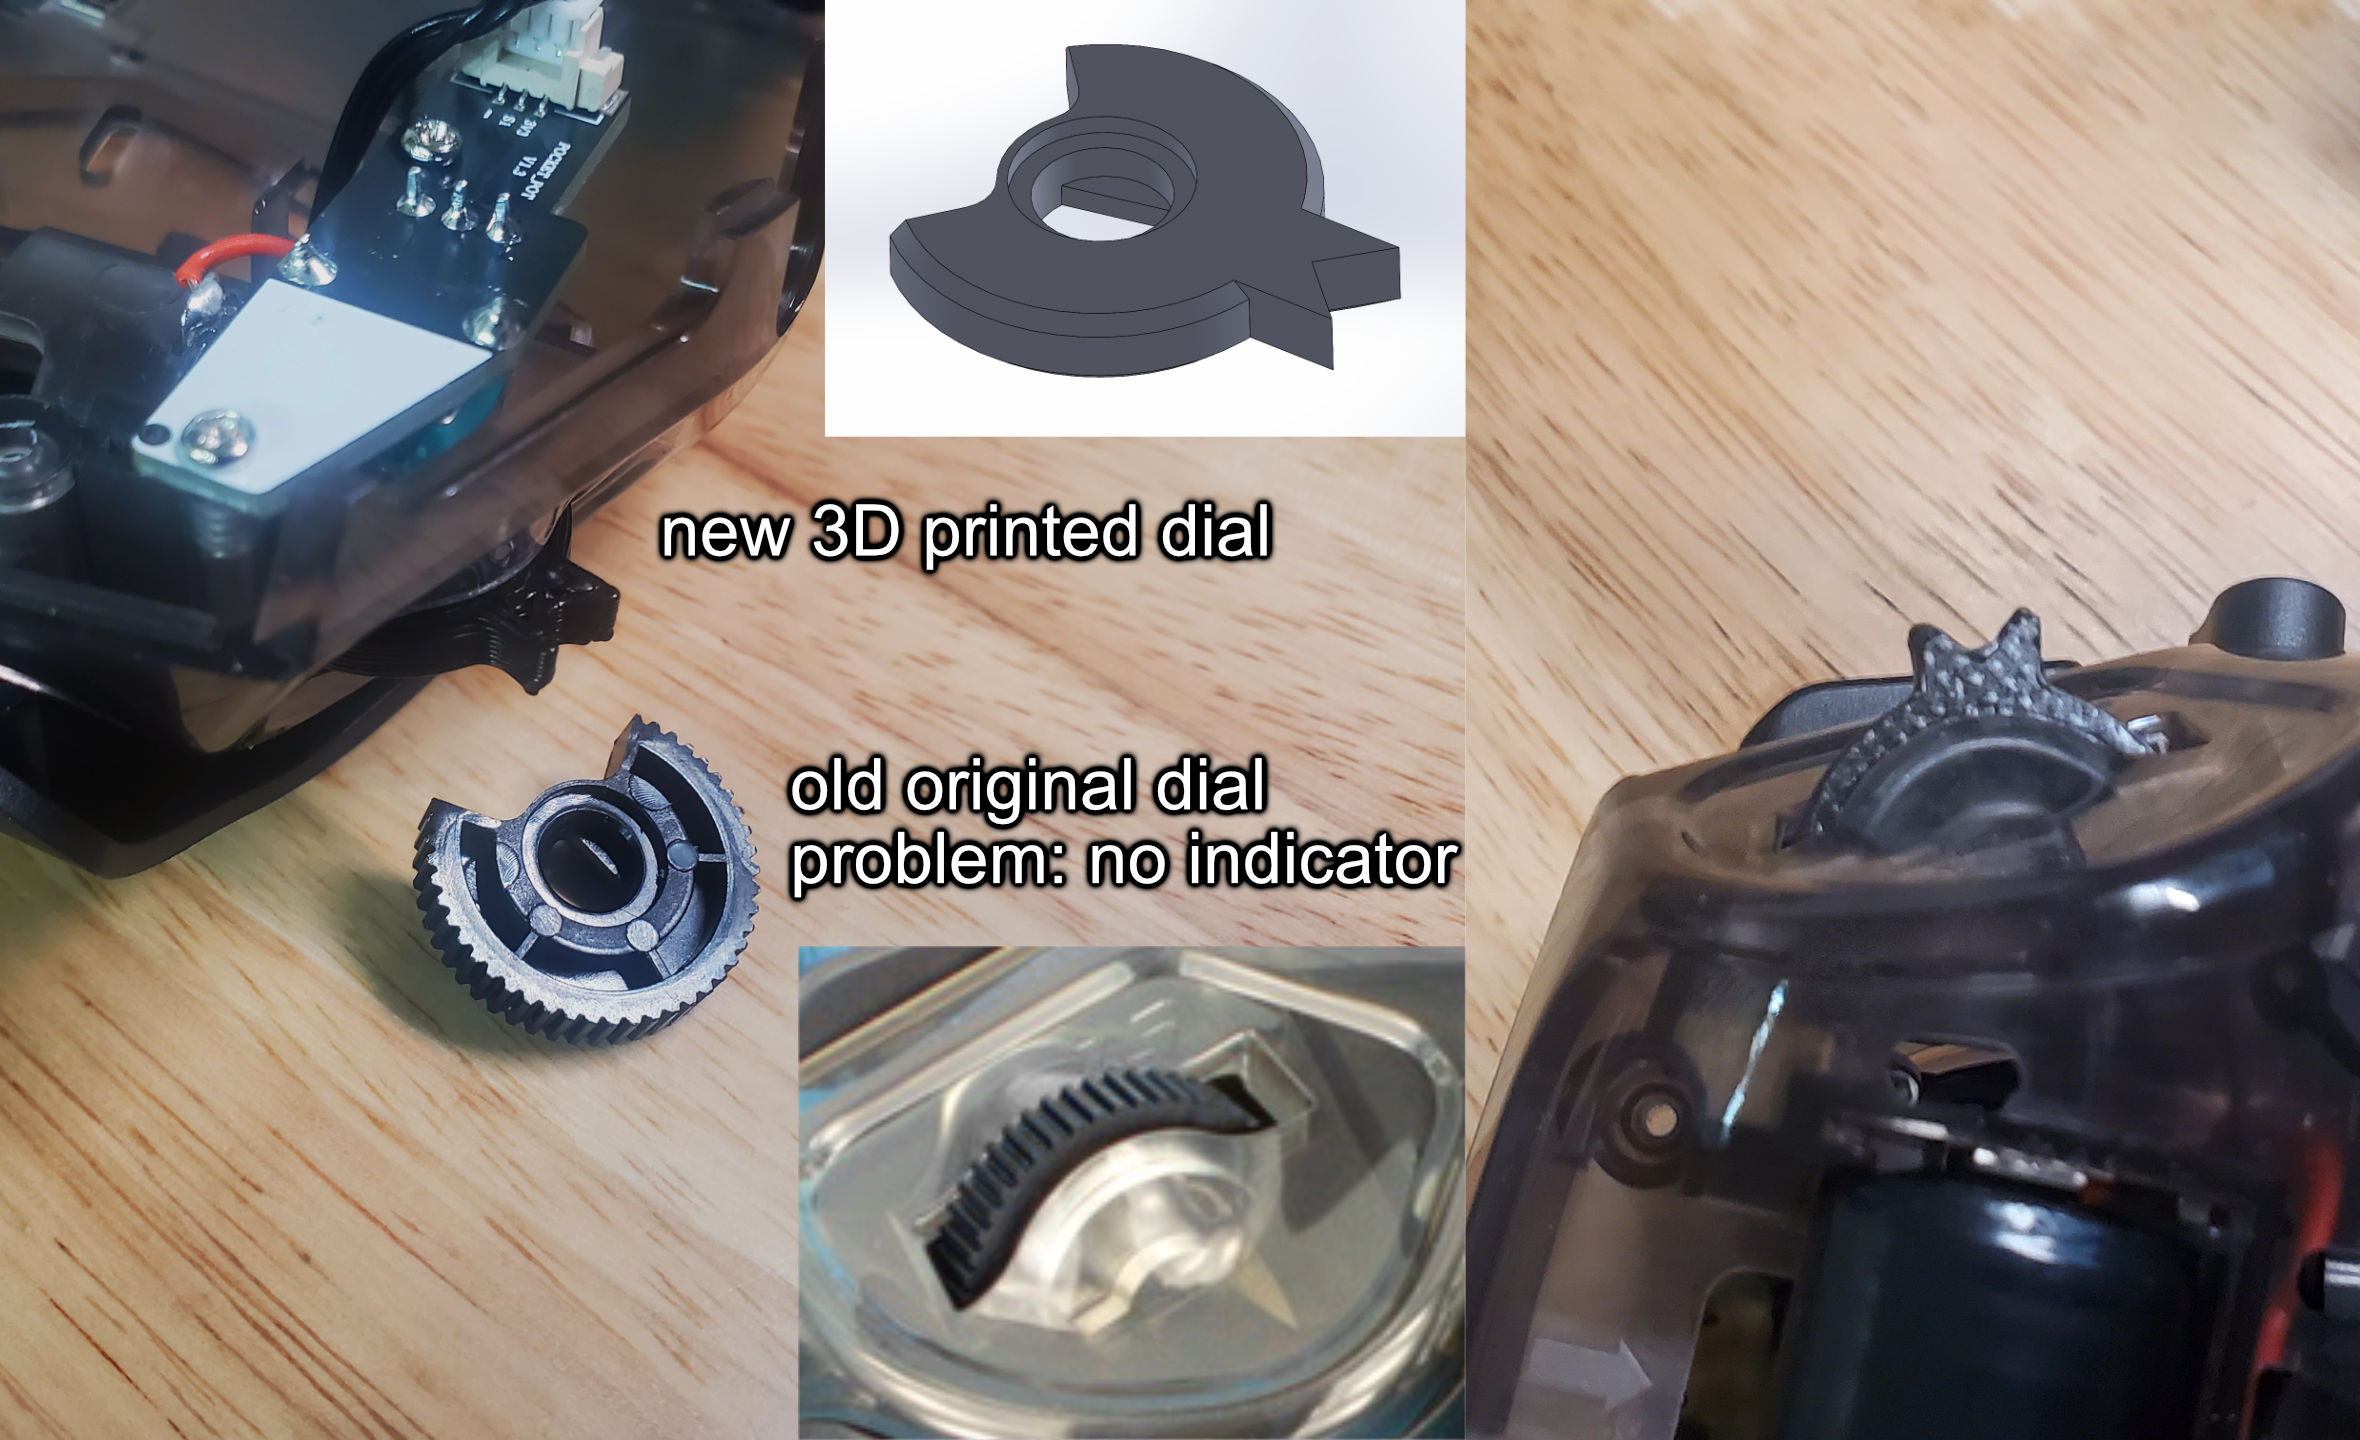
To fix this, I 3D printed an entirely new dial with a sharp bit that my fingertip can easily hook onto. Using this new dial requires a simple recalibration of the potentiometer (very easy to do with EdgeTX, it’s an option in the hardware settings menu). The 3D model is available for download here.
The batteries are covered up by two rubber pieces on the back of the radio, this also functions as the grip. I don’t love how this is done, as the seam it leaves doesn’t settle easily, but it’s acceptable.
Due to the lack of confidence I have in the bumper switches, and the fact that the trim button can be accidentally lost, I don’t feel like this radio is ready for a robotics competition (or any serious drone races). It will be great for casual flying though. The product design feels rushed, it’s mostly good from a design and construction standpoint but it is unrefined, it gives the impression that nobody tested a wide variety of batteries on it, nobody used the bumper switch or potentiometer in mission critical ways. I don’t regret buying it though, this radio is supposed to be an experimental platform for me, something for me to hack up with mods and not be afraid to break.
I’m only criticizing it based on paranoia, I almost lost the trim button but only because I was disassembling the radio, and I have solutions to most of the problems I’ve mentioned. It is still a good value for its potential. If you are on a budget, but want to be as competitive as possible, absolutely pick this over anything made by HobbyKing or Turnigy or FlySky or RadioLink (these are popular budget options being pushed by robotics web stores).
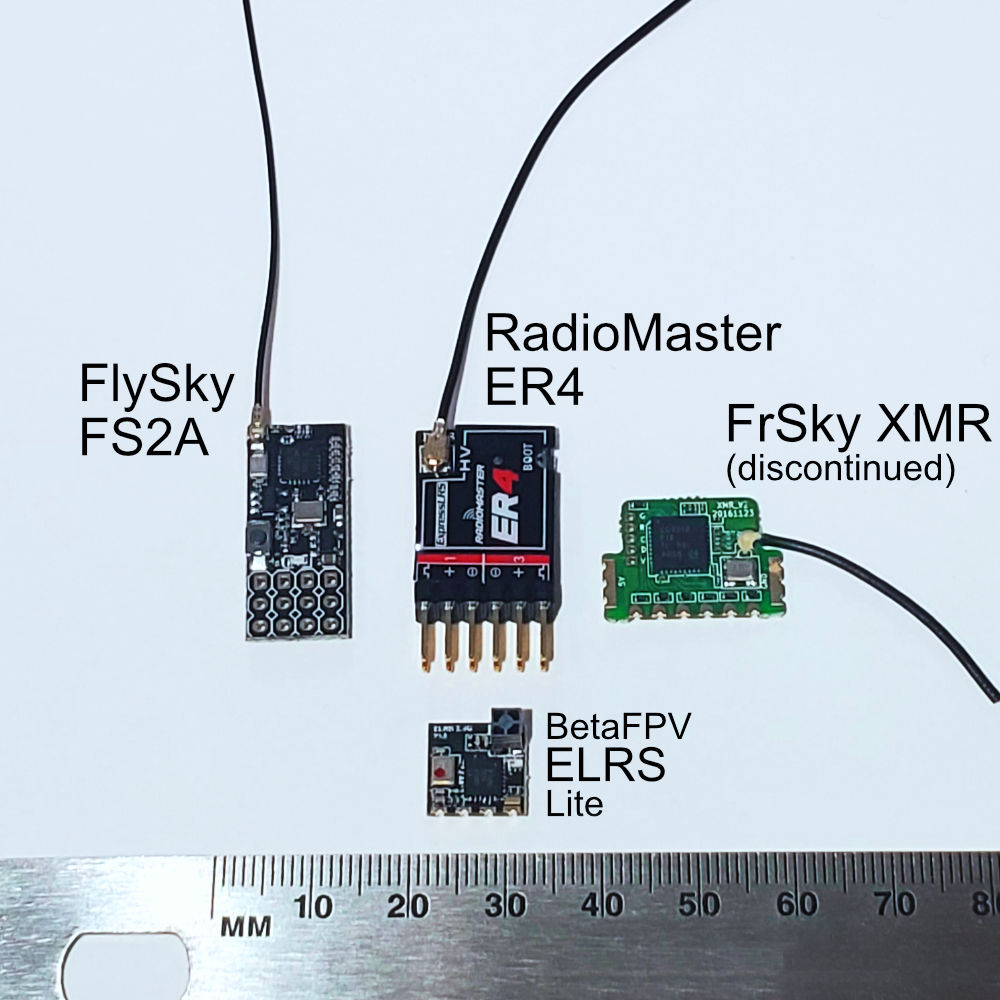
I think starting off with ExpressLRS receivers is a good idea. They are priced and sized similarly to the FS2A. My previous favorite, the FrSky XMR, has been discontinued.
That’s about all I want to say in this review. I mainly wanted to point out the flaws I found and share the solutions for them. For other details and more photos, maybe check out Oscar Liang’s review (note that his website does have affiliate links, and the review is more of an overview and teardown).
Other Nice Things
- comes with microSD card that already has all the files you need
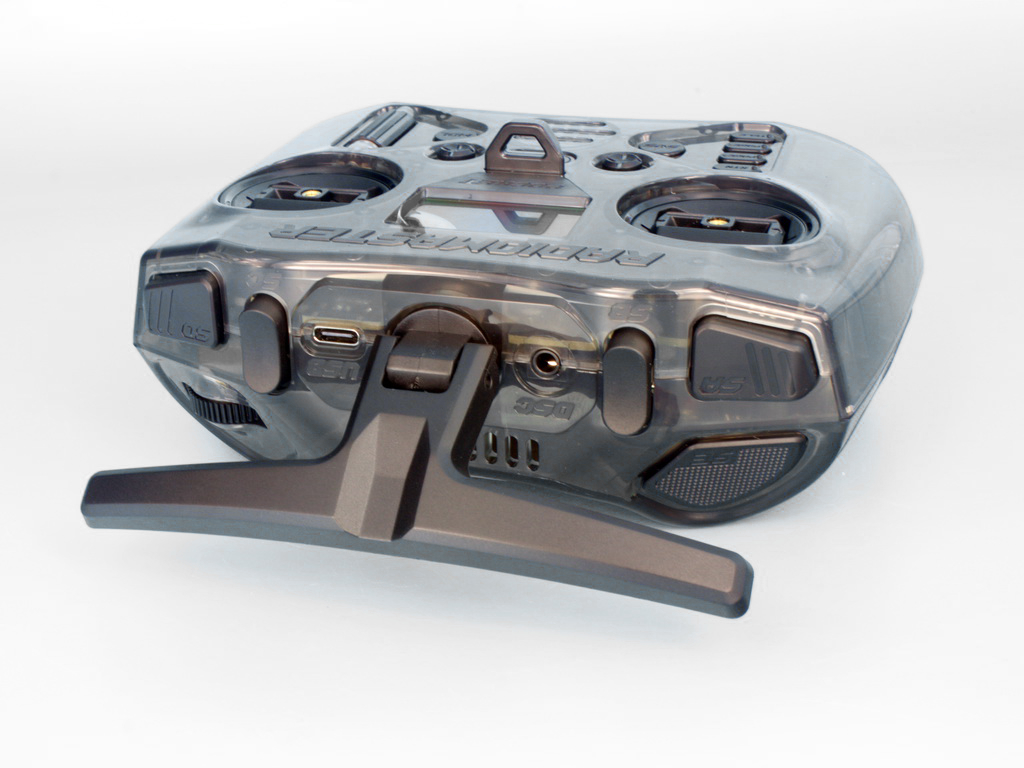
- built-in USB-C charging (I can confirm both QC and PD works, the charger’s requested voltage output is dynamic and can push about 2A)
- hall-effect gimbals (X-Lite did not have them)
- AUX serial port available internally on the PCB (ability to add hardware)
- Trainer port supports serial input (ability to add hardware)
- transmit power is as advertised, capable of 250mW on ELRS, packet rate is high and frequency hopping between 2390 and 2490 MHz
- I only verified the above RF performance using a pocket sized spectrum analyzer, I have not done any long range testing, sorry, I’m not a drone flyer and combat robotics is a very close ranged activity
Lua Scripts
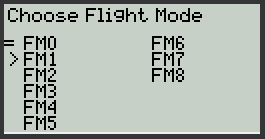
This radio has less buttons than other radios, which is fine since it’s supposed to be cheap and small. I took some time to learn how to write Lua scripts for EdgeTX, specifically, to add virtual switches and dials (operated through the LCD, instead of using real switches/dials), and to make it possible to change flight modes without occupying switches. Link to the scripts here.

Appendix
How does EdgeTX give people a competitive advantage? With the insanely flexible mixer I can:
- avoid having to waste space on a mixer, or be limited to ESCs with built-in mixing
- independently adjust each motor scaling after mixing, which can help keep the robot driving straight even if a motor is damaged or binding slightly
- independently flip the motor direction of a particular motor instantly by mapping it to a switch, this could help me avoid having an extra connector between the motor and ESC, and also speed up repairs while in the pits
- apply a bias to a steering direction to counteract weapon torque, hell, I can probably build a robot with asymmetrically sized wheels if I wanted to
- easily adjust steering ratio and throttle limits, if you see a novice drive poorly, 99% of the time is because they have steering mixed too aggressively
And ExpressLRS is great because it’s open source, high performance, available in small sizes, and cheap too. Aside from this all being great for beginners and budget friendly, it enables me to do weird experiments without having to write radio firmware from scratch.
I am excited for ExpressLRS, the receivers are so unbelievably small, and they use CRSF protocol. Combined with AM32 brushless ESCs, it would be possible to control multiple ESCs with just one signal wire using CRSF! This would save a ton of space inside the robot, give more precise control (debatable), and be more reliable.
NOTE: the cheaper $55 version of the Radiomaster Pocket does not support ExpressLRS, it supports protocols with the CC2500 chipset, meaning it works with the older FrSky D8/D16 protocol receivers (a good choice would be the R84-V2 receiver, which appears to be only $9). The version of the Pocket with ExpressLRS is $65, and I do recommend getting ExpressLRS if this is your first radio, jump into the future now. FrSky has actually already discontinued their older protocol receivers, and I do see Radiomaster discontinuing some of their older products as well.
To make the Pocket work with FlySky receivers, it would need an external 4-in-1 module. This is not a cheap add-on, probably about $50. Personally I wouldn’t do it, and simply avoid FlySky receivers.
Appendix – Radiomaster Tech Support Response
Radiomaster’s tech support replied back to my issue about the battery not fitting:
The standard 18650 battery size is 18mm in diameter and 65mm in length. However, the 18650 battery with built-in protection board is non-standard, and its length is more than 65mm, generally about 68mm, because a PCB board to protect the battery is stuffed into the iron shell of the battery cylinder. This battery cannot be charged in series, that is, it cannot be charged in 2S battery pack, it can only be charged in a single section, and requires a special charger.
Therefore, you will need to purchase a standard-sized 18650 battery without the built-in protection plate.
I am aware of all of this, but they are wrong about not being able to be charged in series. There is no reason for it to be impossible to charge protected cells in series. The cells I have installed are charging fine even if they have the protection circuitry. If they can charge two unprotected cells in series, it means their charger has a balancing function, which should also work for protected cells.
Also, consumers should not be purchasing unprotected 18650 cells. Unprotected 18650 cells is best suited to be used for high power applications, such as a cordless drill battery, electric skateboards, etc. For a flashlight or similarly low powered devices, people should buy protected 18650 batteries, which will make them last longer because they have undervoltage protection, and safer to charge.
And I have purchased their official batteries, I ordered on Sept 18. Today is Oct 6 and they still haven’t shipped (even though I have a tracking number). Maybe I wouldn’t have even noticed this design flaw if they simply shipped it.