Difference between revisions of "Structured Brim For 3D Printing Warp"
(Created page with "I have a method to solve the problem of 3D printed objects warping during 3D printing. This method is a combination of the brim technique and the "Micky Mouse Ears" technique....") |
|||
| (One intermediate revision by one user not shown) | |||
| Line 3: | Line 3: | ||
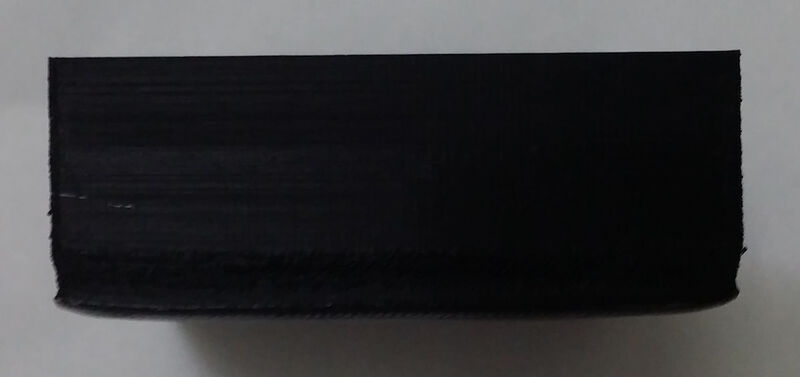
The problem looks like this, where the bottom of a 3D printed object shrinks and curls upwards. | The problem looks like this, where the bottom of a 3D printed object shrinks and curls upwards. | ||
| − | [[File:Cure3dprintwarp_problem.jpg]] | + | [[File:Cure3dprintwarp_problem.jpg|800px]] |
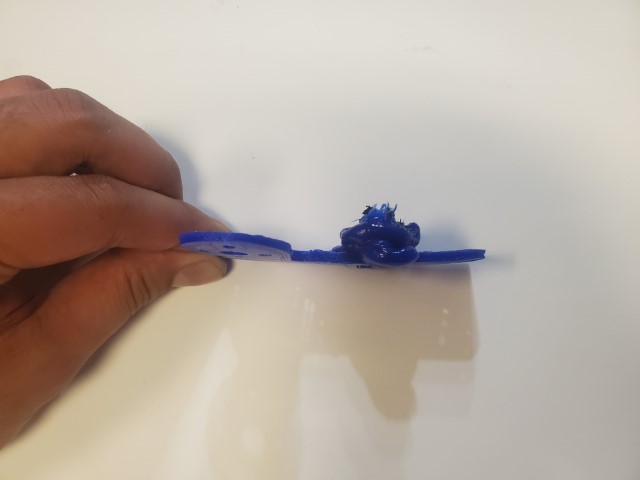
With more difficult materials, like nylon, this can cause the print to completely detach from the bed during the print. | With more difficult materials, like nylon, this can cause the print to completely detach from the bed during the print. | ||
| − | [[File:Cure3dprintwarp_problem2.jpg]] | + | [[File:Cure3dprintwarp_problem2.jpg|800px]] |
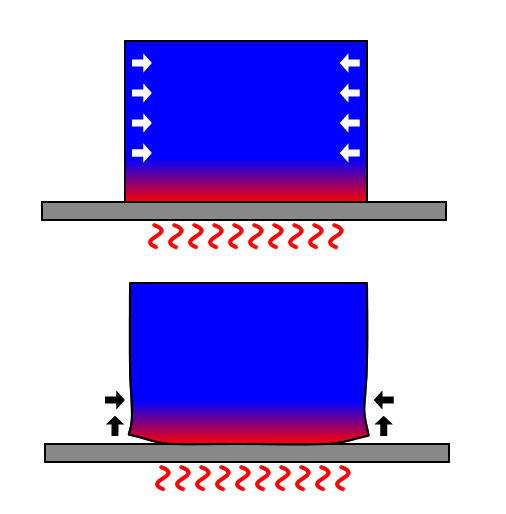
The reason why this happens is that the printer bed is hot, but the upper layers are cool. The upper layers will want to contract. | The reason why this happens is that the printer bed is hot, but the upper layers are cool. The upper layers will want to contract. | ||
| − | [[File:Cure3dprintwarp_whywarp.png]] | + | [[File:Cure3dprintwarp_whywarp.png|800px]] |
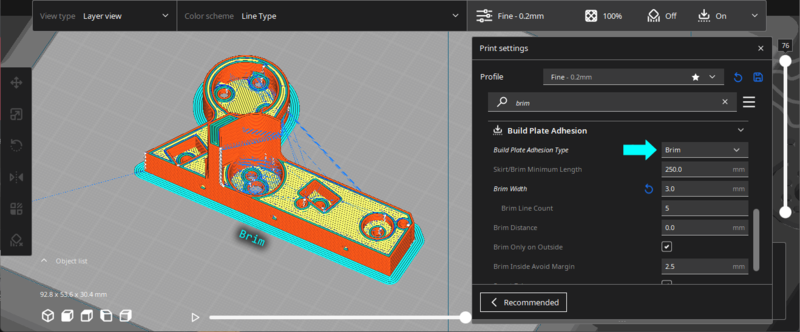
| − | There's usually a brim option in 3D printing slicers to counter this effect. | + | There's usually a brim option in 3D printing slicers to counter this effect. The slicer will add concentric rings of plastic that forms a wide flat skirt around the object, which is an attempt to add surface area that holds the object down. |
| − | [[File:Cure3dprintwarp_curabrim.png]] | + | [[File:Cure3dprintwarp_curabrim.png|800px]] |
| − | But it is not always effective. | + | But it is not always effective. It helps but frequently there is still enough warping to render the object useless. |
| − | [[File:Cure3dprintwarp_brim_photo.jpg]] | + | [[File:Cure3dprintwarp_brim_photo.jpg|800px]] |
| + | |||
| + | The contraction causes tension forces along the entire edge of the object. But, what if those forces was broken up and concentrated? I Liked the idea of having a gap between the brim and the printed object, it also makes the brim simpler to remove. The tension forces would pull on the tabs instead. | ||
| + | |||
| + | [[File:Cure3dprintwarp_whatwouldhappen.png|800px]] | ||
| + | |||
| + | [[File:Cure3dprintwarp_whatwouldhappen2.png|490px]] | ||
| + | |||
| + | To solve this problem, a ridge is added: | ||
| + | |||
| + | [[File:Cure3dprintwarp_addridge.png|580px]] | ||
| + | |||
| + | To summarize: | ||
| + | |||
| + | * the brim adds adhesion surface area | ||
| + | * tabs added to brim, to make it easier to remove, and concentrates tension forces | ||
| + | * a ridge prevents the brim from deforming at the tabs | ||
| + | |||
| + | Here's an example of how I use this technique: | ||
| + | |||
| + | [[File:Cure3dprintwarp_finalmodel.png|800px]] | ||
| + | |||
| + | [[File:Cure3dprintwarp_example_photo_top.jpg|800px]] | ||
| + | |||
| + | [[File:Cure3dprintwarp_example_photo.jpg|800px]] | ||
| + | |||
| + | It is perfectly flat on the bottom, problem solved. | ||
| + | |||
| + | [[File:Cure3dprintwarp_finalwithruler.jpg|800px]] | ||
| + | |||
| + | It is easy to cut off the brim with a knife. | ||
| + | |||
| + | [[File:Cure3dprintwarp_brimcutoff.jpg|800px]] | ||
Latest revision as of 23:14, 29 December 2023
I have a method to solve the problem of 3D printed objects warping during 3D printing. This method is a combination of the brim technique and the "Micky Mouse Ears" technique.
The problem looks like this, where the bottom of a 3D printed object shrinks and curls upwards.
With more difficult materials, like nylon, this can cause the print to completely detach from the bed during the print.
The reason why this happens is that the printer bed is hot, but the upper layers are cool. The upper layers will want to contract.
There's usually a brim option in 3D printing slicers to counter this effect. The slicer will add concentric rings of plastic that forms a wide flat skirt around the object, which is an attempt to add surface area that holds the object down.
But it is not always effective. It helps but frequently there is still enough warping to render the object useless.
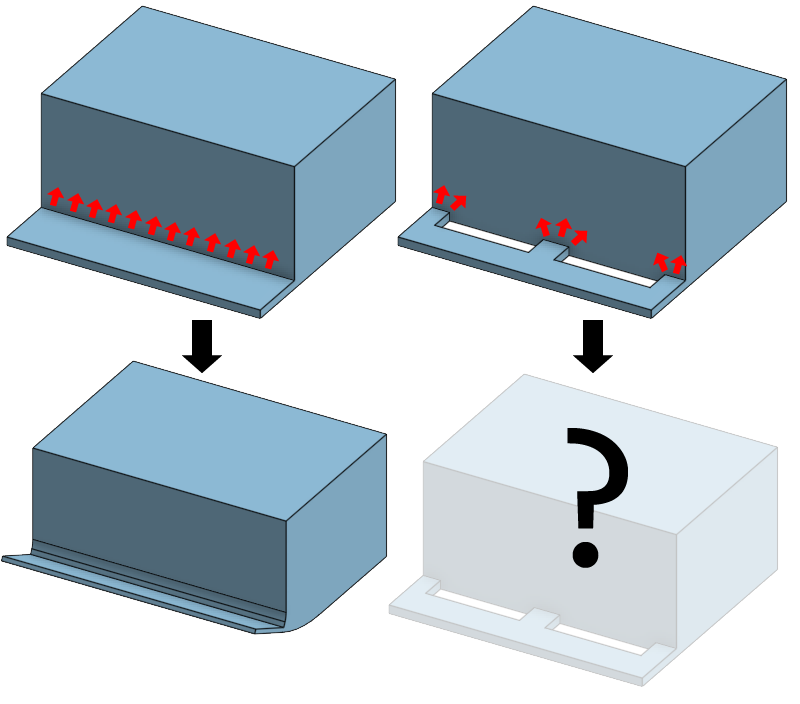
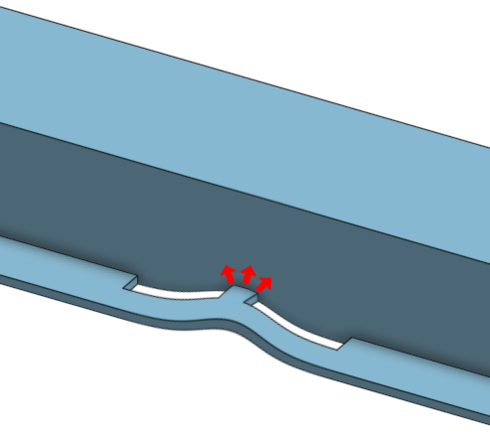
The contraction causes tension forces along the entire edge of the object. But, what if those forces was broken up and concentrated? I Liked the idea of having a gap between the brim and the printed object, it also makes the brim simpler to remove. The tension forces would pull on the tabs instead.
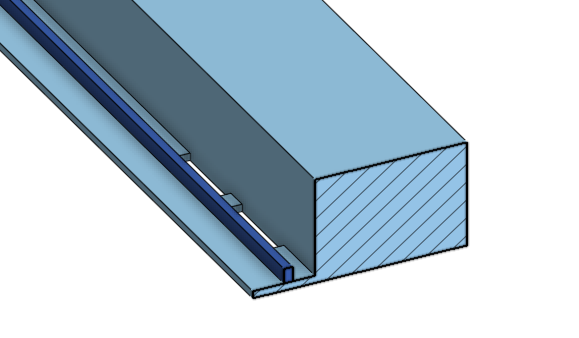
To solve this problem, a ridge is added:
To summarize:
- the brim adds adhesion surface area
- tabs added to brim, to make it easier to remove, and concentrates tension forces
- a ridge prevents the brim from deforming at the tabs
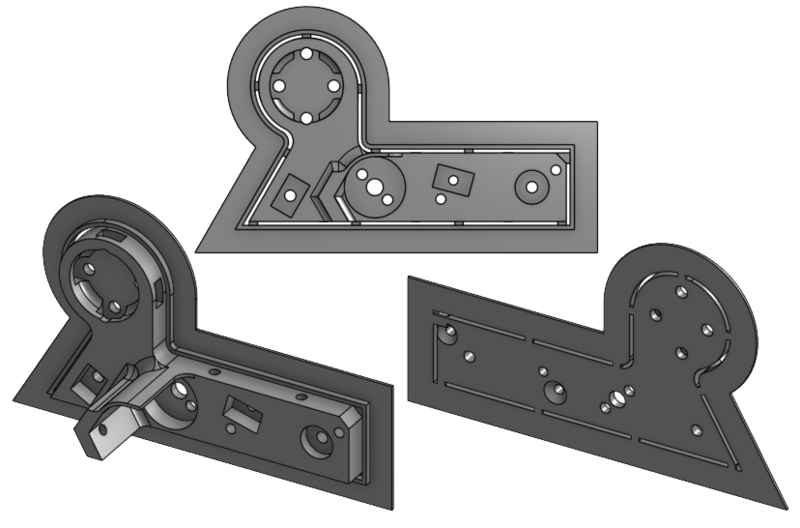
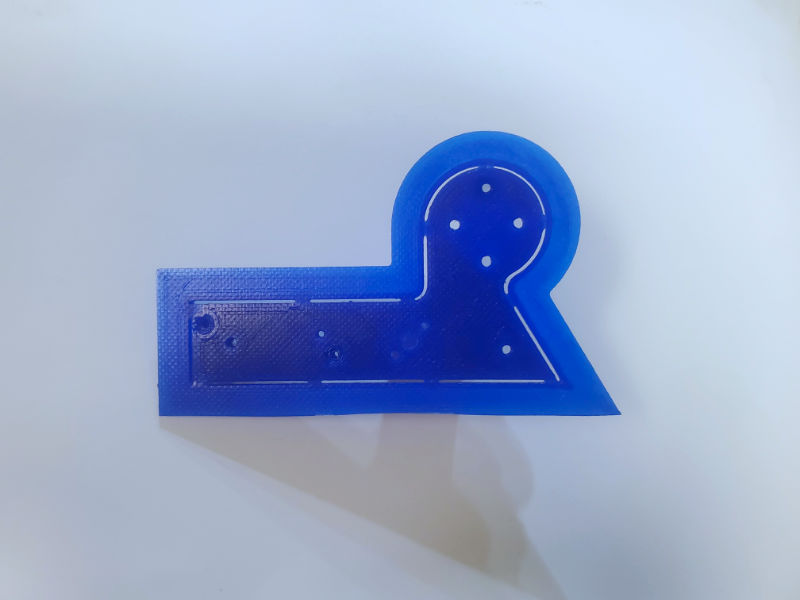
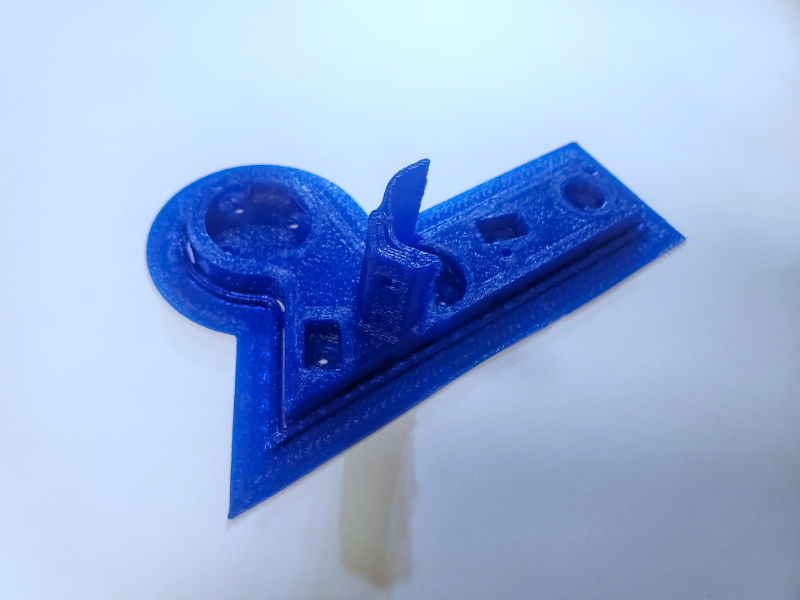
Here's an example of how I use this technique:
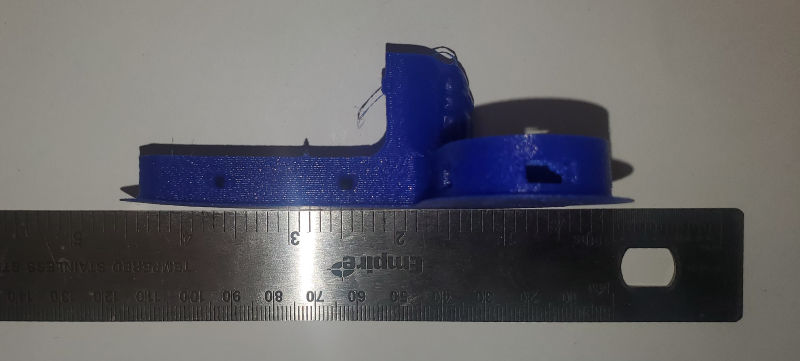
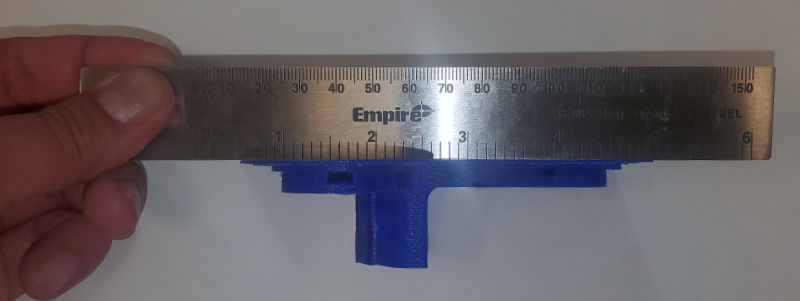
It is perfectly flat on the bottom, problem solved.
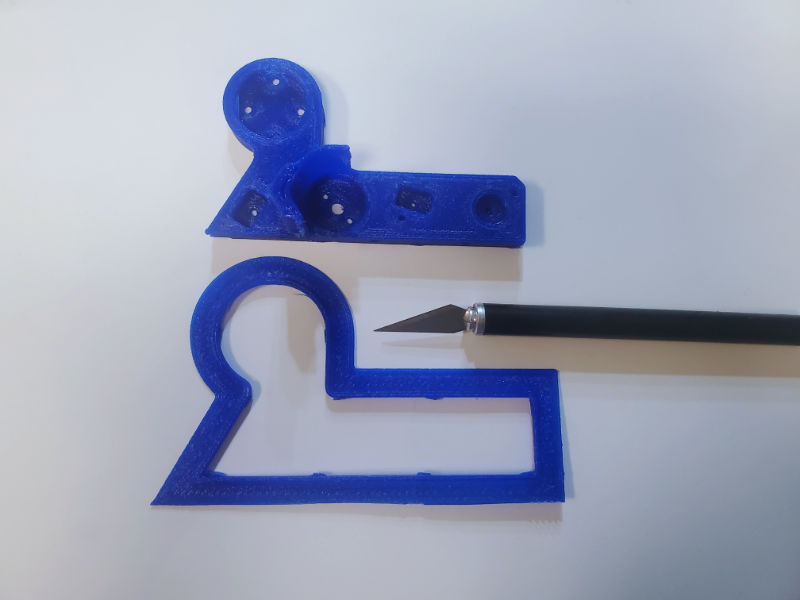
It is easy to cut off the brim with a knife.
