The Ultimaker2 3D printer has a problematic filament feeder mechanism assembly. When the filament is stuck and the feeder motor turns, it can grind away the filament, causing a gouge in the filament. The gouge makes the problem worse since the tensioner bearing will force the gouge into the feeder’s knurled wheel more, causing even more grinding. This jam happens frequently because sometimes even if the temperature sensor reports that the print head hot end has heated up, the plastic hasn’t melted yet and can’t move yet.
The Ultimaker2’s feeder design is both beautiful and disappointing. It is beautiful in the sense that is is symmetrical and compact. If you had a dual extruder, you can use the same feeder mechanism for both feeders, cutting down on manufacturing costs. But it is impossible to disassemble without removing the stepper motor because the same 4 screws that holds the feeder together also holds the stepper motor in place. If you attempt to open the feeder mechanism to clear a jam, the motor will fall off. The motor is also covered by a metal casing so you need to remove the casing as well. This is very annoying.
There is no other way to move the tensioner bearing because the design is so compact and the spring is tight. There is no other way to remove the feed tube either.
What I needed was a feeder mechanism that can be opened up without removing the stepper motor, and also allow the tensioner bearing to be moved out of the way easily. I came up with the following design:
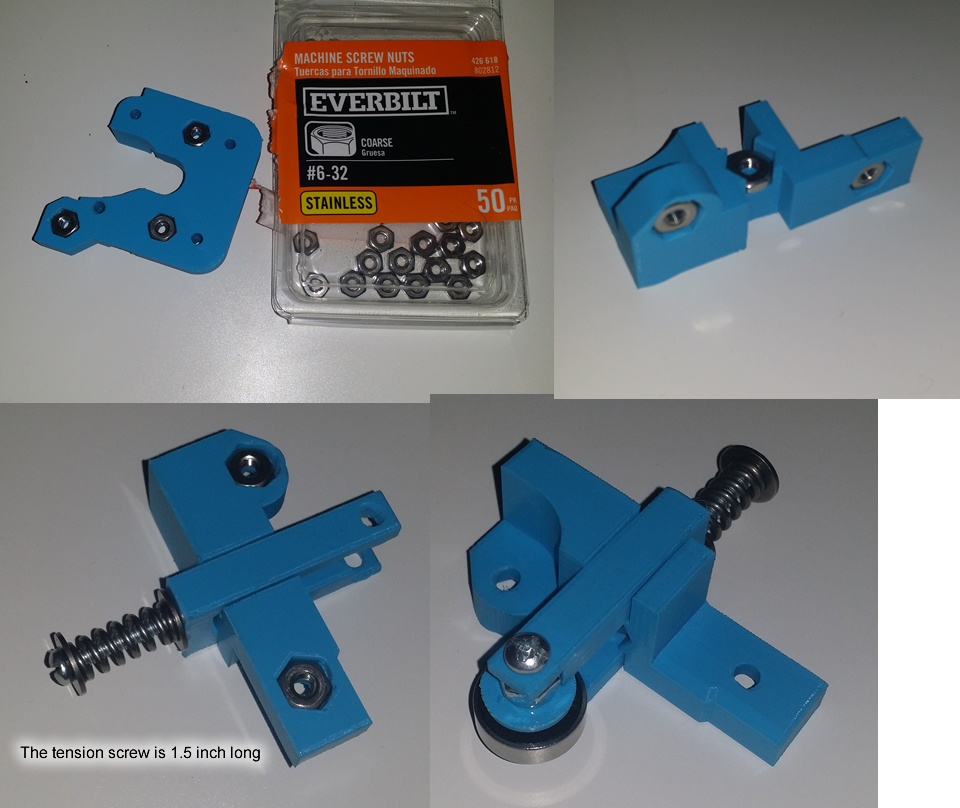
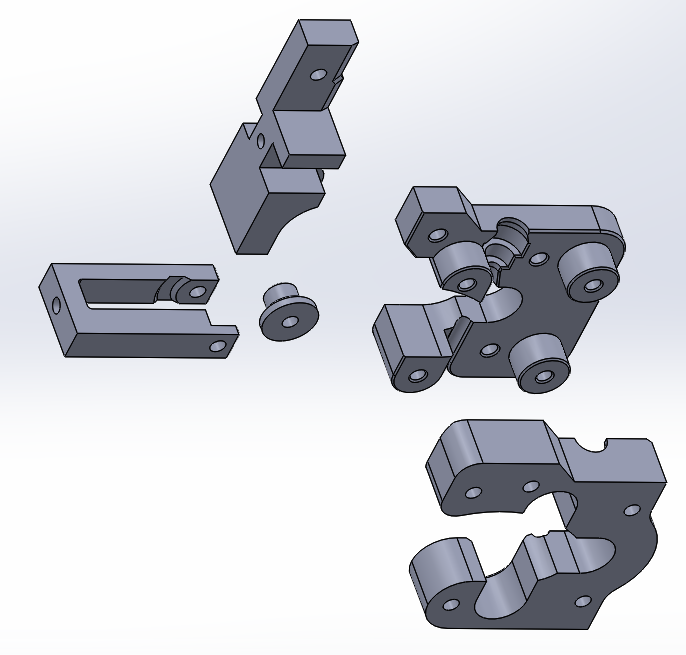
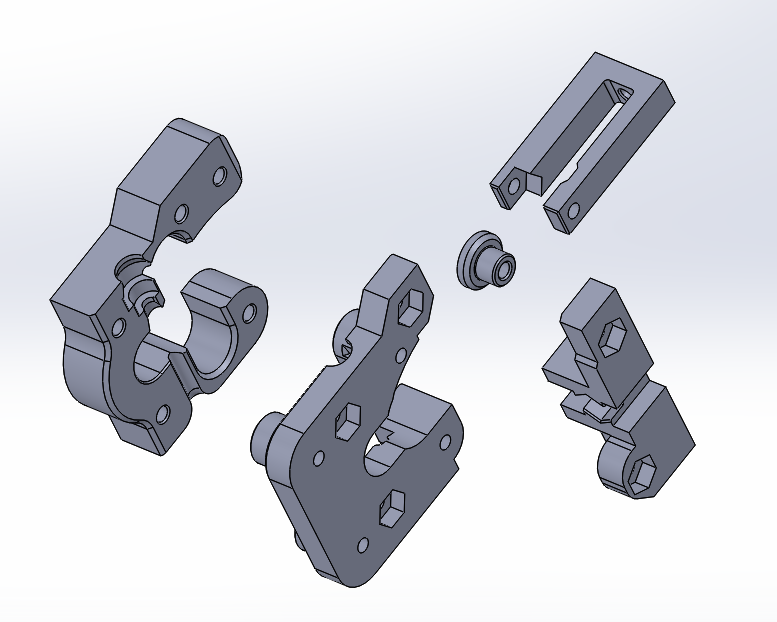
It consists of a back piece, front piece, a door piece, an arm piece, and a small bearing bushing. The 4 original M3X25 screws are used to hold the back piece and the stepper motor together. Additional #6-32 screws are used for everything else (easier to buy at Home Depot, feel free to modify the design for another screw size, I provided the SLDPRT files so you can do this easily). The spring and bearing are from the stock feeder mechanism.
Specifically the parts I used are:
- M3X20 screws and washers from stock UM2 feeder
- stock UM2 feeder’s bearing
- stock UM2 feeder’s spring
- six #6-32 thread 0.75 inch long thumb screw with washer head
- seven ordinary #6-32 nuts
- one #6-32 nylon lock nut
- one #6-32 thread 1.5 inch long screw (socket cap prefered)
- two #6-32 washer
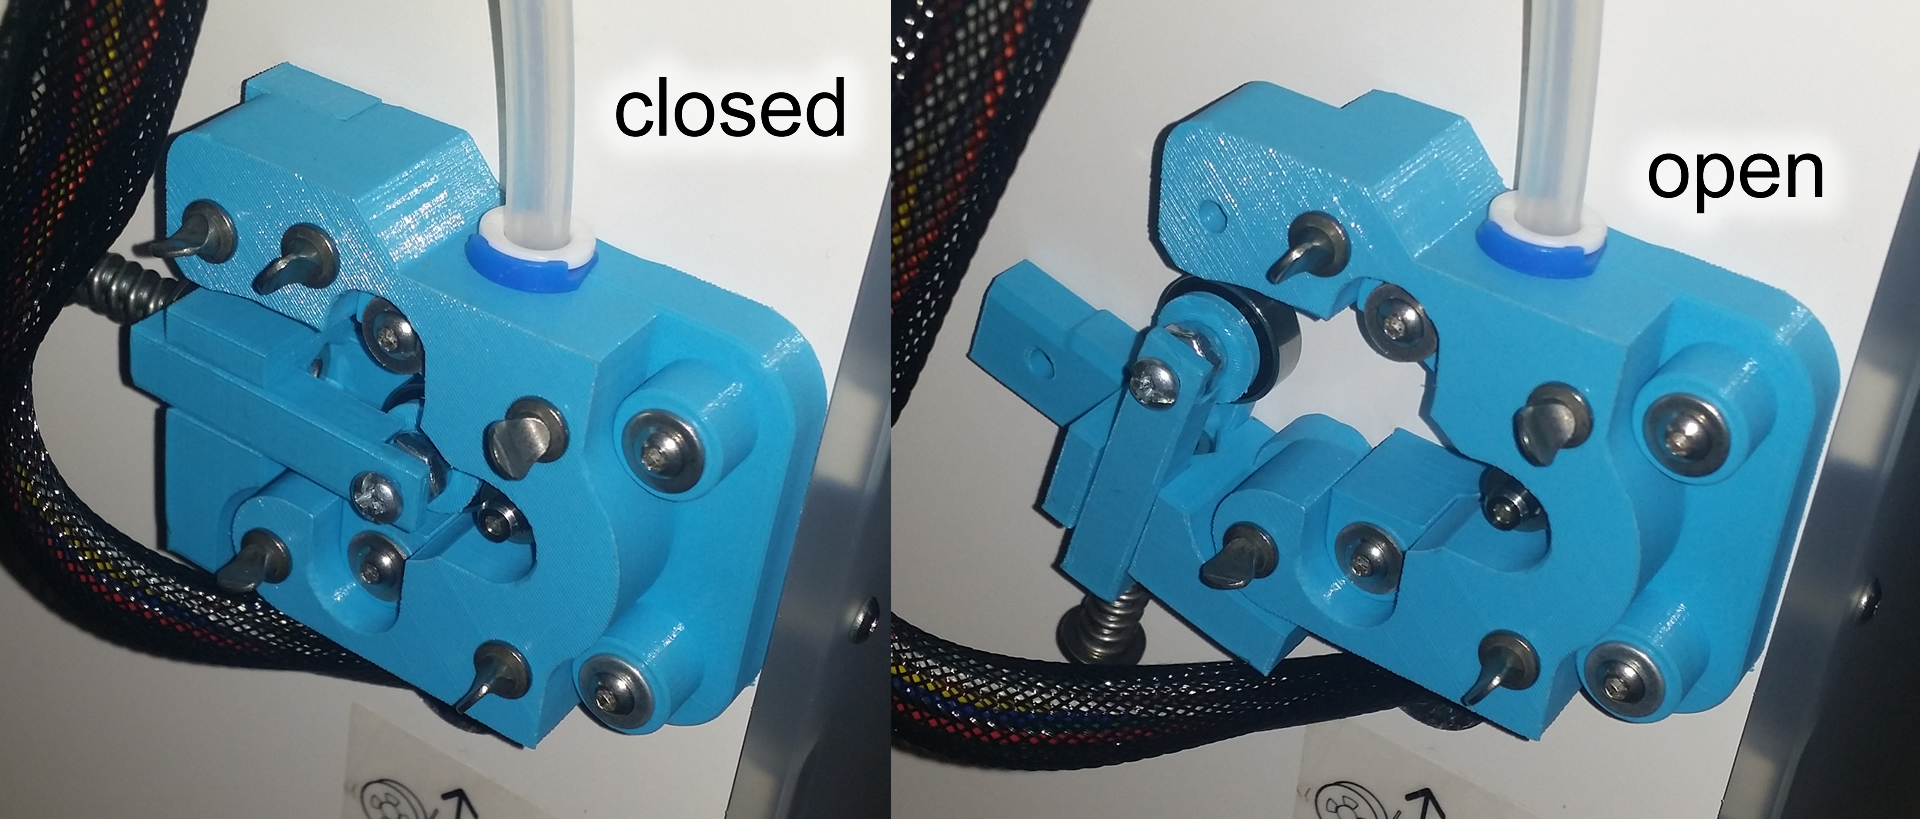
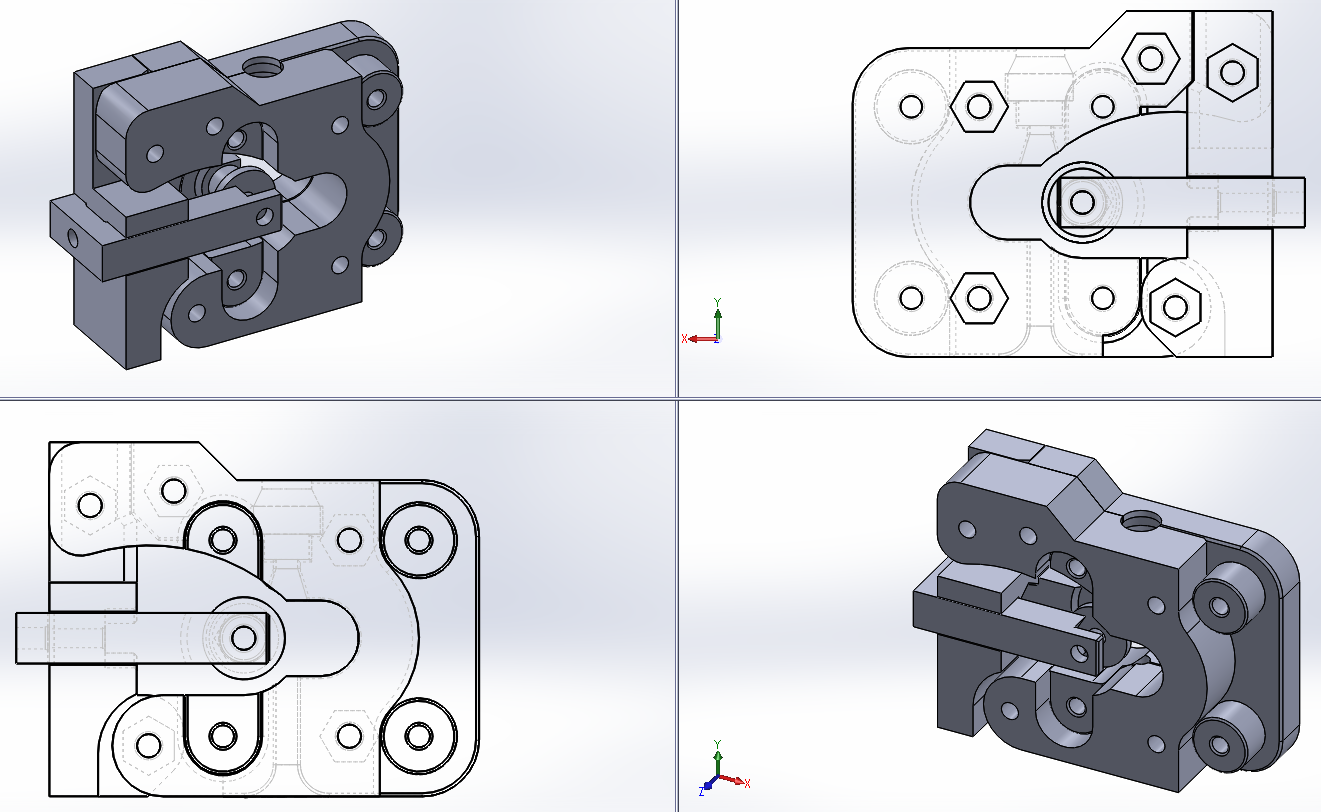
The door holds the arm in place, and it swings out easily. If the feeder grinds the filament slightly, just remove the top left screw holding the door and swing open the door, then pull the filament out.
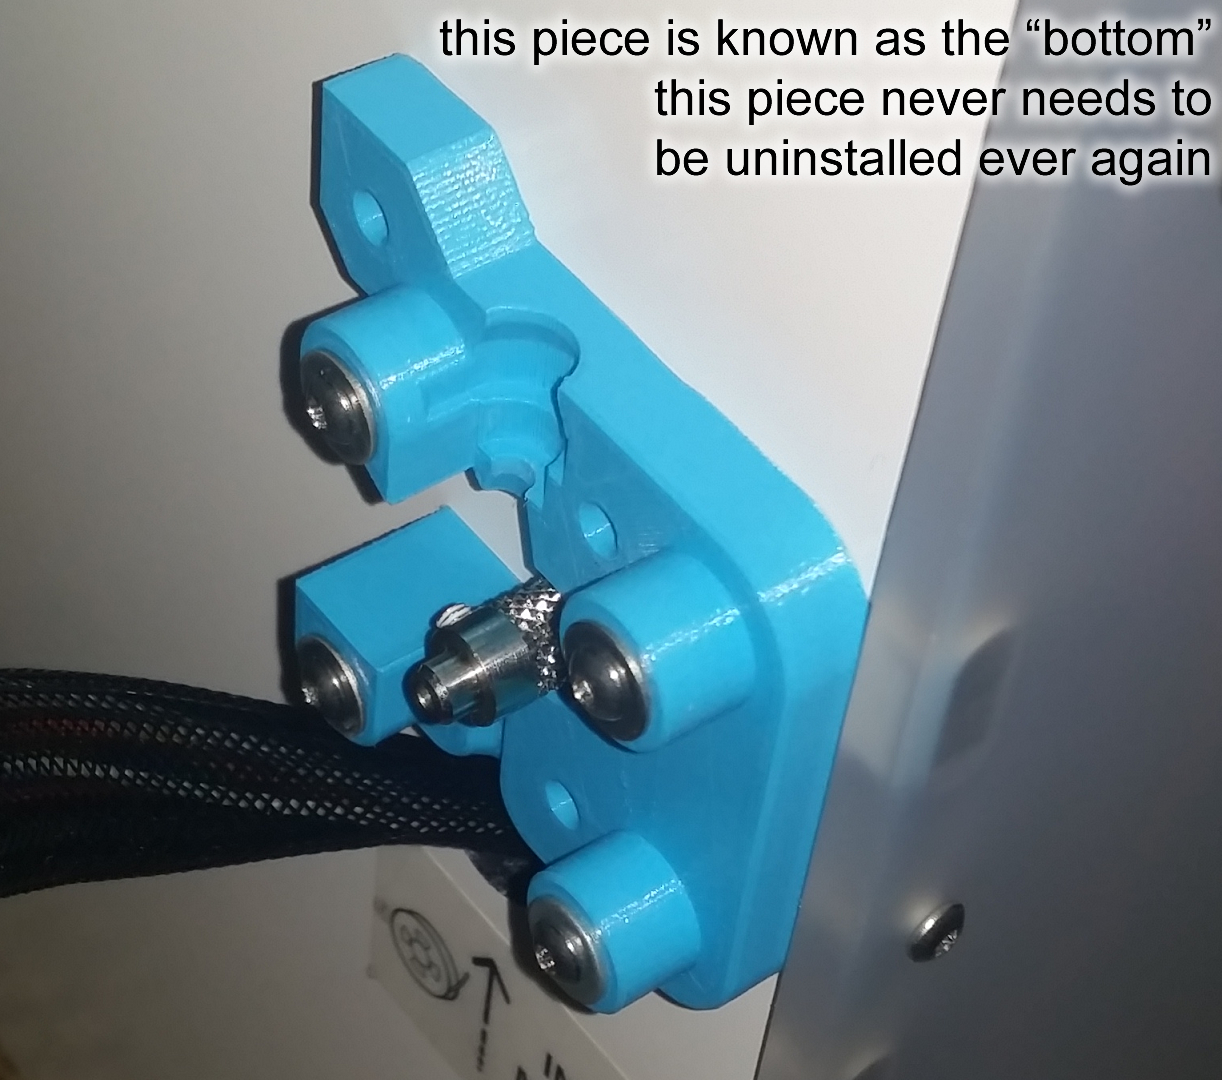
If the filament breaks and you need to remove the feed tube, then remove the top piece. You can do this without removing the bottom piece so the stepper motor doesn’t have to be removed.
The front exposes the mechanism instead of enclosing it, this makes it easy to clean out plastic particles from the grinding.
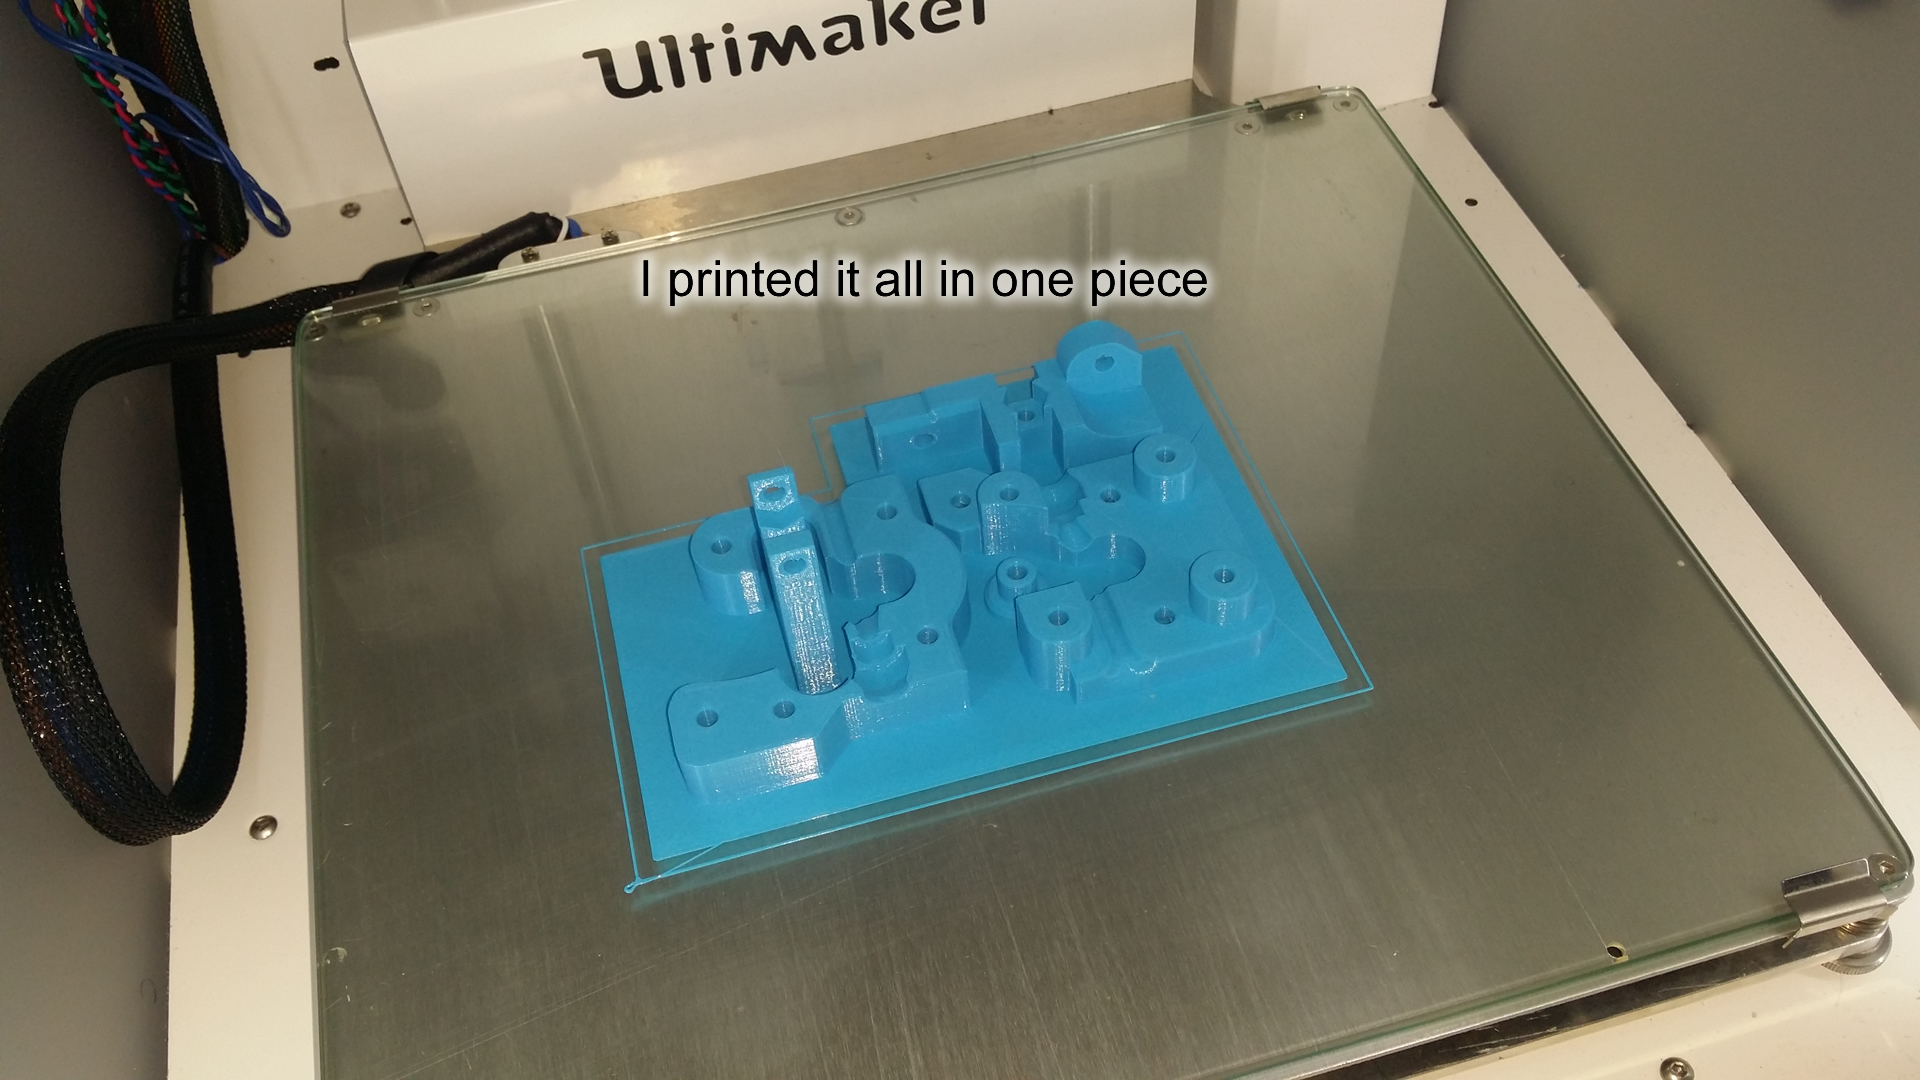
All of the pieces can be 3D printed on a FDM 3D printer. They are designed with special considerations for FDM 3D printing, such as careful attention to overhangs, wall thickness, interlayer and wall bonding, etc. In fact, I printed them all in one go, wall thickness set to 1.2mm, 30% infill.
All the files have been posted to YouMagine, click here.
I am not the first person to 3D print an alternative feeder for the UM2, here are a few on YouMagine already. This one by Robert is my favorite except you cannot remove the feed tube without removing the stepper motor (correction: Robert said that it is possible to remove the tube without removing the stepper motor, I just didn’t see how, apparently my tube is too tight so I made a false assumption about the difficulty of removing that tube), but his design does not require additional screws. There are some variations of his design and some of them involve additional guiding bearings. If I decide I need to add some bearings, I can easily redesign and reprint just the “top” piece of my own design to fit in another bearing.
A somewhat related story: There are some wires that are pretty close to the feeder motor. When I reinstalled the motor, I didn’t realize that I accidentally crushed one of these wires with the screw. This caused the printer to malfunction (it was the wire for the X-axis limit switch, so the X axis motor kept moving to the right, jamming itself). This is another reason I insist on a design where the motor never needs to be removed.
Hi Frank
Thank you very much for this well thought out solution.
Yesterday my IRobertI – feeder got broken (at the “predetermined breaking point” on the filament inlet). It worked for quite many (ca. 200) printing hours with good results. The filament inlet is the weak point of IRobertI’s design. The filament guide (described as “optional” proved to be quite helpful to insert new filament and should have been included in the attachment (my CAD – talent is not very developed at this moment…). I always hated the use of the same screws for fixing the stepper and the feeder (the Dutch are really parsimonious people ;-D).
So I’m going to print your design and I’ll report my experiences with it on Youmagine soon.
Kind regards from Switzerland
Paul