A brief explanation of why corners of large 100% infill solids lift off the print bed during 3D printing, and my way of solving the problem.
Cause
I am printing a model that is essentially half of a box, meaning there is a bottom and 4 walls. The bottom and walls are thick (because it’s not actually a box) for strength and I printed it at 100% infill. When it was printed, the corners lifted during printing, causing the entire model to deform. Sometimes this can cause the entire print to fail.
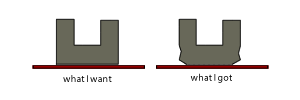
Why does this happen? The bottom is touching the heated bed, it is hot. The temperature is lower further away from the bed. That means the colder plastic contracts.
The walls didn’t shrink nearly as much, that is because:
- We are printing layer by layer, the walls are not that warm to begin with
- Less material means less capacity for heat
- Less material means less material that can shrink. If the bottom was 100mm and shrunk to 99mm, then a 10mm wall would only shrink to 9.9 , so it is less noticable on a wall
Easy Solutions
To avoid this, you can simply not large print 100% infill objects. Also, use a brim on the bottom layer, which will hold down the bottom layer better. A funny looking trick is the “Micky Mouse Ears” technique, which puts down a pad on the corner of a model so the corner doesn’t lift.
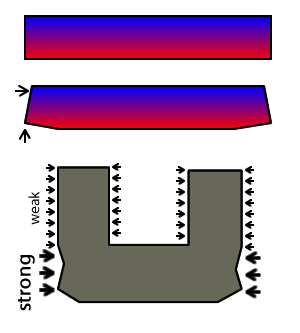
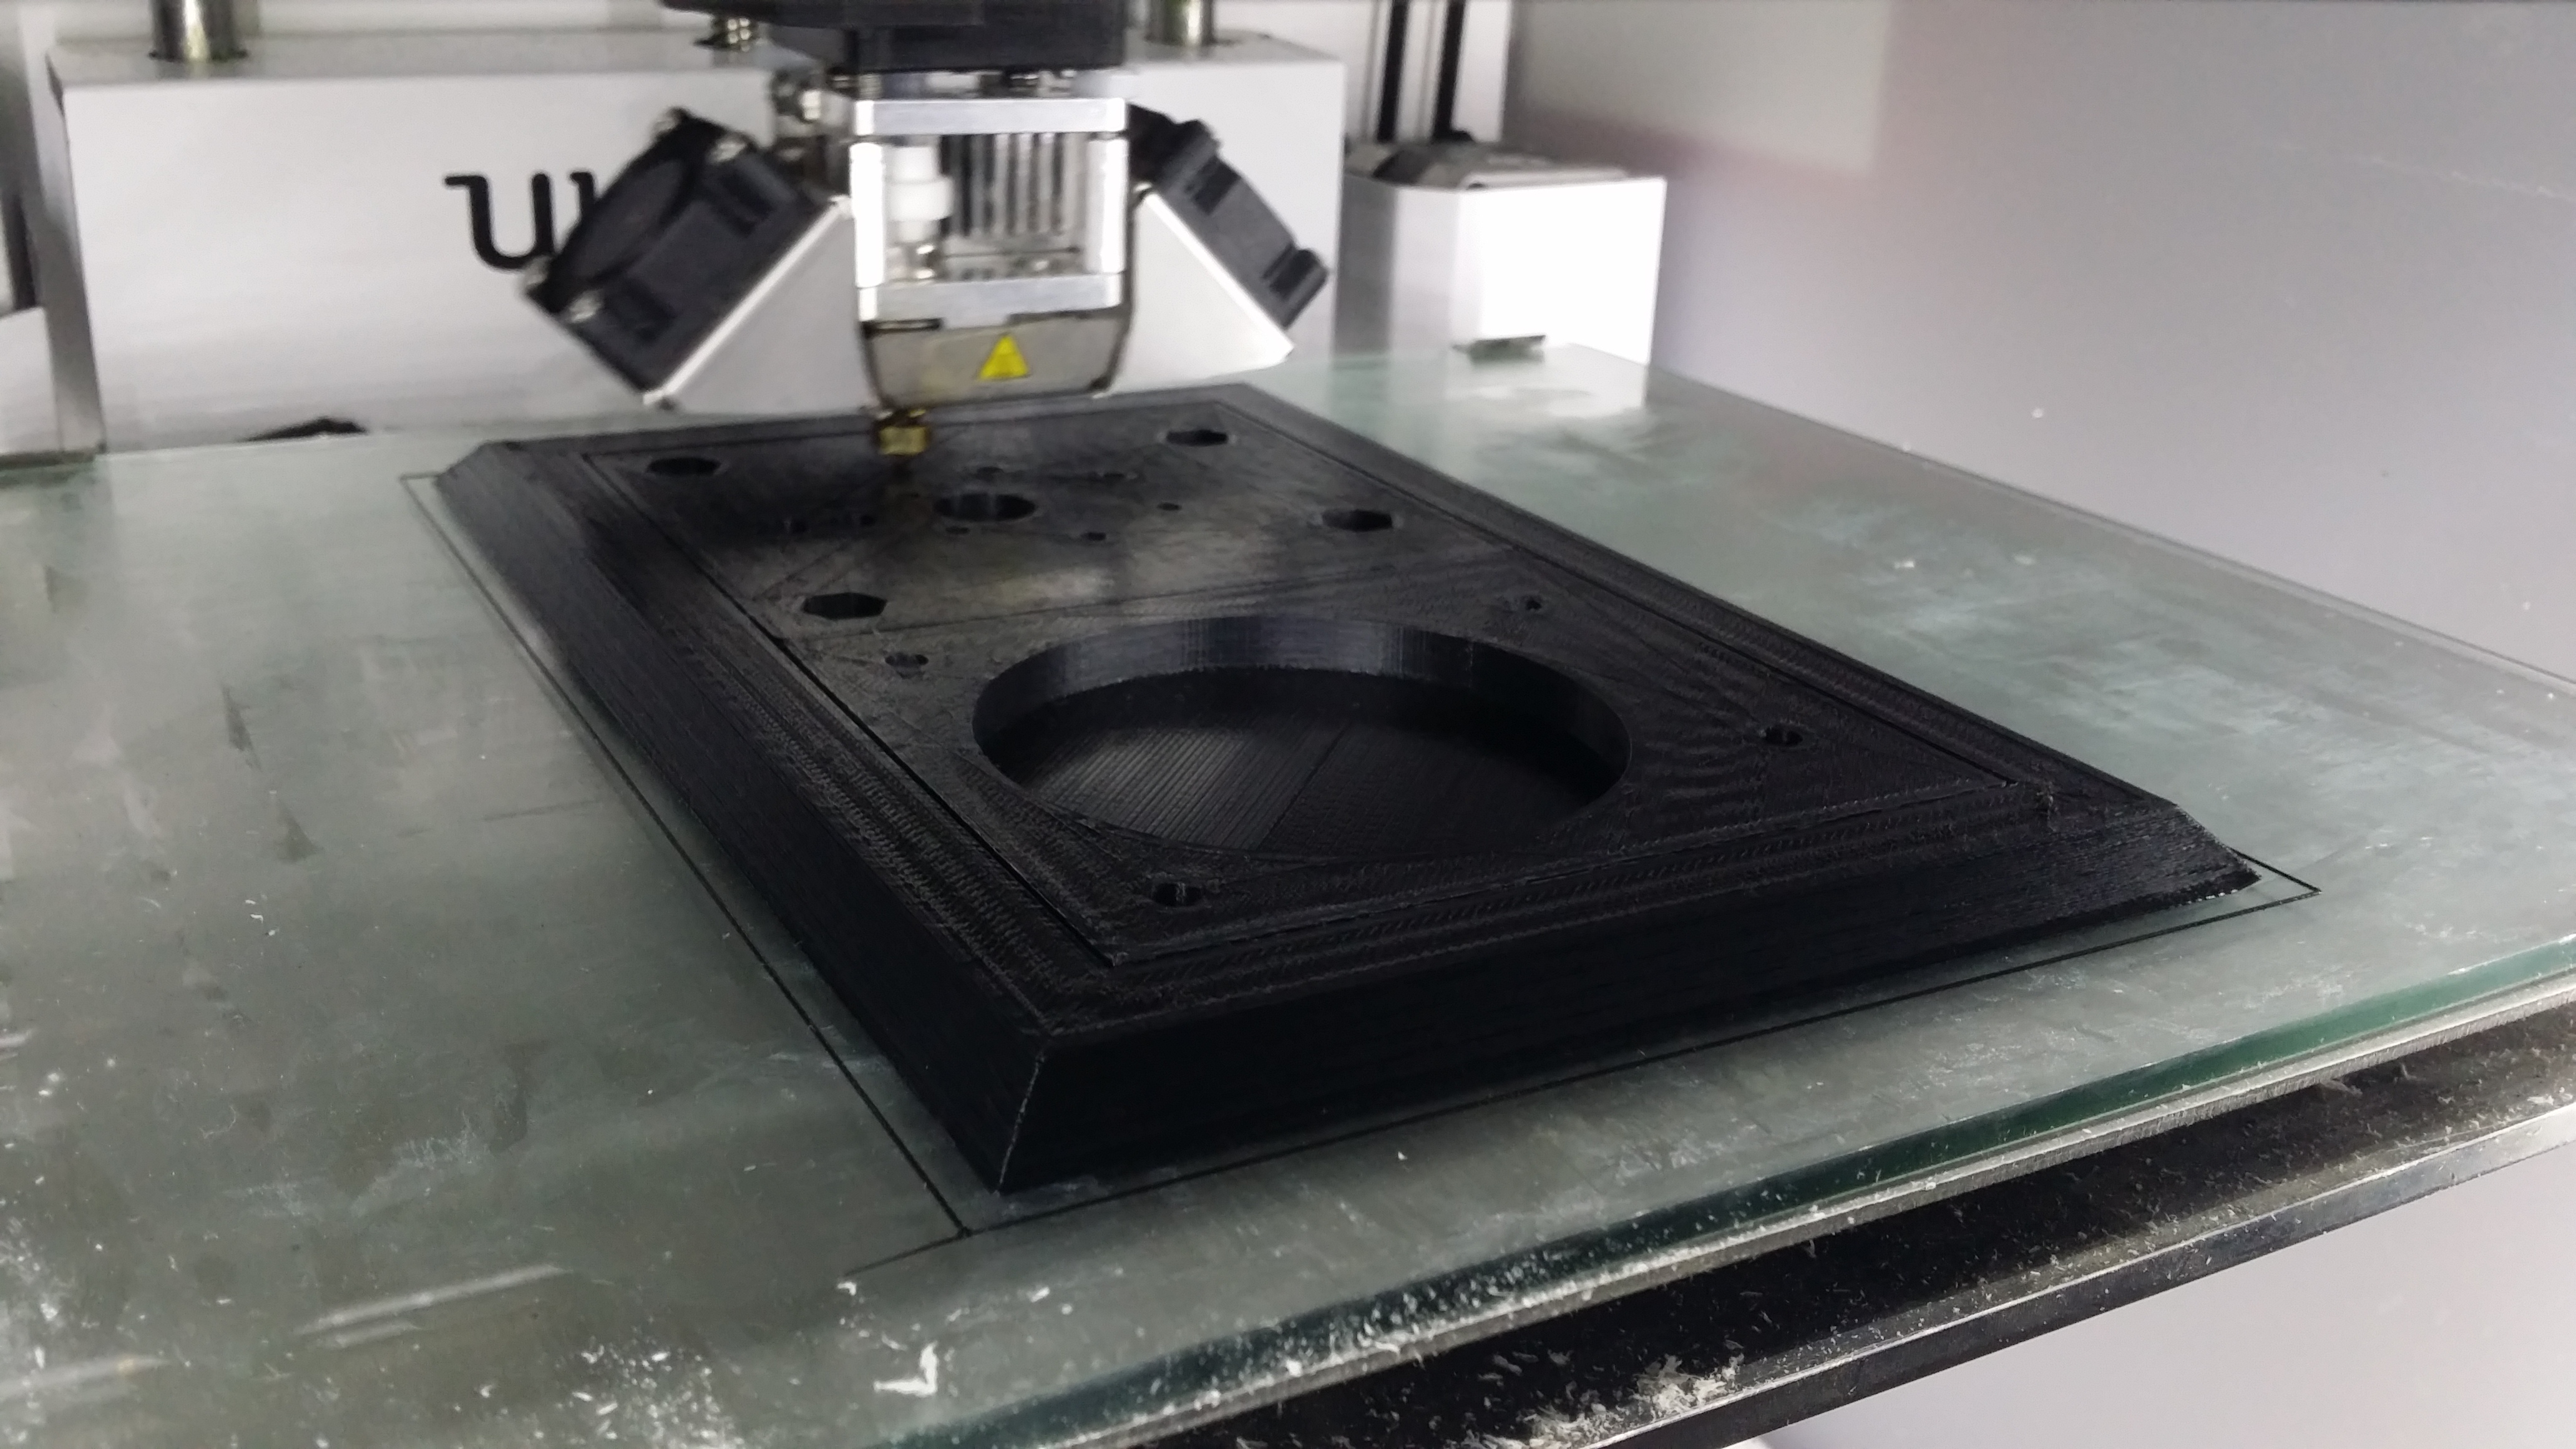
However, my model was huge and thick and the even a full 20mm brim still couldn’t hold it down. My idea was, instead of using glue to keep the brim down, I make the brim super thick so that it’s stiffness is what is keeping it down. So I came up with this technique, the extra-thick-brim:
The stiffness keeps the first layer down on the bed. The extra-thick-brim is wide on the bottom and narrow on top, which gives it strength while preventing itself from curling. In fact, the triangular shape might even provide a force that is the exact opposite of lifting corners.
The downside is that this obviously uses more plastic and takes more time, plus takes up bed area, and you need to cut away the excess plastic after. But at least you are almost guaranteed a successful print on the first try, so when the situation is right, you are actually saving plastic and time by not having any failures.
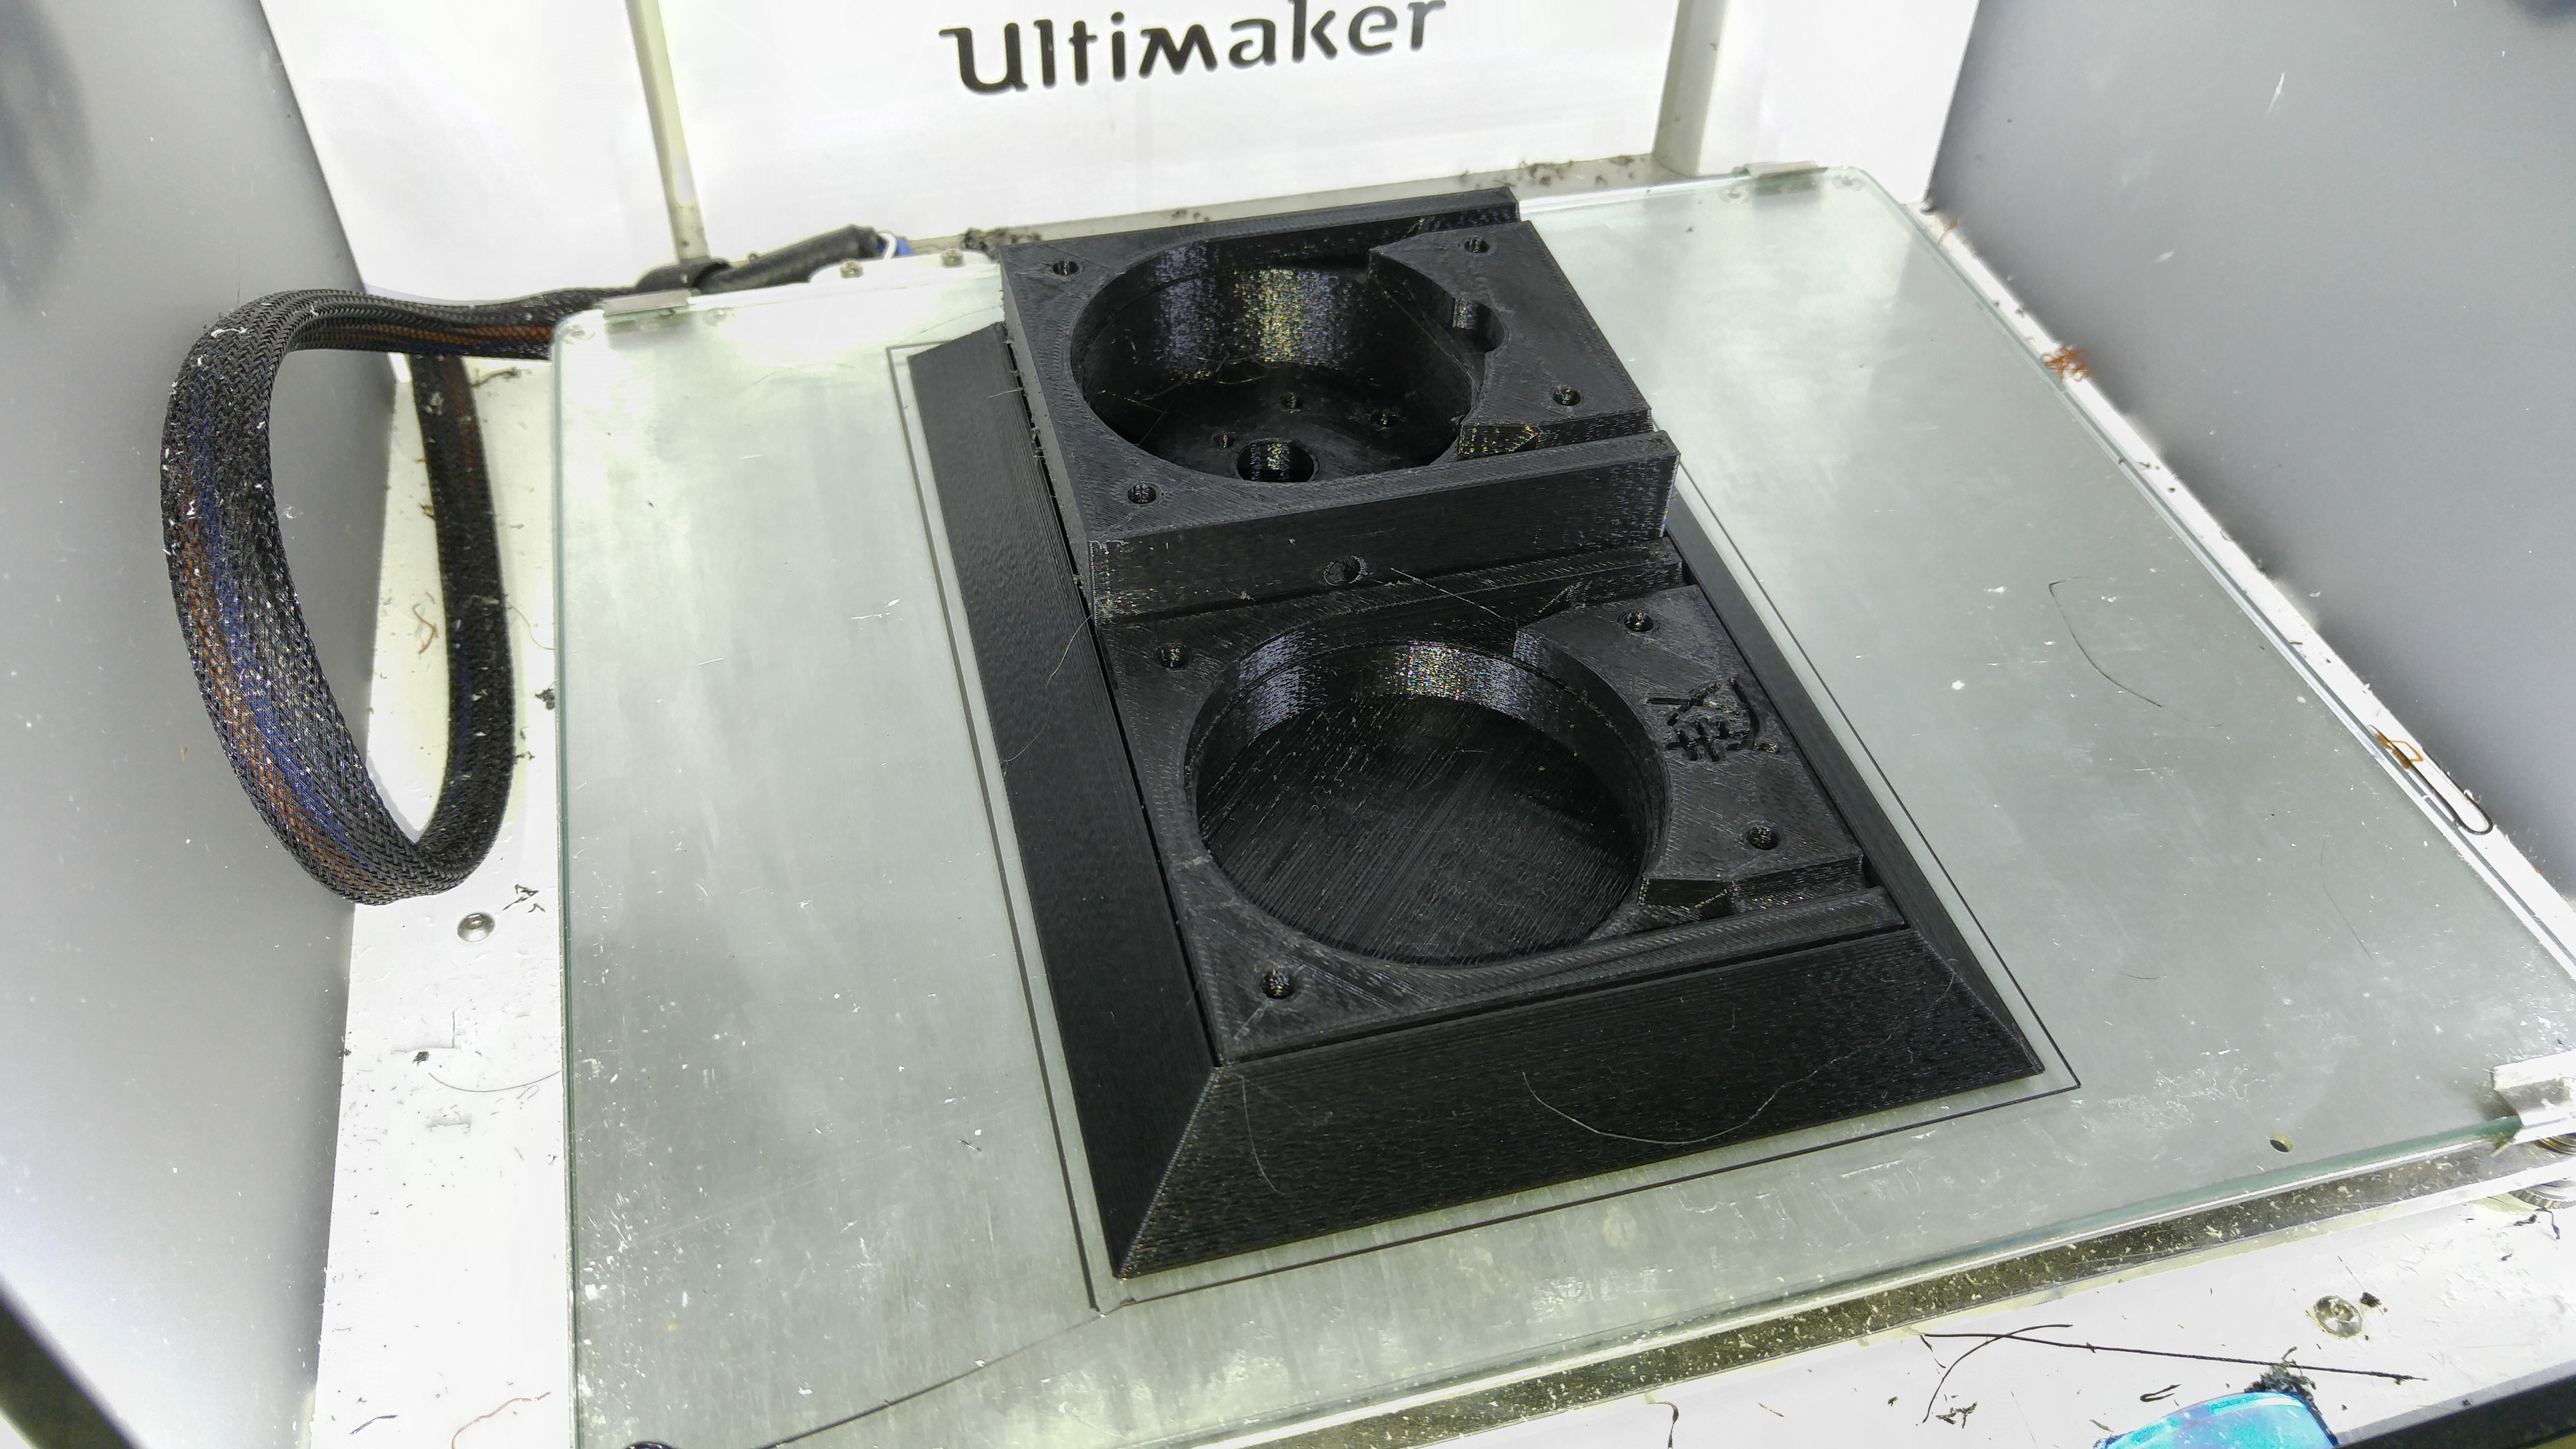
To save some time and plastic while still using this method, put the extra-thick-brim around two models, so the weight of one model keeps the second model’s corners down. This saves two lengths worth of extra-thick-brim.
WHy 0.3mm for the bottom? That’s the default bottom layer thickness in the Cura slicer, which works pretty well. Why 0.8mm for the gap? It should be wide enough to avoid Z scarring from joining the outside and inside, and fit a thin knife blade into.
Results
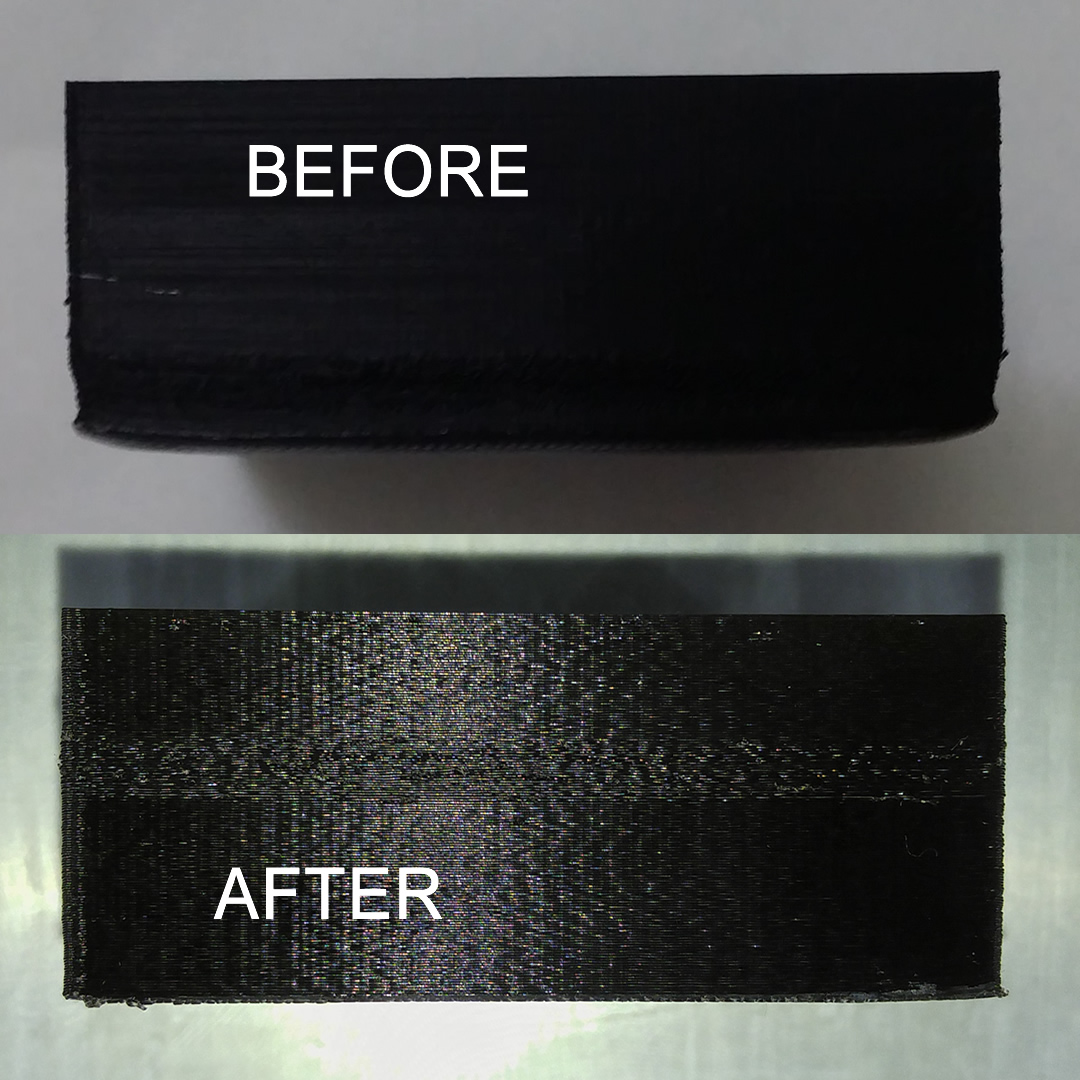
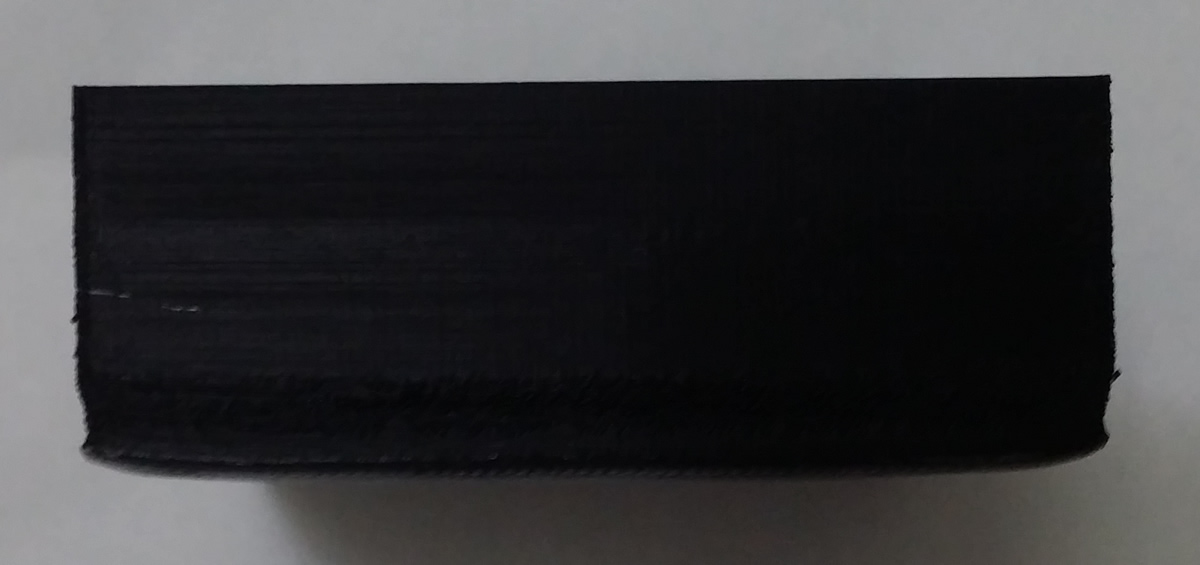
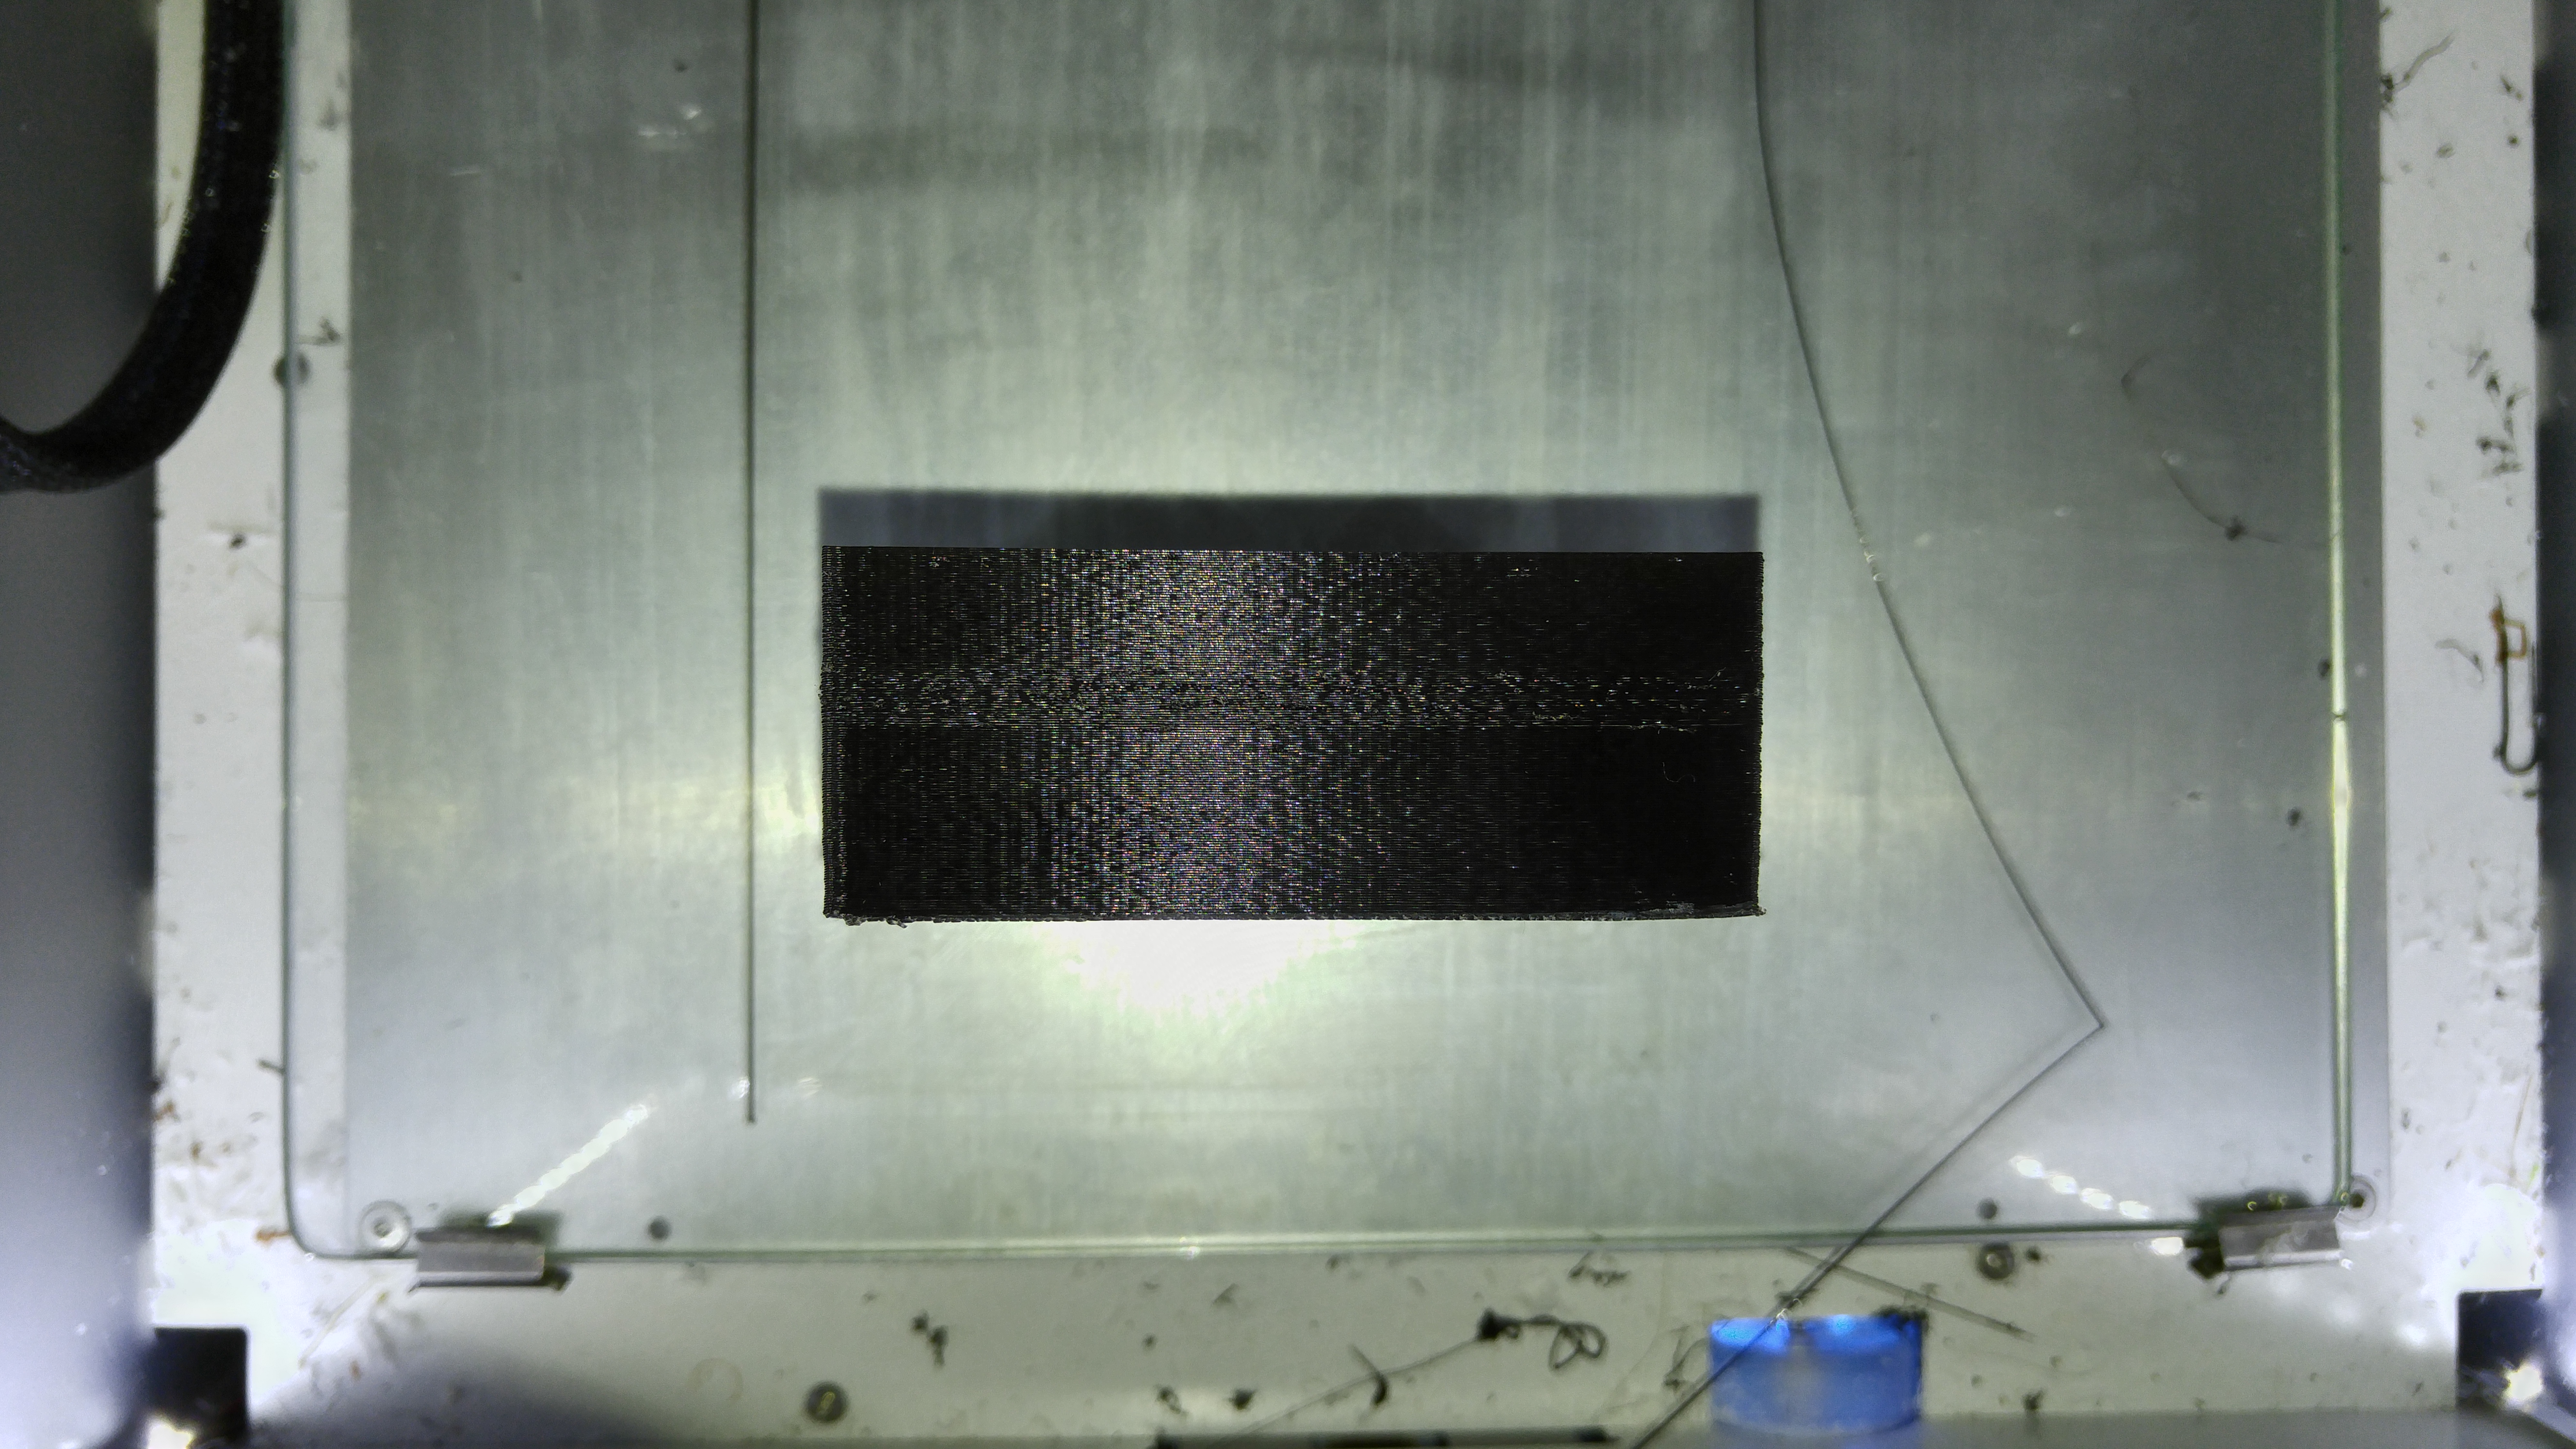
Through a view of the bottom, one can see that there’s still some force threatening the corner to lift, but now it is drastically reduced.
During print:
After print:
I have been looking for a solution for this for a long time. Great and simple idea can’t wait to try it out . My boxes have all been lifting hopefully its going to work for me too.
Heat the baseplate close to the softening temperature of the plastic. For ABS, softening temperature is 150C, so I use 120C for the baseplate. High temperature keeps the upper layer soft. If is soft, then it does not have enough force to lift the first layer. For large parts, I will even put a piece of cardboard in front of the table to push the air away as the table is moving. Keeps the part hot to prevent lifting.
Blue Filament wrapping at 220C
Thank you for not only providing a solution, but also a good explanation of WHY it happens. Coolaroony
I just thought I’d drop a note that this article helped me out. I just happened upon it and I’m glad I did. I was at my wit’s end trying to prevent bottom curling, even on a raft. Thanks for the explanation of why it happens; that helped most of all!
Useful idea. Will give it a go as most of my fails are due to corner lifting
Great way to do it, i have made a smalle paper box around the area i print on and a head deck. that works for me.
is there a way to make the base thicker in cura ? new to the whole printer thing have a chirion with the pre upgraded bed, love the machine !! but yea some lifting is a wee bit of problem.
Your first layer isn’t fusing as evidenced by the first “results” picture. You likely need to add some negative Z offset to get the nozzle closer to the bed so that the plastic squishes out and joins neighboring passes. Hard to tell from your other pictures but if layers that arent the bottom also exhibit bad fusing you may need to crank up the flow (extrusion multiplier)
I would go a step further – the middle of the box almost never lifts, it’s only the corners – so you can add the triangles only around the corners (say 5mm on each side of each corner) that should be enough to keep them down without using too much plastic and adding too much print time
Thank you very much.
After building the heated encosure, some other upgrades and alot of tweaking I still couldn`t print my 18cmx10cm car radio bezel.
You saved me man 🙂