In my quest to have the best Ultimaker 2 possible, I have installed a Flex3Drive kit and Olsson Block kit.
Recently I have been having issues with inter-layer adhesion. I tried a speed test and would consistently fail them, either due to jamming or inter-layer splits… This is a story of how somebody more experienced in electrical and software engineering tackles a thermodynamics problem.
Bonus: this article contains a picture of my extra power 400W supply for the Ultimaker 2
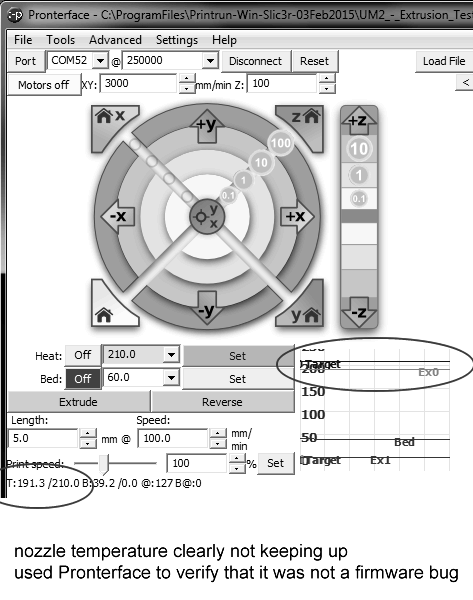
I then tested repeatedly while monitoring the nozzle temperature, both the current and target temperature, using both the LCD menu, and Pronterface‘s temperature graph. The temperature would reach the starting temperature of 210C, but would drop to 190C only a few minutes after the print head started to move.
The fact that the target temperature doesn’t change indicates that it is most likely not a firmware bug that is changing the temperature actively. I double checked the firmware to make sure that the heater cartridge is fully turned on, it is. I tried dialing up the temperature to 230C during the print and it could not raise it self back up.
Next I suspected a power supply issue. So I built a power consumption monitor using an off-the-shelf panel meter that can read both current and voltage. The circuit was built on a small perfboard and I got some DIN 4 pin male and female connectors, so the circuit sits between the power supply and the printer.
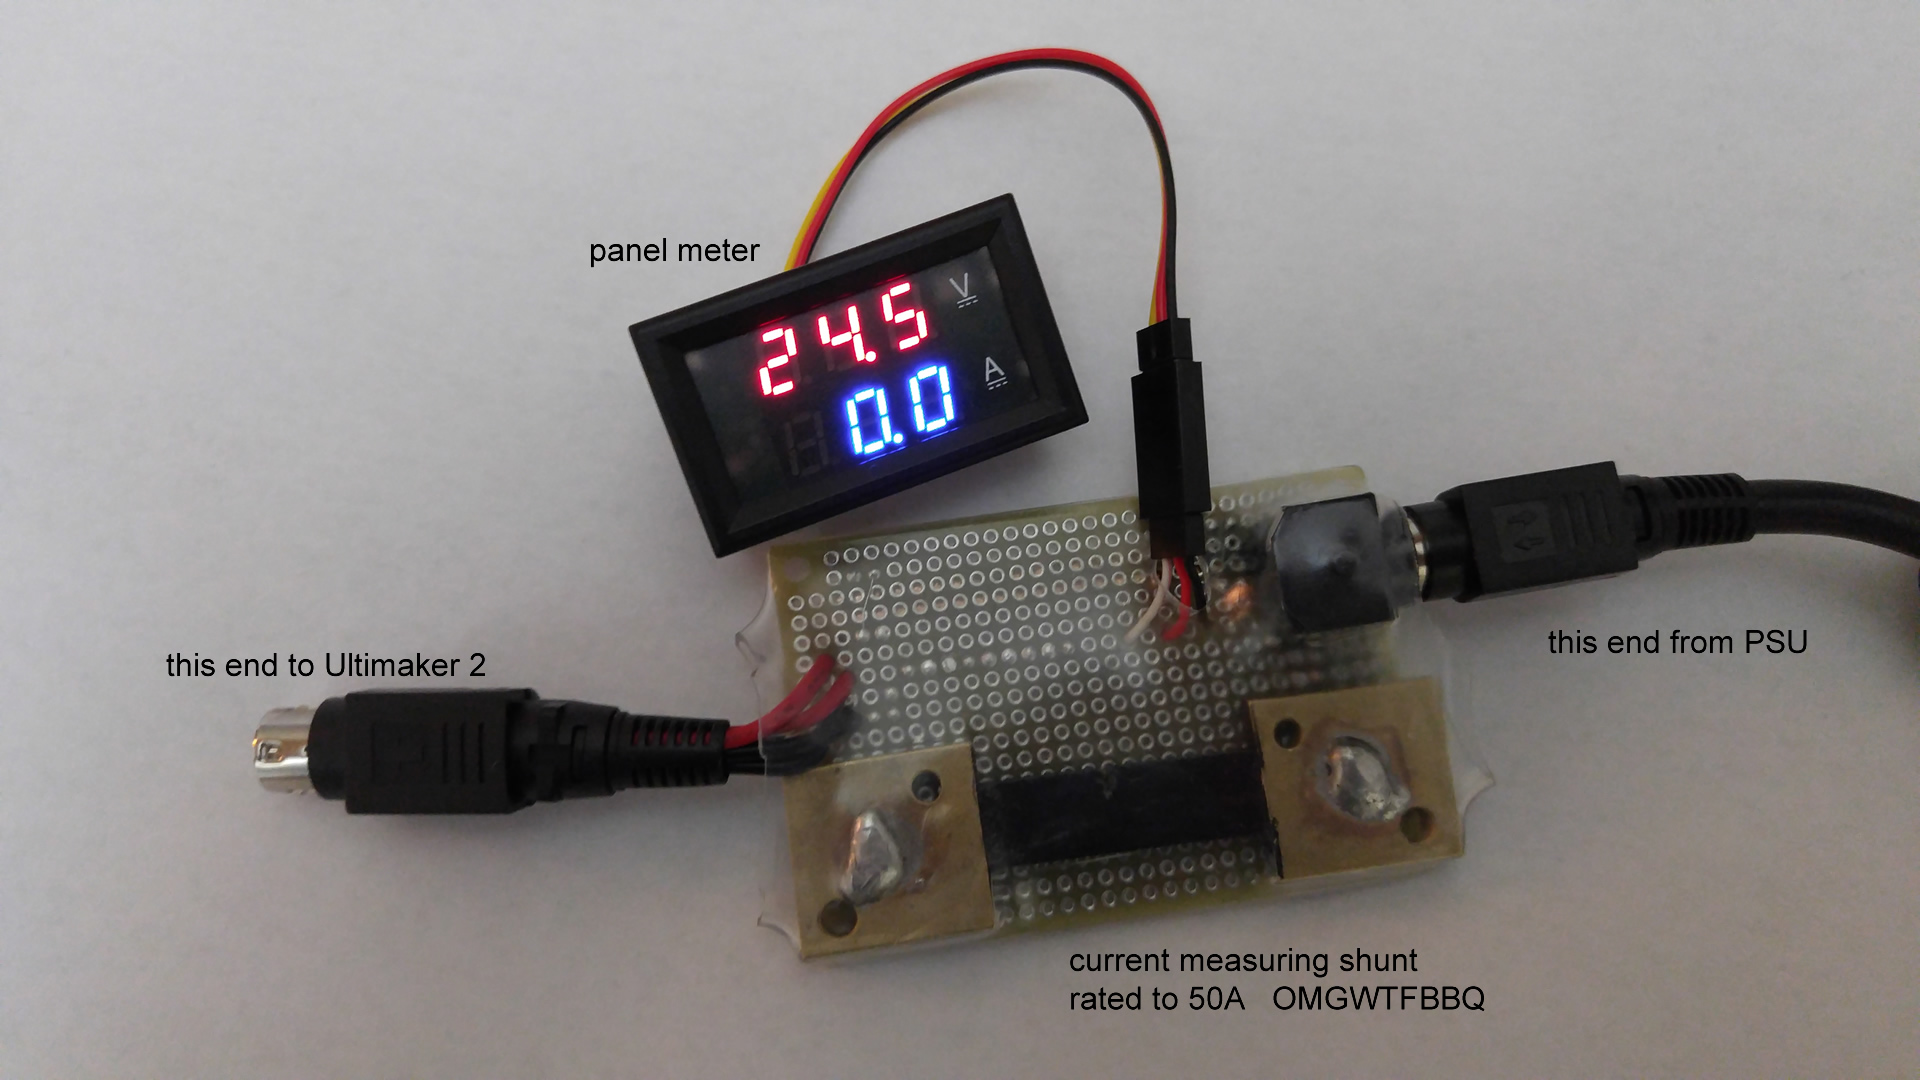
What I observed was nothing out of the ordinary. The voltage never dips at all, staying at a constant 24.5V, which is expected from a 24V PSU. The current peaks at 12A when the heated bed is warming up and 2.5A when the heater cartridge is the only one active. Since the voltage never dips, I cannot suspect the power supply any more.
I begin to suspect the heater cartridge itself, which is a pain in the ass to swap out if I ever need to. It is a 25W unit, and I could purchase a 35W replacement that is the same size. This would strain the PSU slightly more but I wouldn’t care. However, the same website also sells Olsson Block kits, so I send them an email.
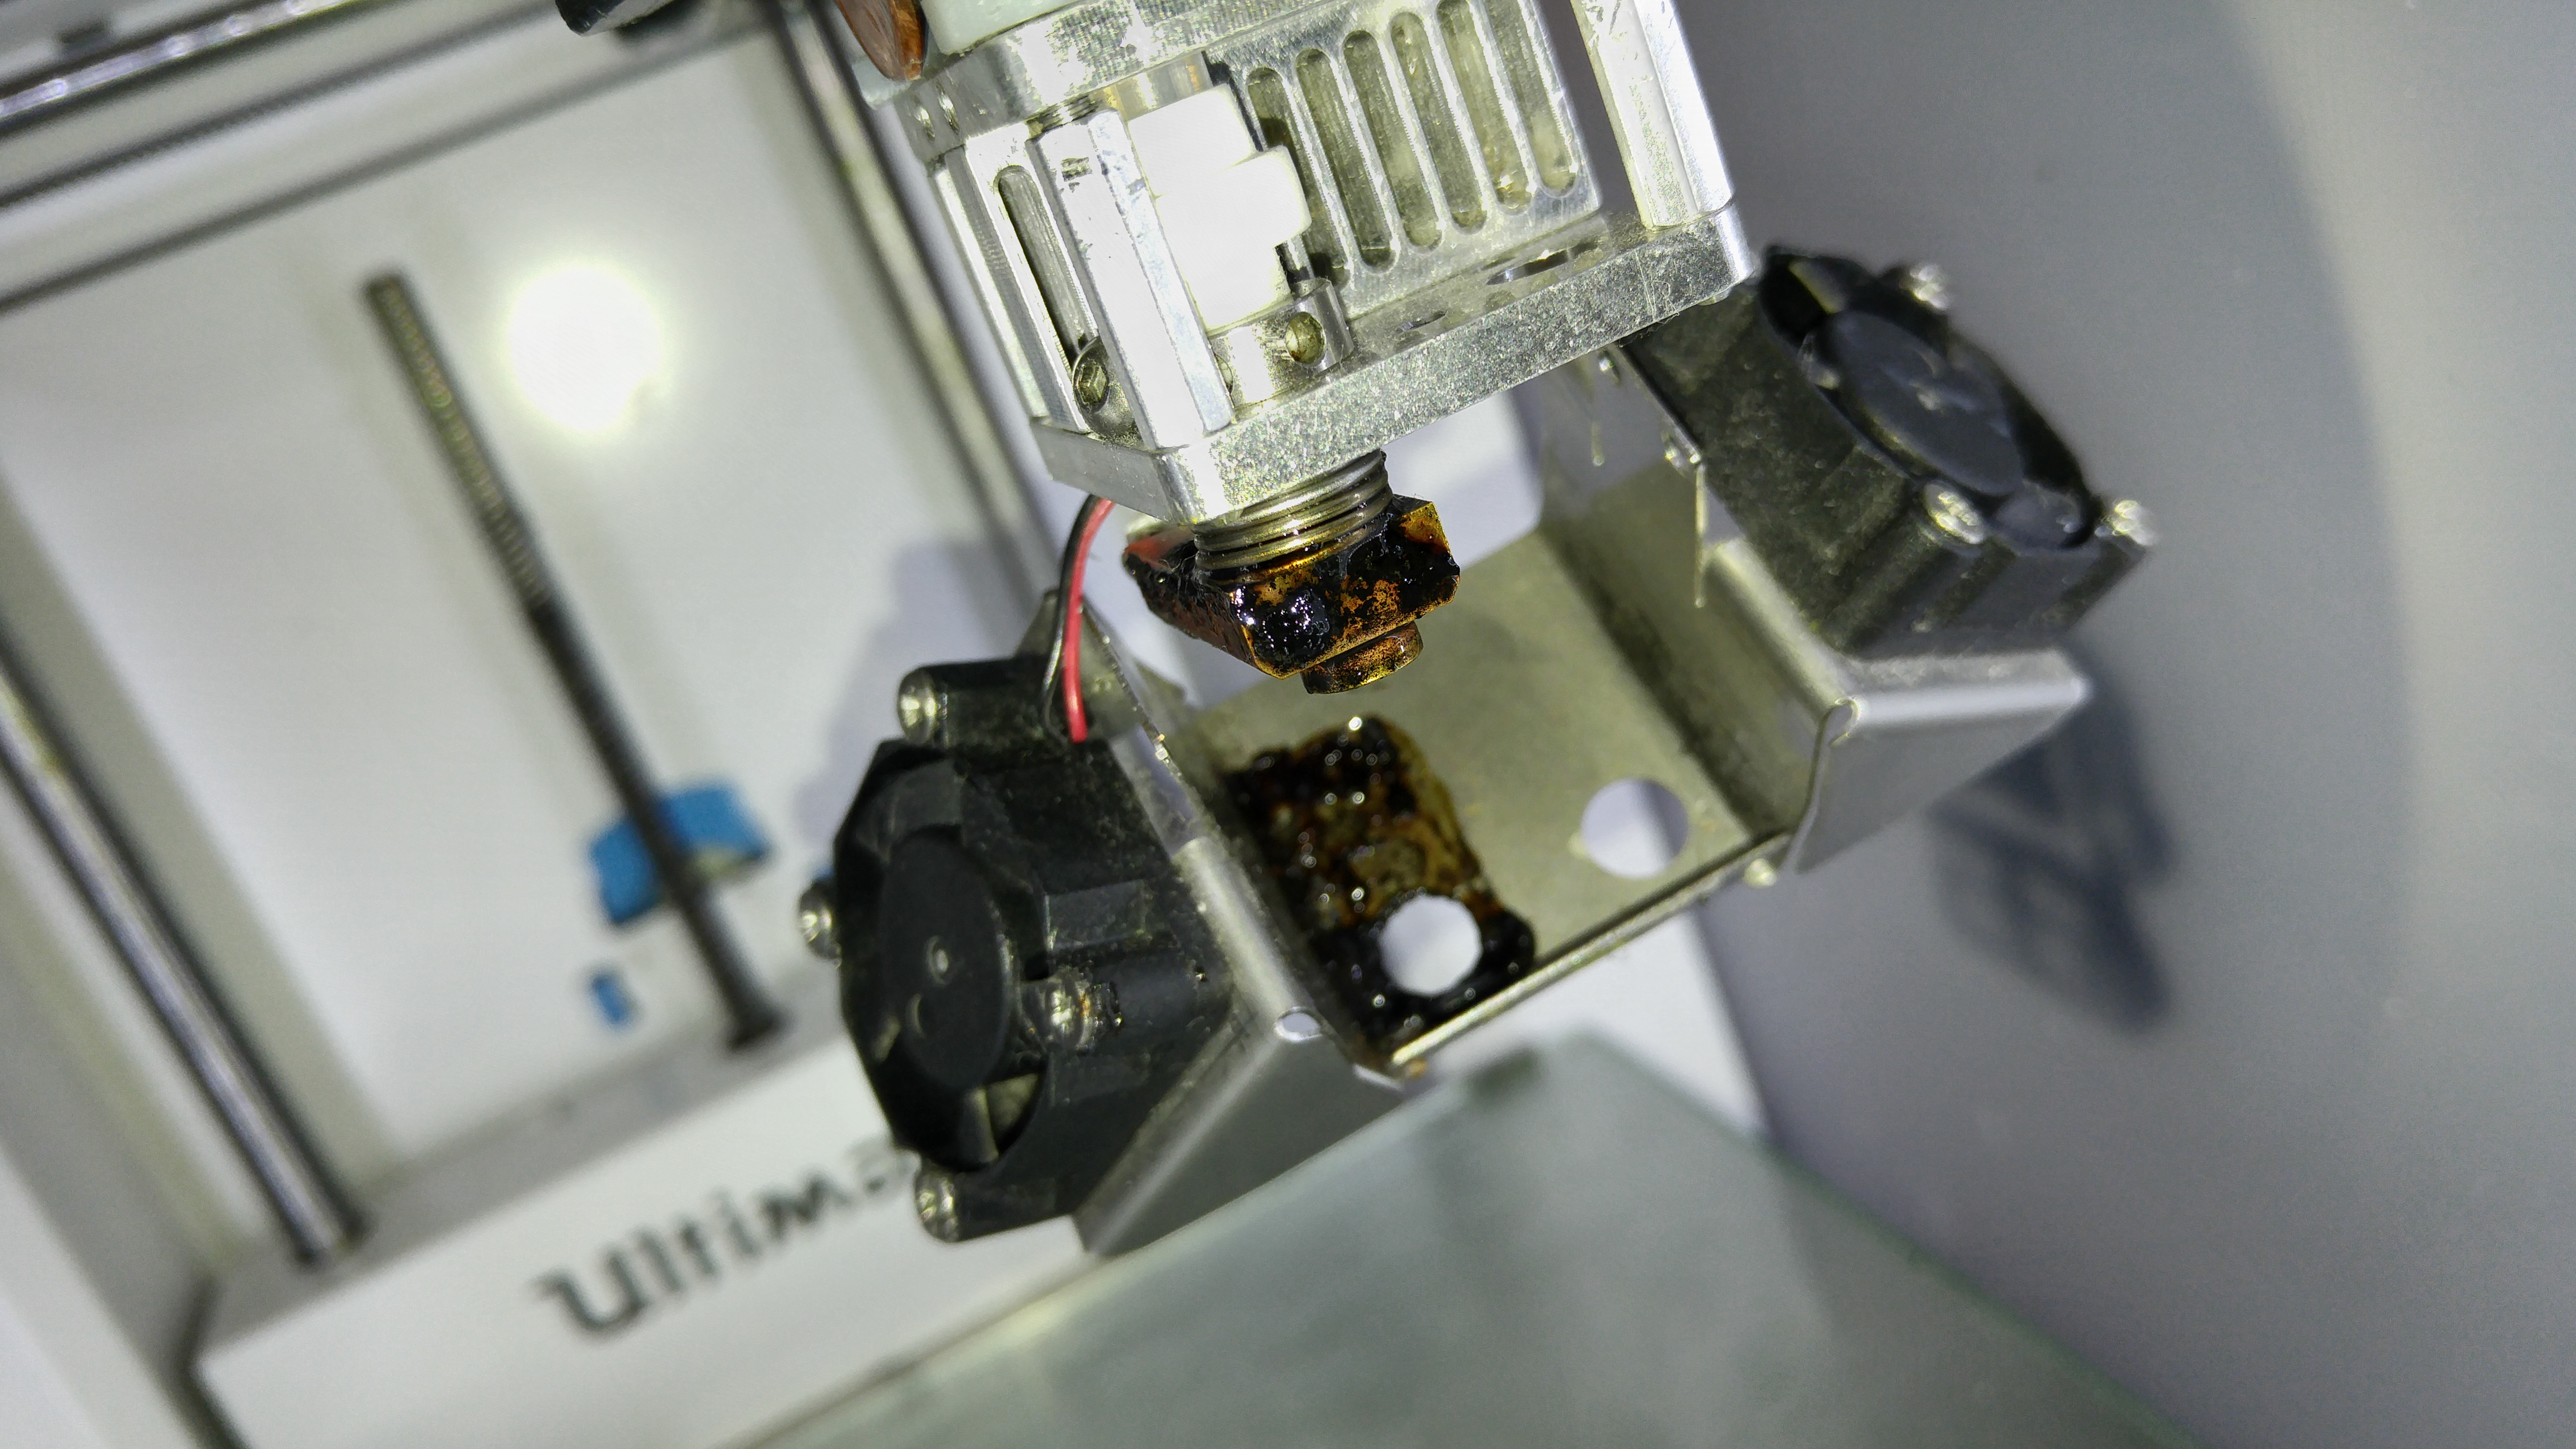
It turns out, they have also had this issue, and it was caused by the fan bracket making contact with the block, thus becoming another heat sink.
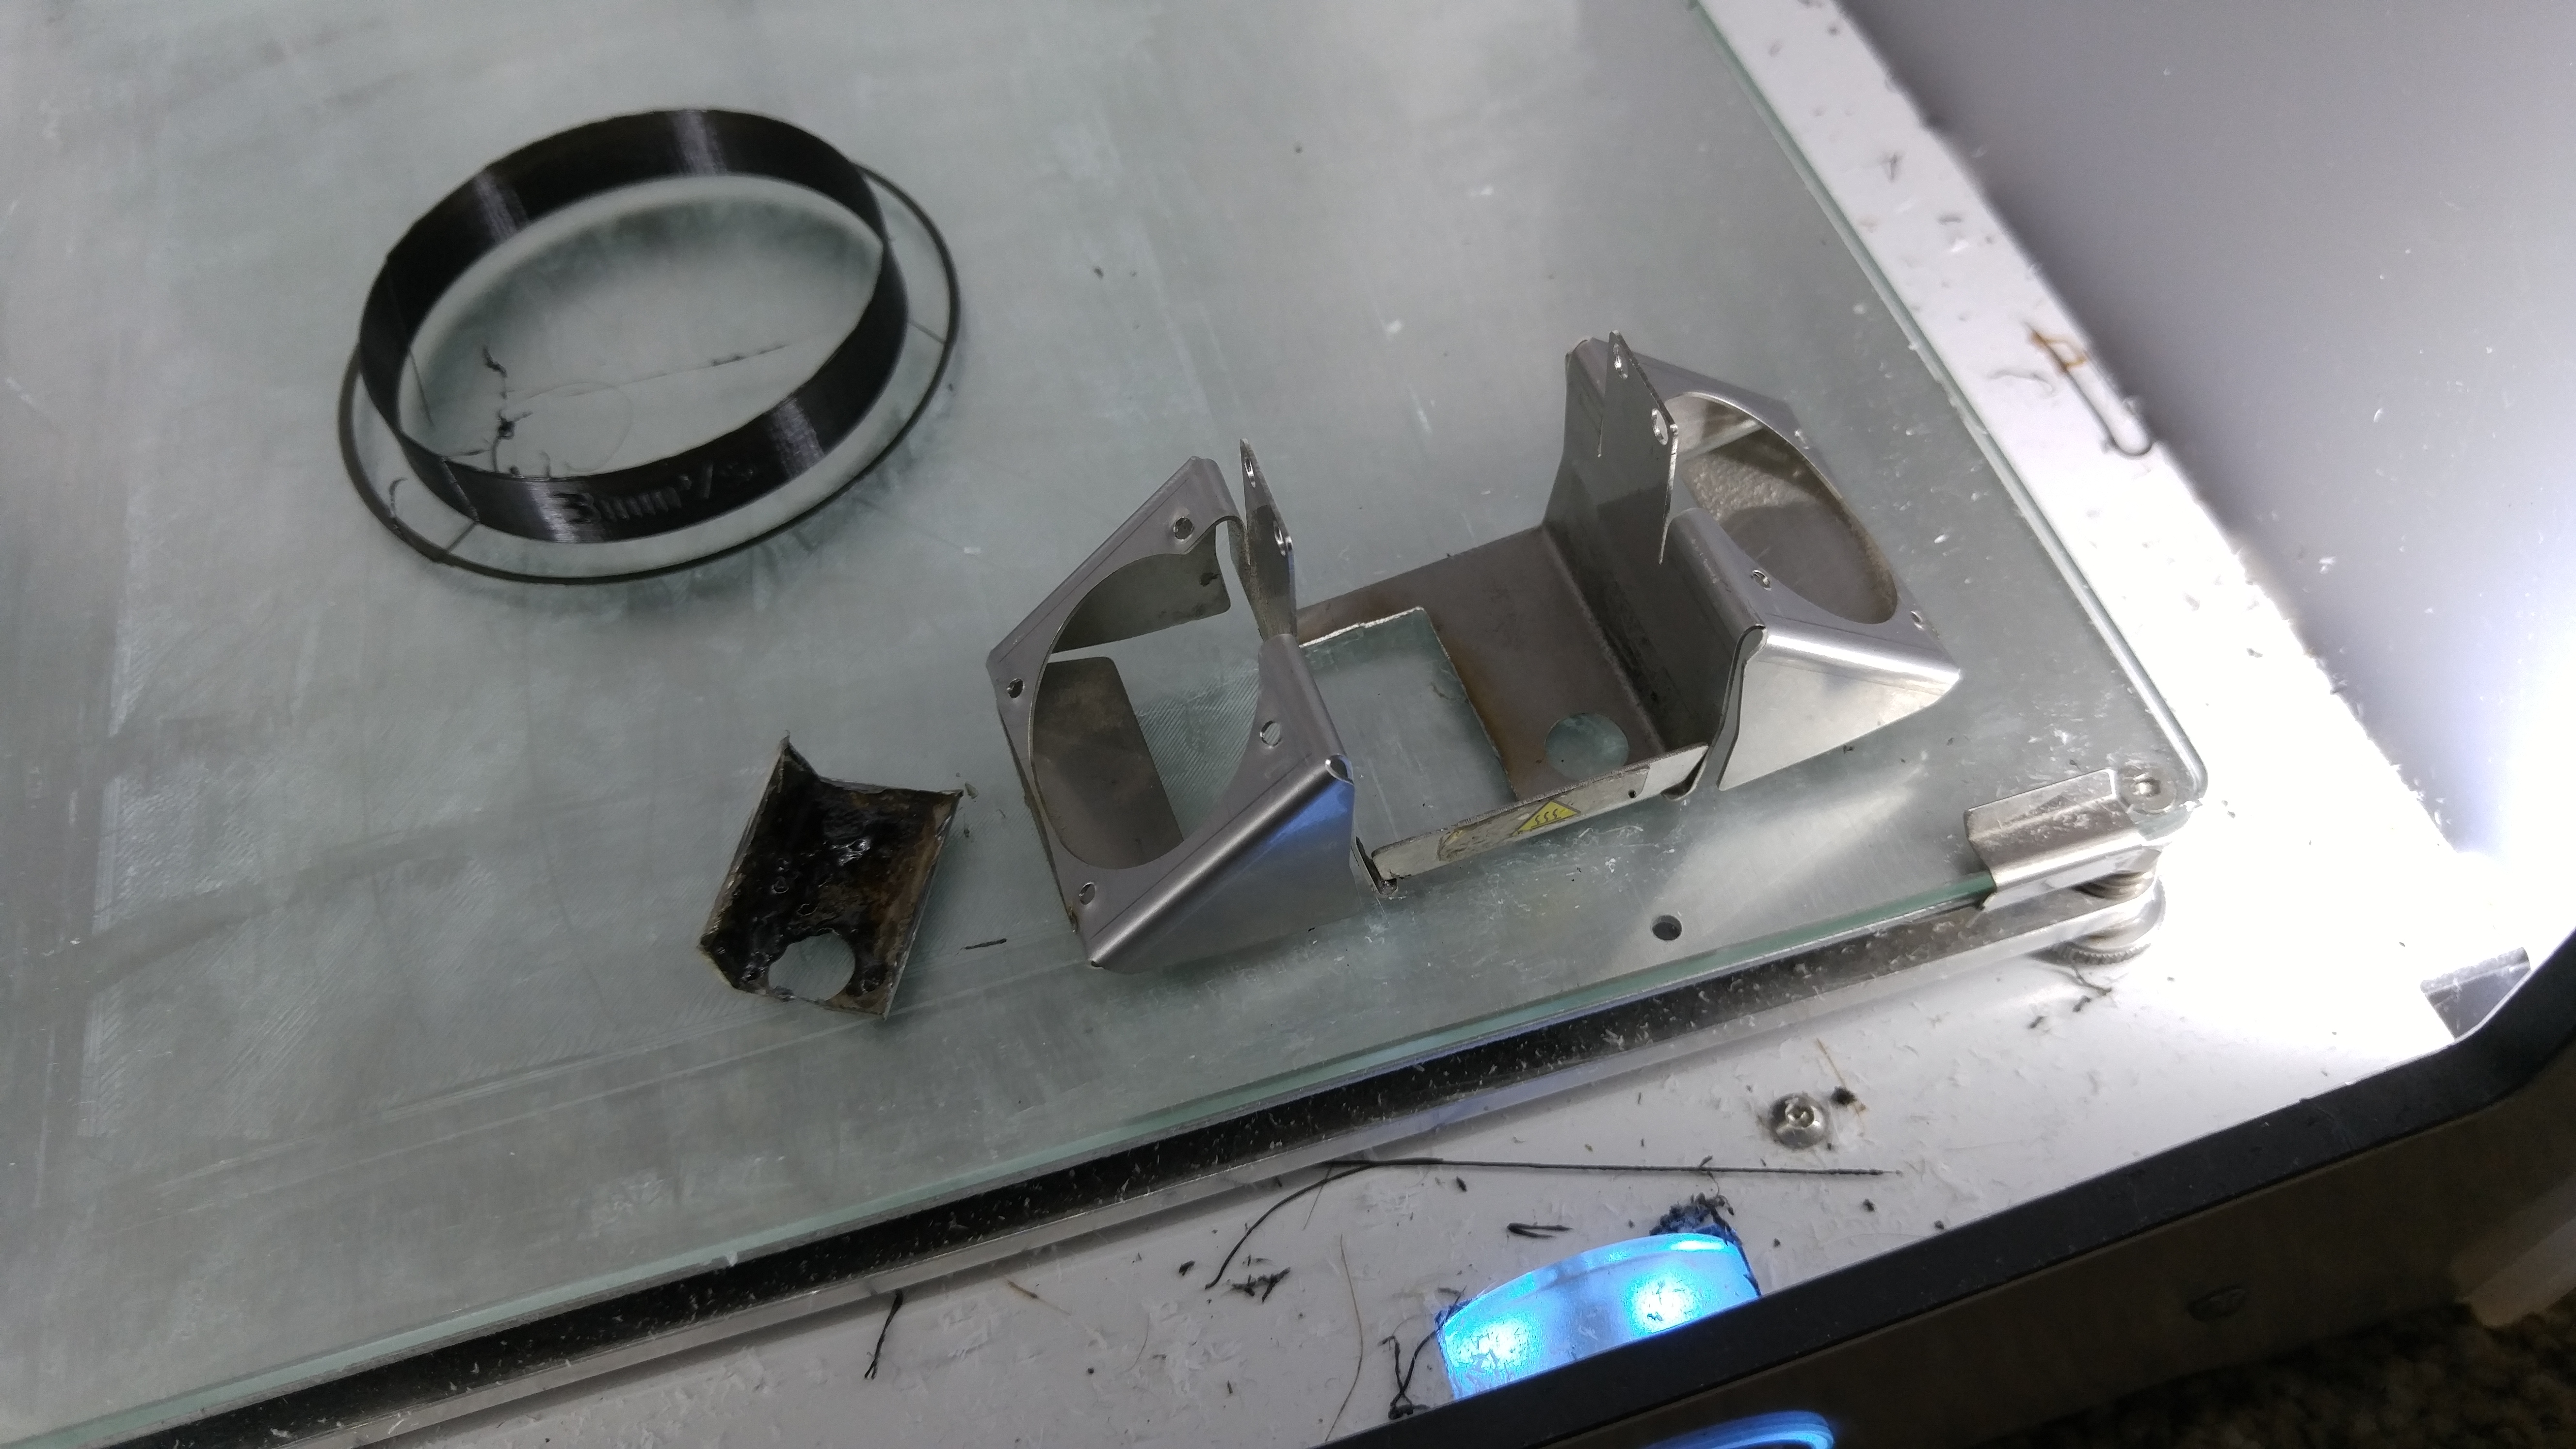
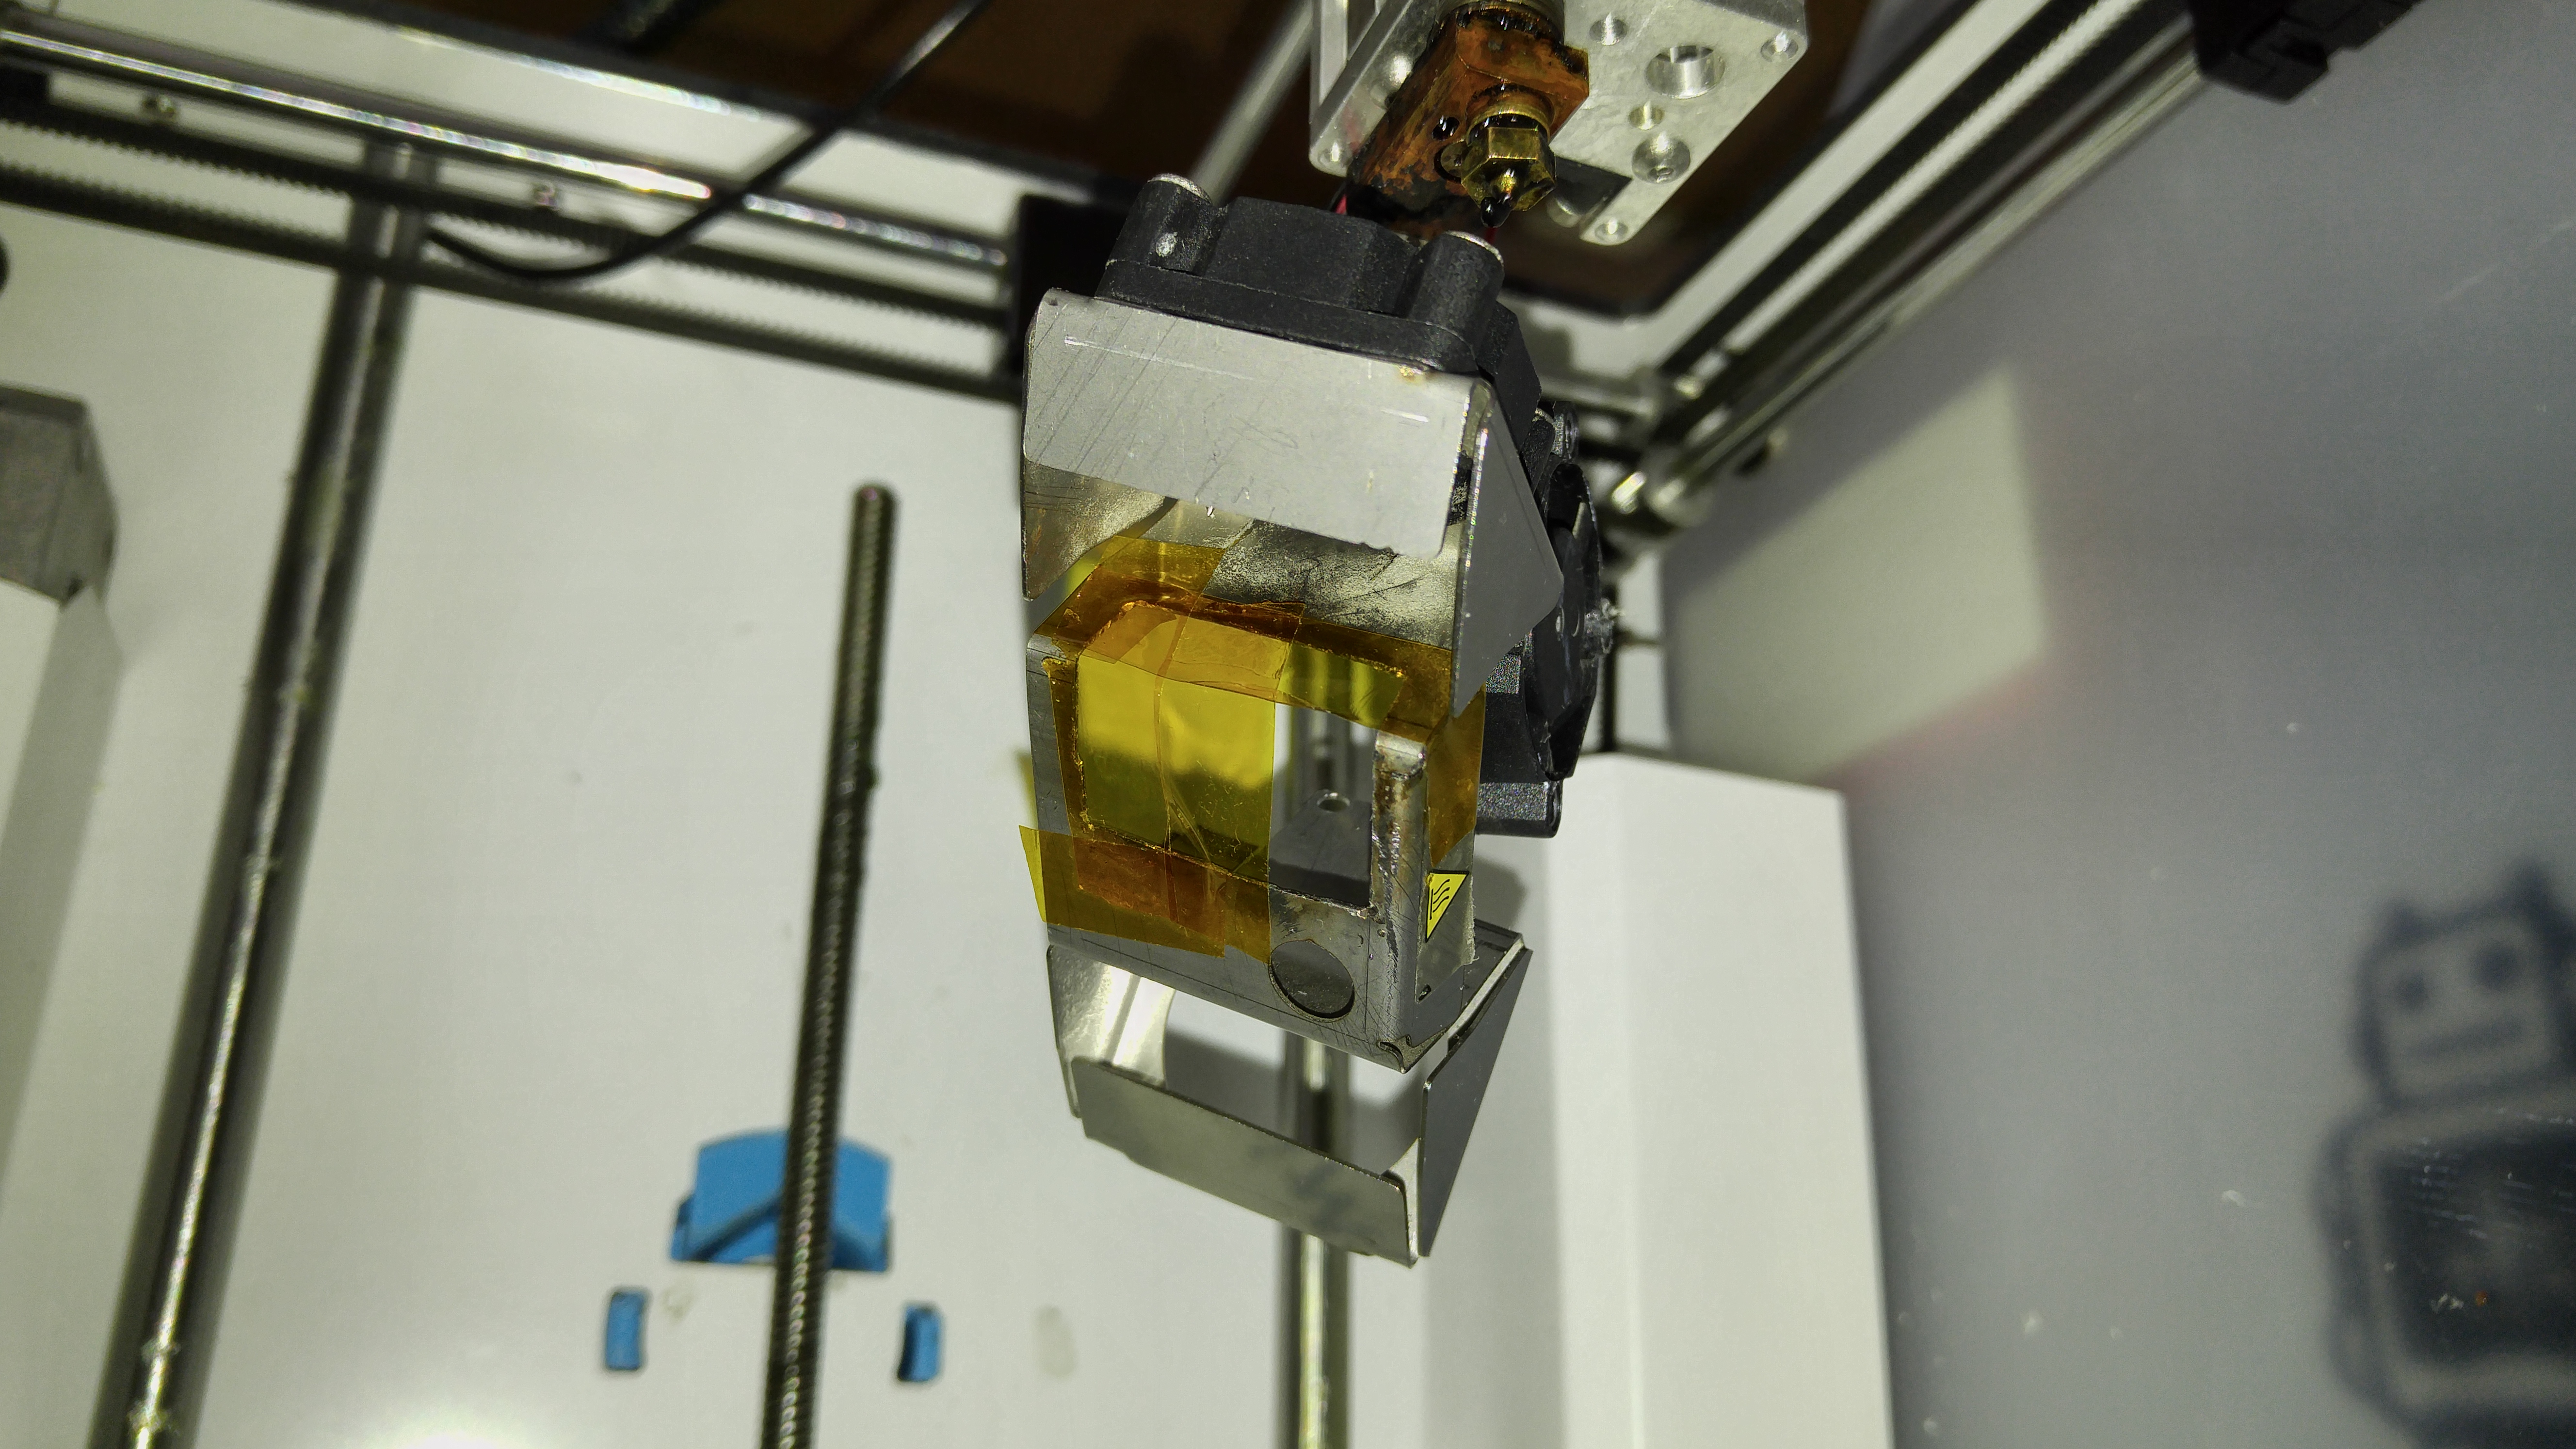
I remove the bracket on my printer, and behold, it’s a mess. There’s plastic gunk everywhere, possibly conducting all the heat. The plastic comes from the fact that the Flex3Drive is a fucking beast of an extruder, it has so much torque and grip that even if the nozzle can’t keep up with the feed rate, it will simply leak out the threading on the heat block.
My final solution was to cut out a rectangular section of the fan bracket. Then, realizing that most of the metal is there to prevent airflow… I used kapton tape (very heat resistant tape) to cover the gaps. If any more leakage happens, I just have to replace some tape.
Extra Power PSU for Ultimaker2
That current measurement device shows usages of over 12A from the Ultimaker2’s standard 220W PSU. This is pushing the limits, 12A at 24V is 288W. So I purchased a 400W 24V PSU from eBay and put a few connectors on it so that it can be connected to the Ultimaker2. It also has a voltage adjustment potentiometer so I can even give it a little extra boost, if needed. I used the thickest wires I have for this. Warning, the wall AC voltages are exposed, I need a good way to hide them without impeding airflow.

If you are thinking of dual nozzles, especially with extra powerful/fast extruders and/or extra powerful heater cartridges, then I recommend doing something like this.
New 35W Heater Cartridge
The original heater cartridge that came with the Ultimaker2 is a 25W heater. Gr5 sells a upgrade, a 35W heater cartridge.
I upgraded and boy, this thing gets hot fast. I had to re-tune the nozzle temperature PID values just so it doesn’t overshoot and oscillate the temperature wildly. My P and I terms were basically exactly 75% of the original P and I terms, and I left the D term alone. This gave me a slight but tolerable overshoot but no undershoot, and it stays steady.
Hi
I need some help about DIN 4 pin. Do you have a wiring diagram ?
Thank you.