This post will describe the first few mods I’ve made to my Nomad 883 Pro CNC milling machine.
Nomad 883 Pro Easy Upgrades, Better Bed, Handles, Lights
1 Reply
This post will describe the first few mods I’ve made to my Nomad 883 Pro CNC milling machine.
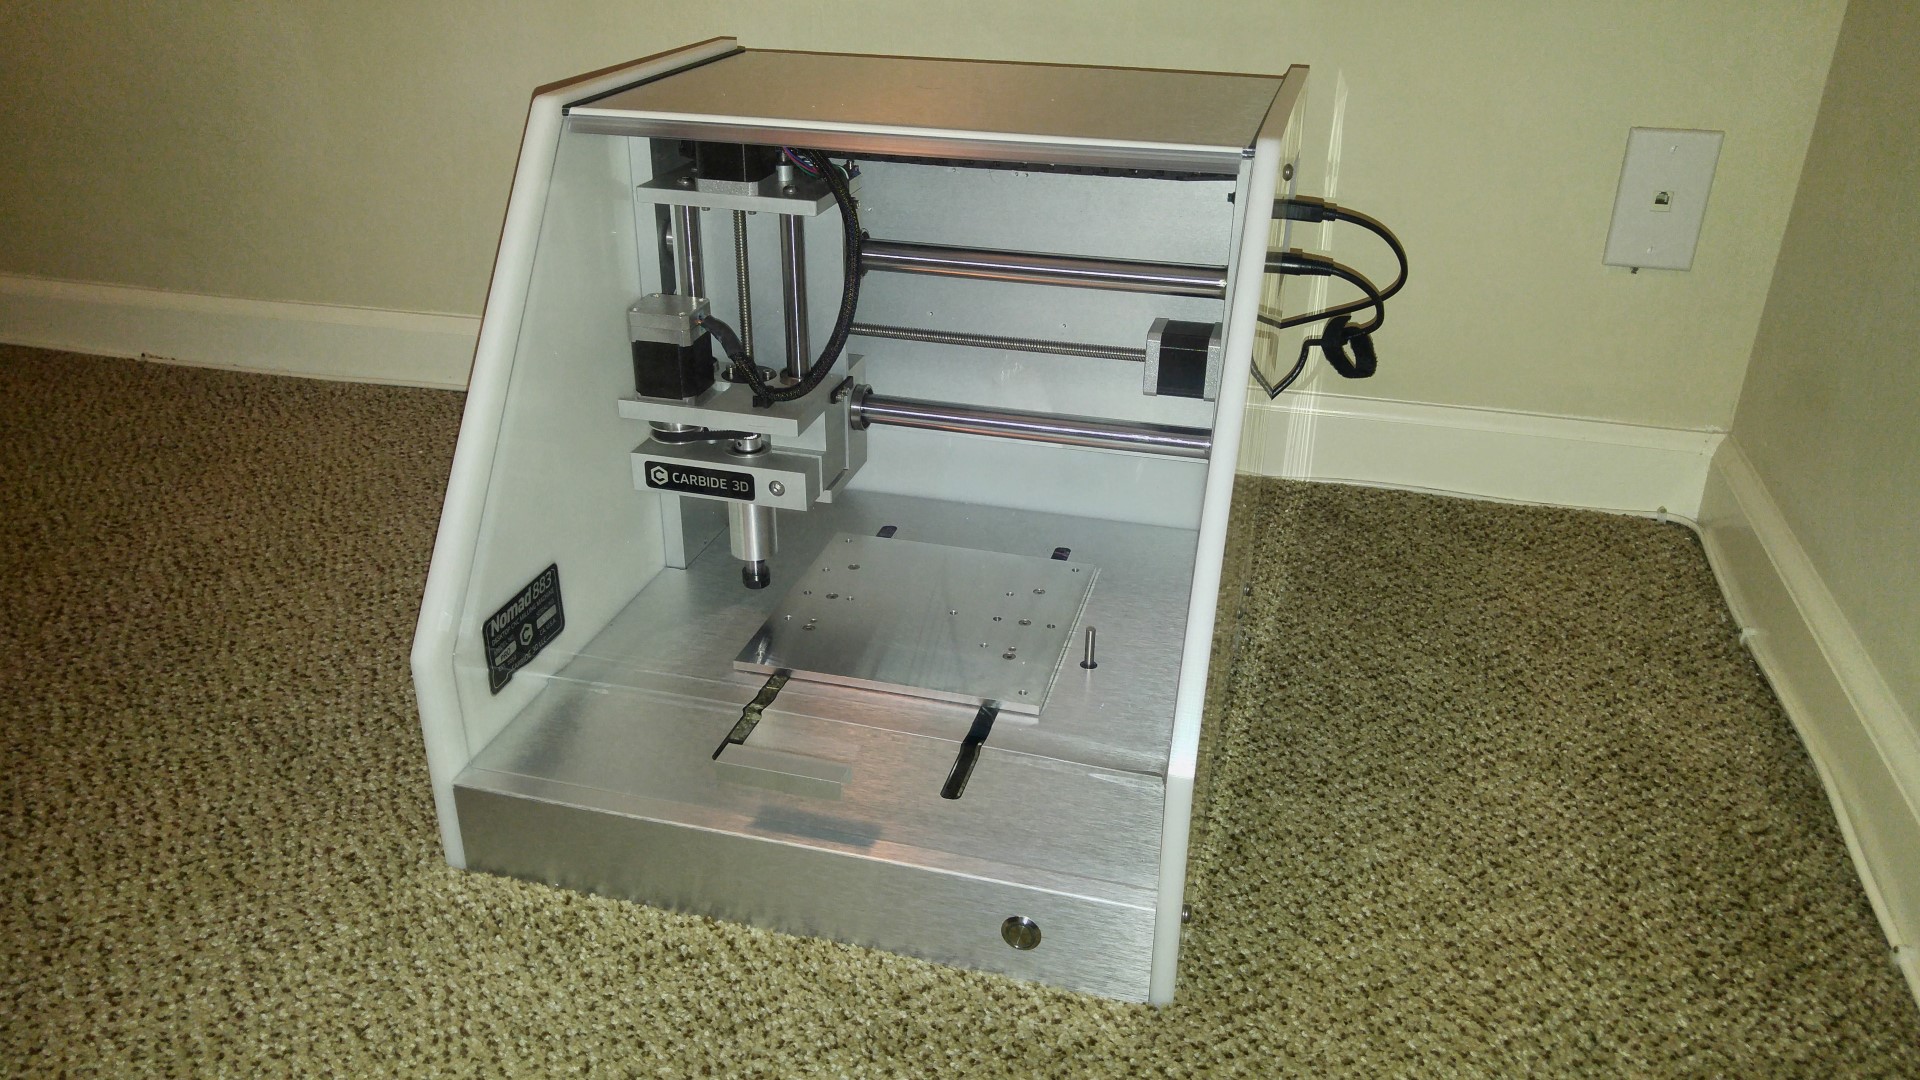
After getting comfortable with 3D printing, I decided I want to dabble with in-home CNC machines. I decided that I need something powerful enough to cut aluminum, but also precise enough to handle PCBs, and is enclosed so I can keep it in a home environment. I absolutely did not want a machine that’s designed to fit an ordinary router or Dremel. The Nomad 883 by Carbide 3D fit these requirements (link to specs).
I also really wanted to see the machine before I buy. I saw Othermill at RoboGames 2015, and while it seemed nice, it was geared more towards PCB milling. Another choice would’ve been Carvey but it is a Kickstarter that hasn’t started shipping yet. I saw Nomad 883 at the SF Maker Faire 2015, and it really impressed me, perhaps because it was built with all metal structure. The guy at the Nomad booth also hinted that I can cut steel on the next revision of the Nomad 883 (sorry I forgot his name). I picked Nomad 883 because it was more powerful and bigger than Othermill, while smaller than Carvey, and I would get it in around late August.
Long story, but I ended up getting the Nomad 883 Pro version around early November. Keep reading to see more pictures and my first impressions.
I have a project that involves Micro Match connectors. They are similar to IDC connectors, but with a lower profile and a zig-zag pattern.
![8_way_Micro_match_IDC_male_on_wire_connector_assembly[1]](https://eleccelerator.com/wp-content/uploads/2015/11/8_way_Micro_match_IDC_male_on_wire_connector_assembly1-300x300.jpg)
I had to crimp one connector onto a ribbon cable, my first attempt using a vice failed miserably, instead of the conductors being forced into the teeth properly, the forces instead crushed the connector. Unlike a IDC connector, which is mostly solid plastic, the Micro Match connectors are pretty hollow, thus weaker.
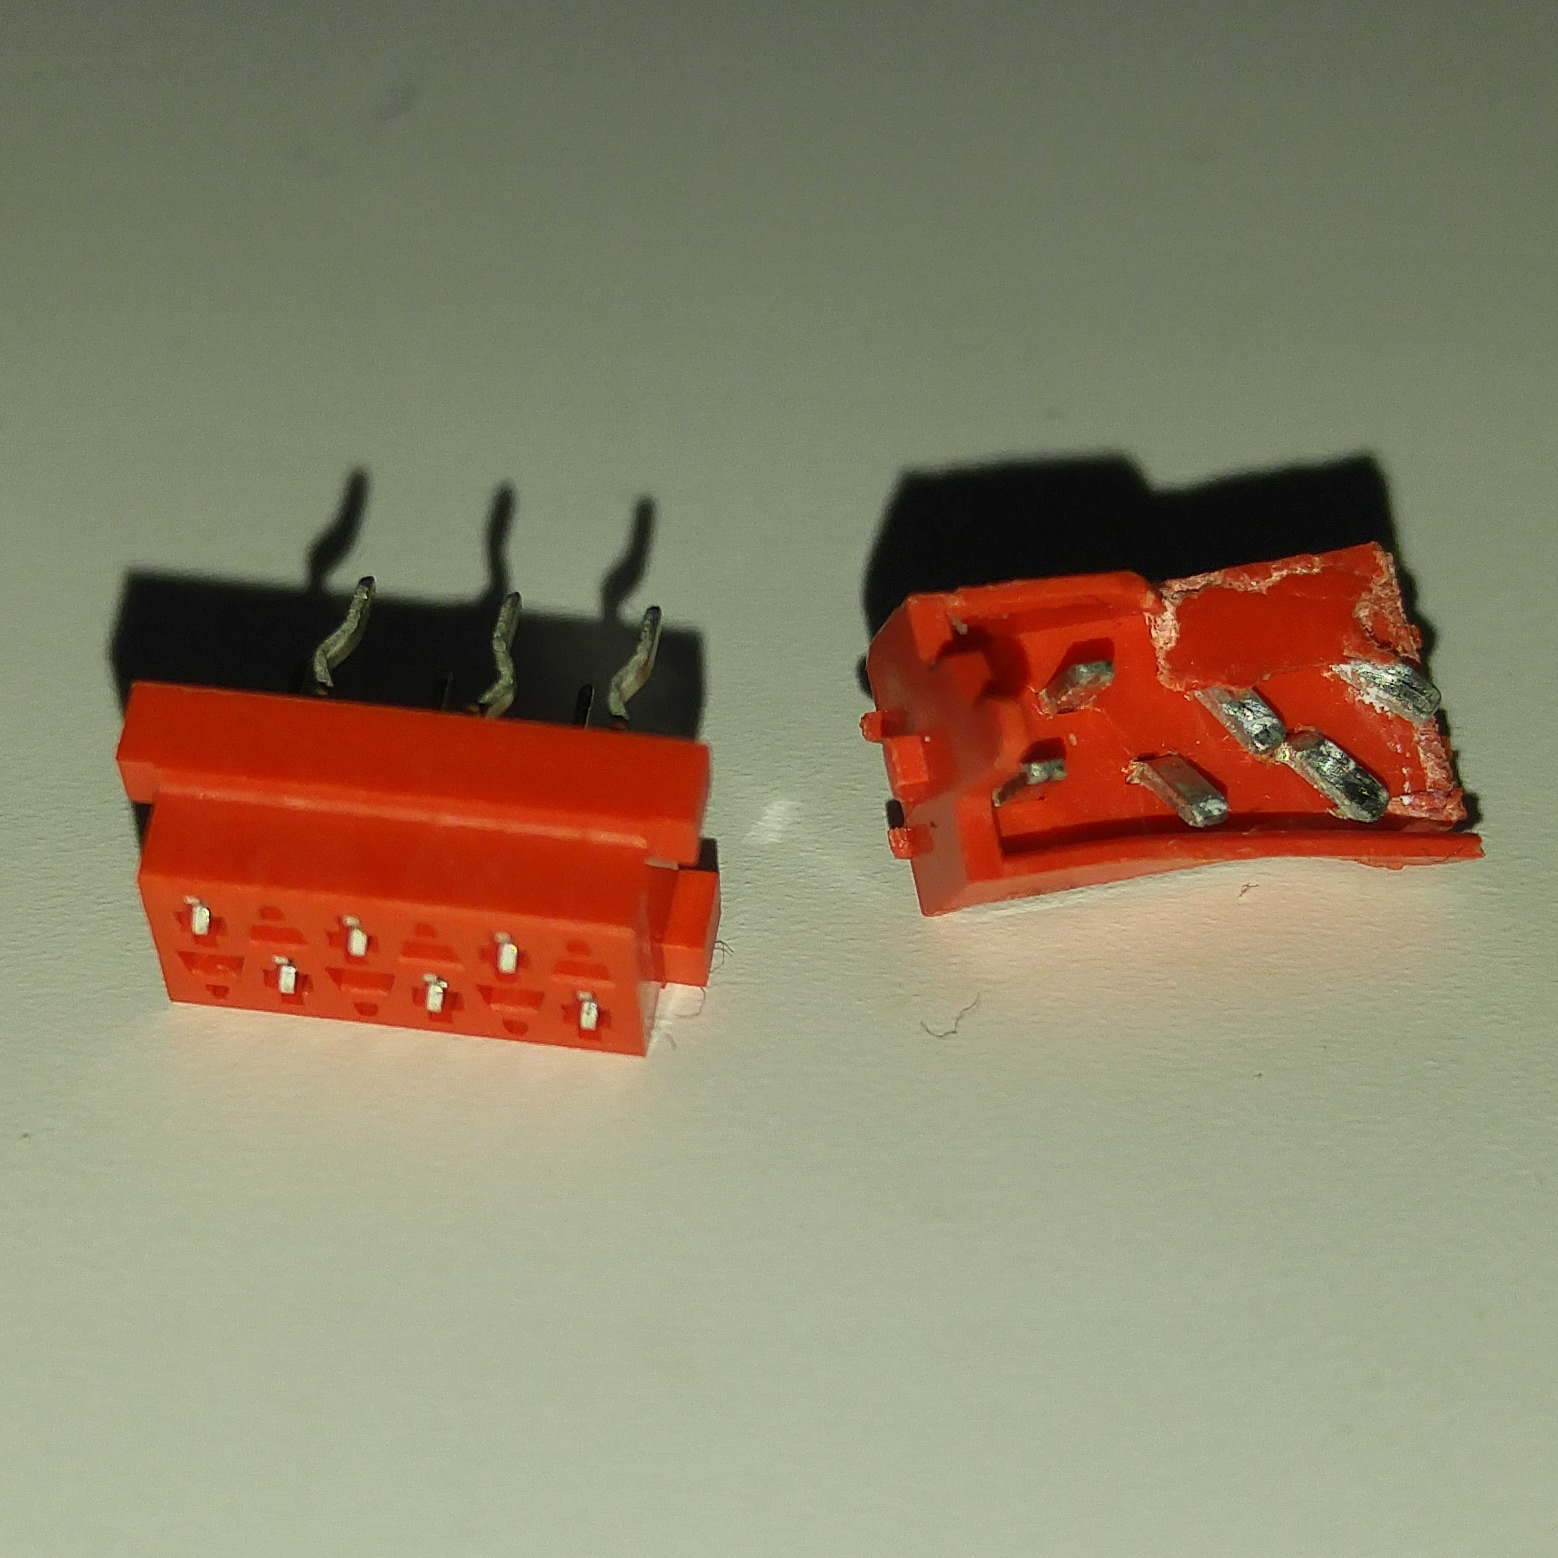
Continue reading to see how I solved this problem.
I 3D printed a very durable peristaltic pump. It is capable of pumping very thick liquids at as much pressure as the tube can handle. It is durable because it is printed at 100% infill at high thicknesses and uses steel ball bearings. It is capable of such strength because it is using a massive 12V DC brushed motor that has a 150:1 gear ratio metal gear box, which means several kilograms of torque.
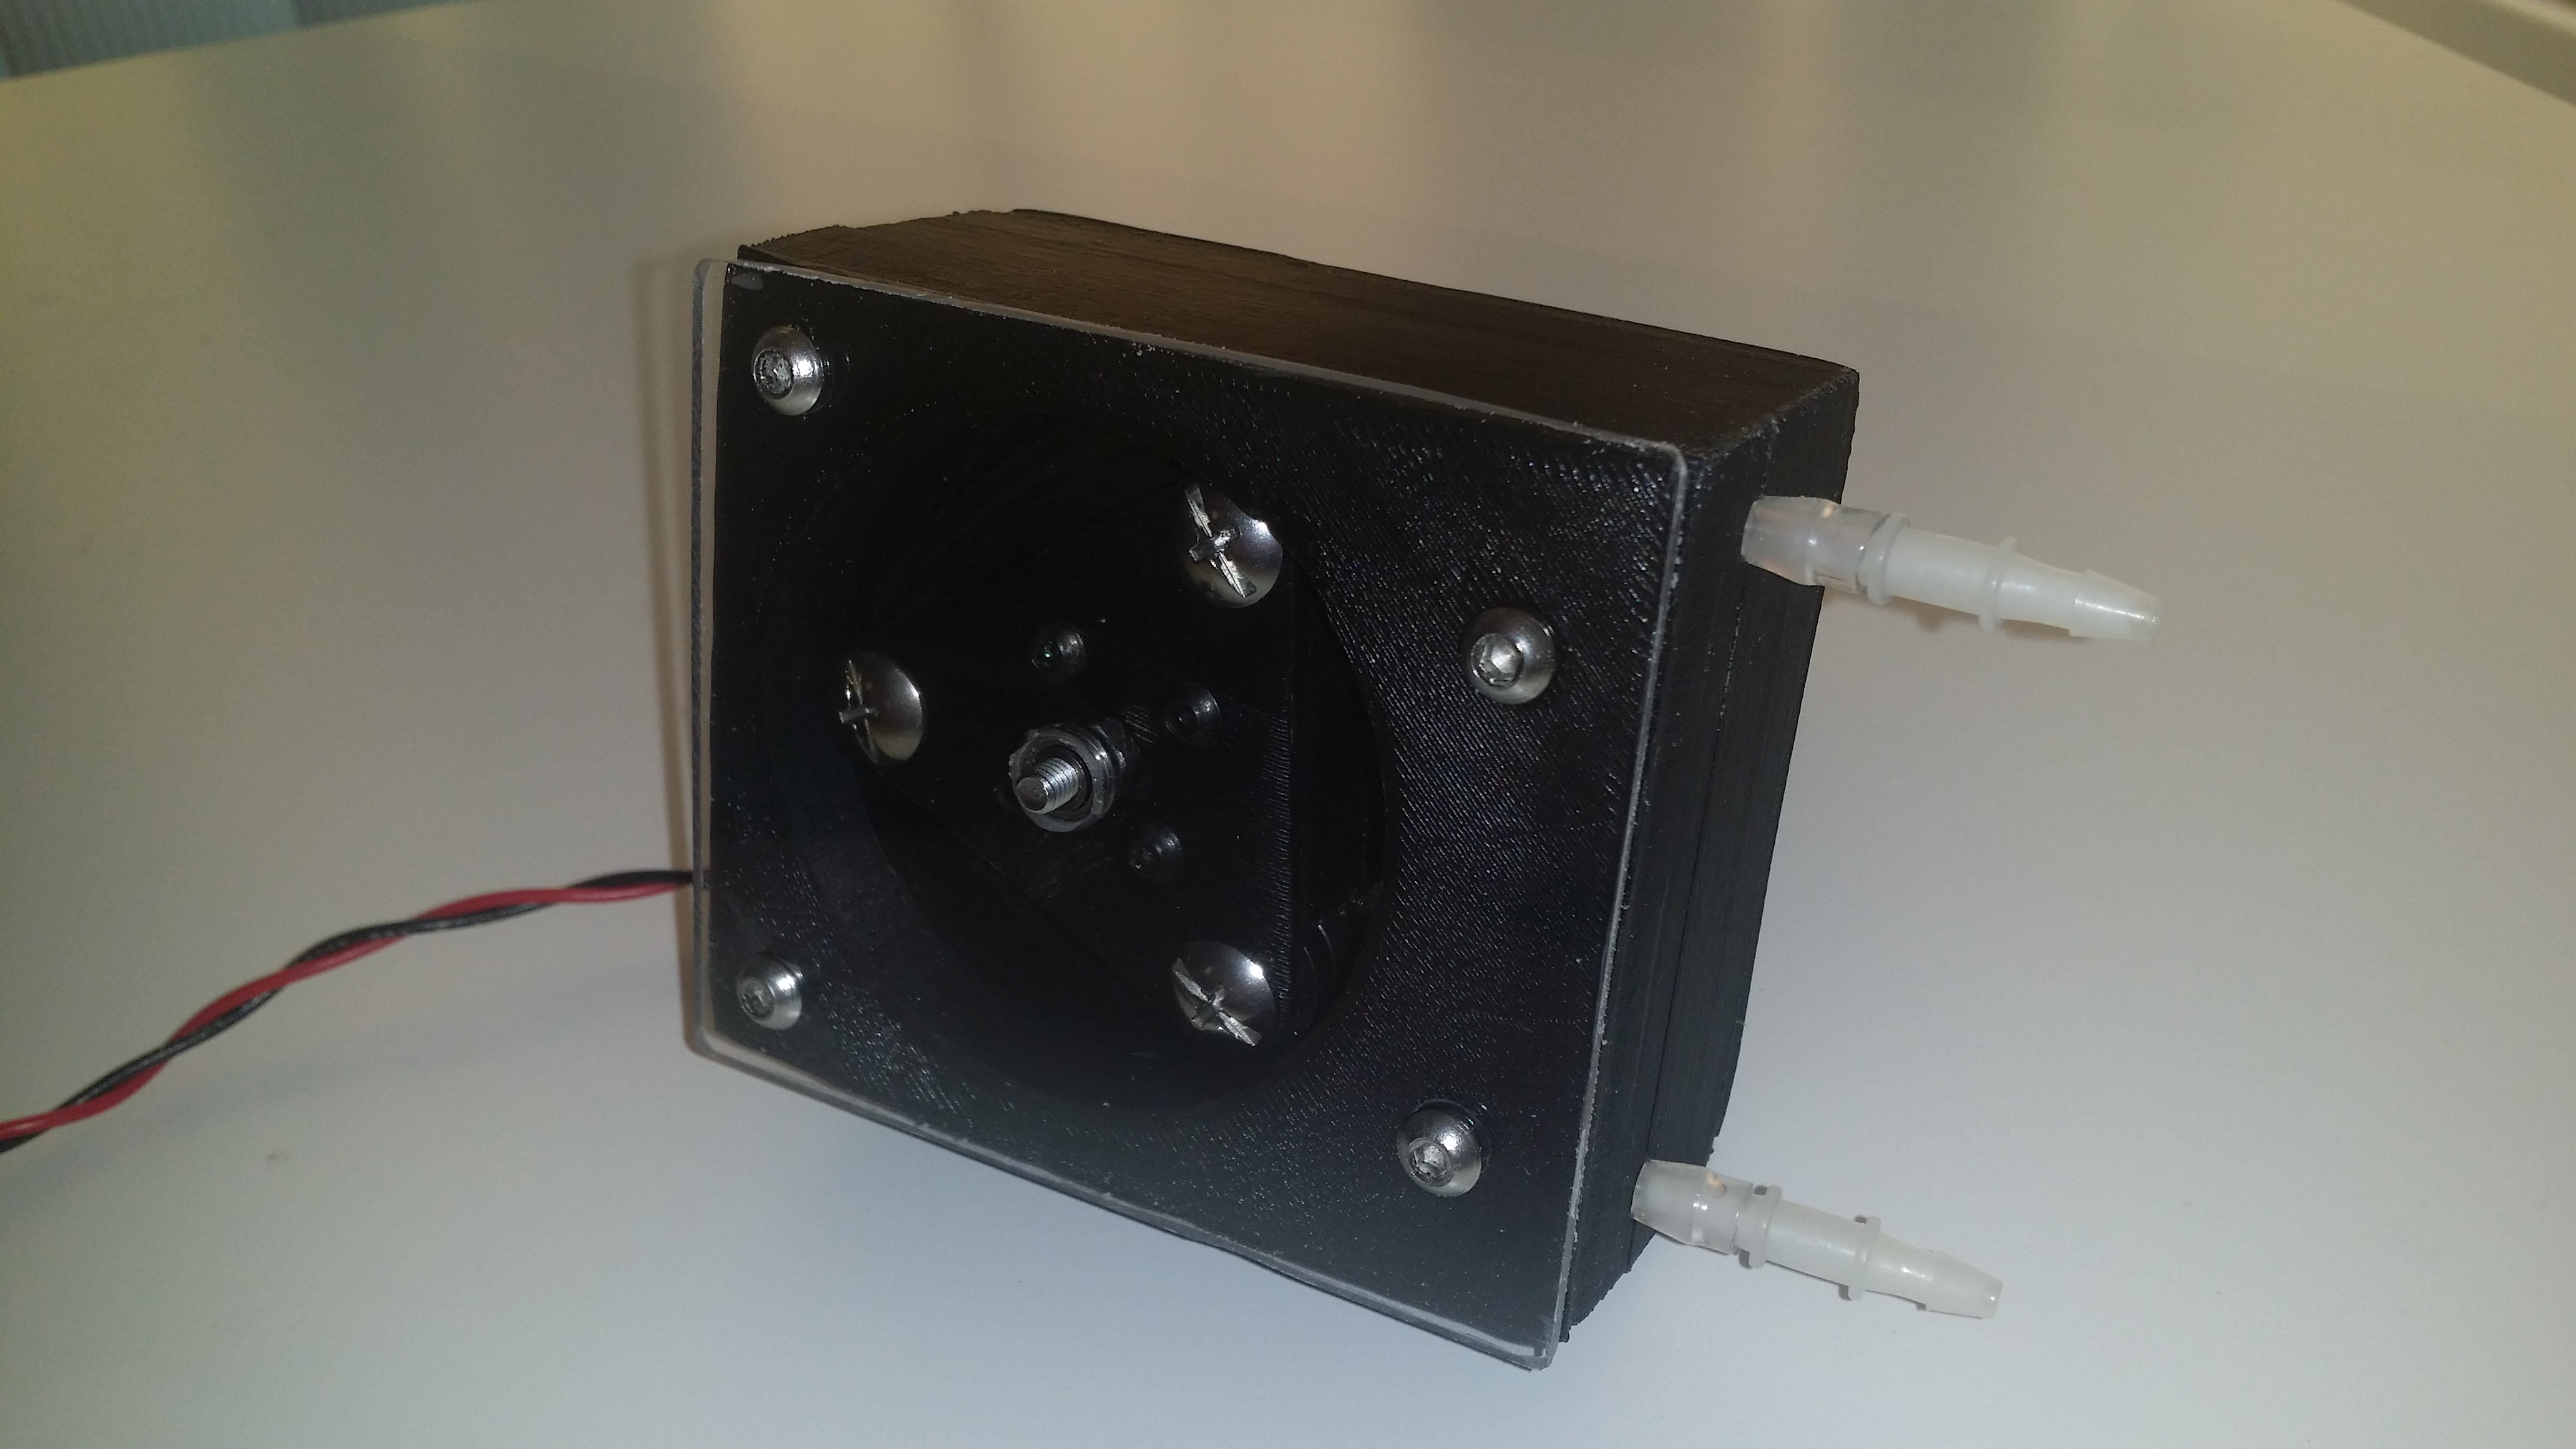
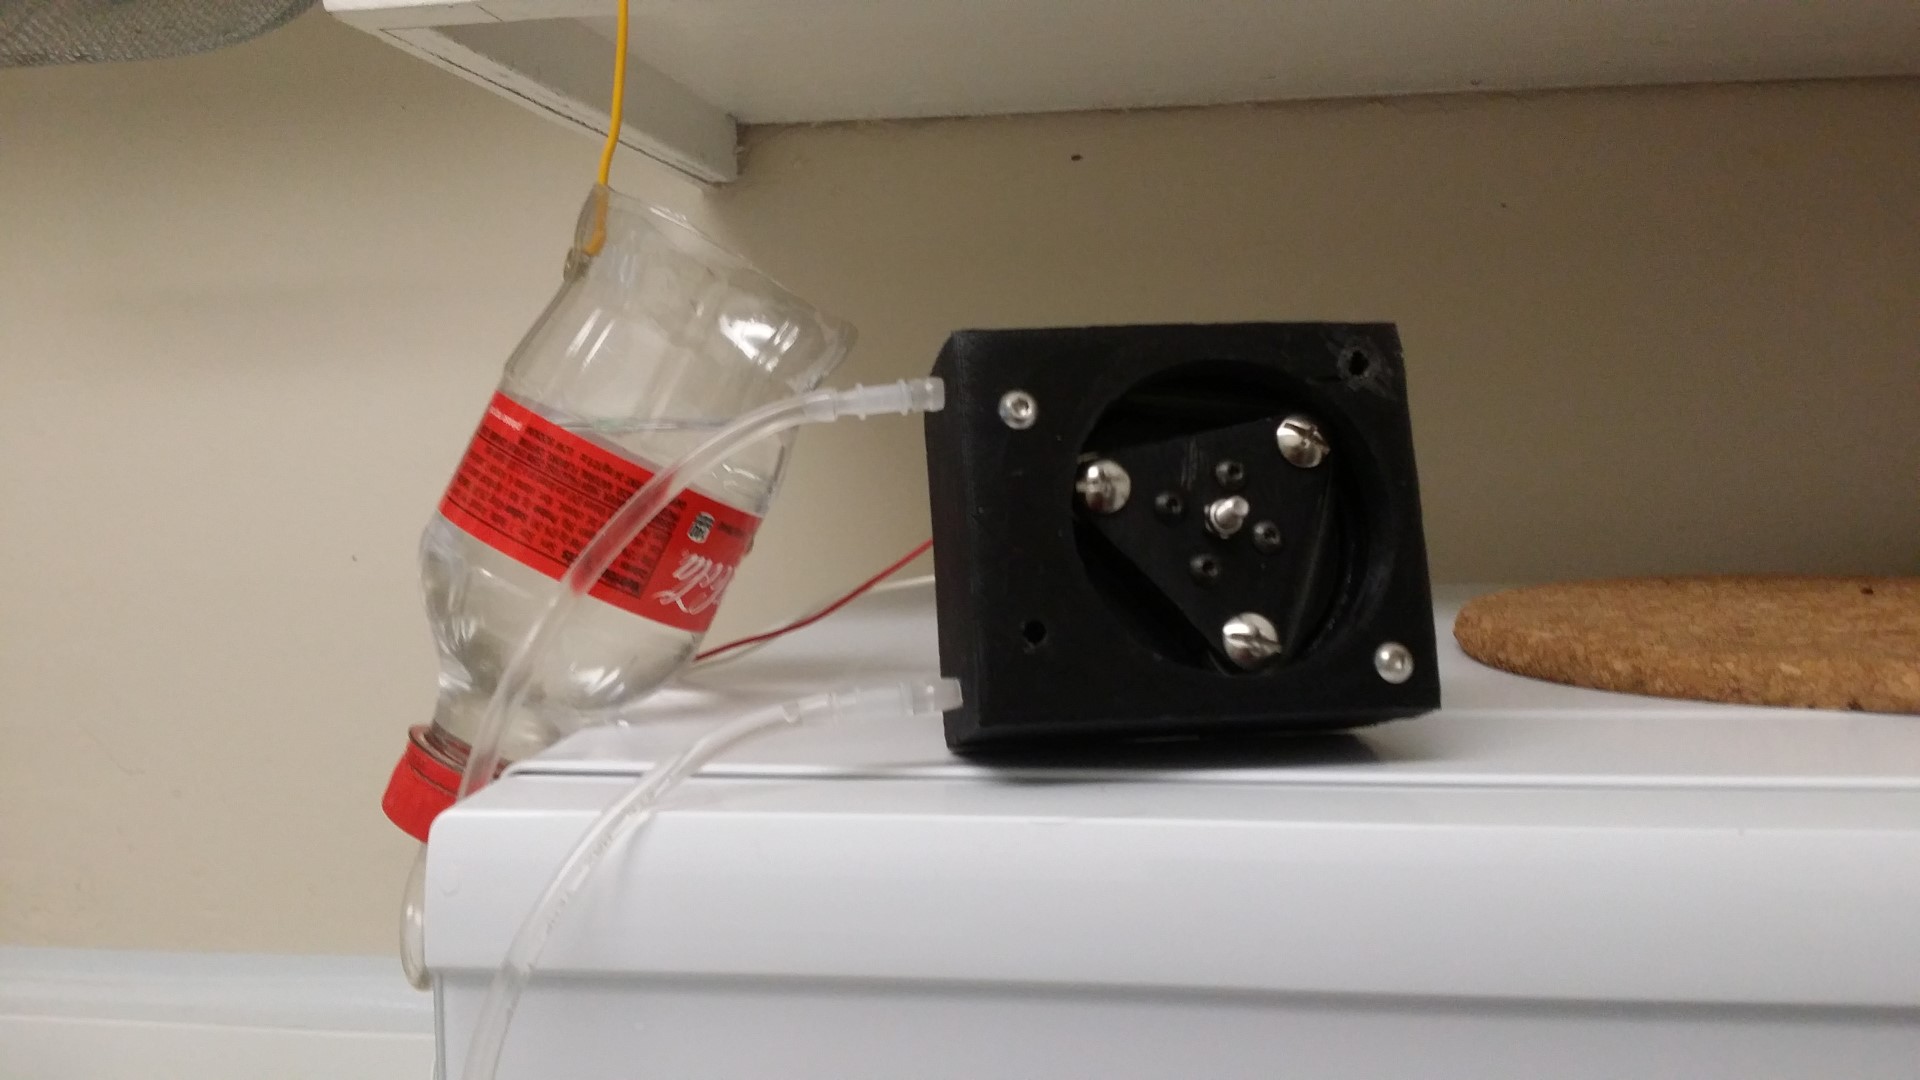
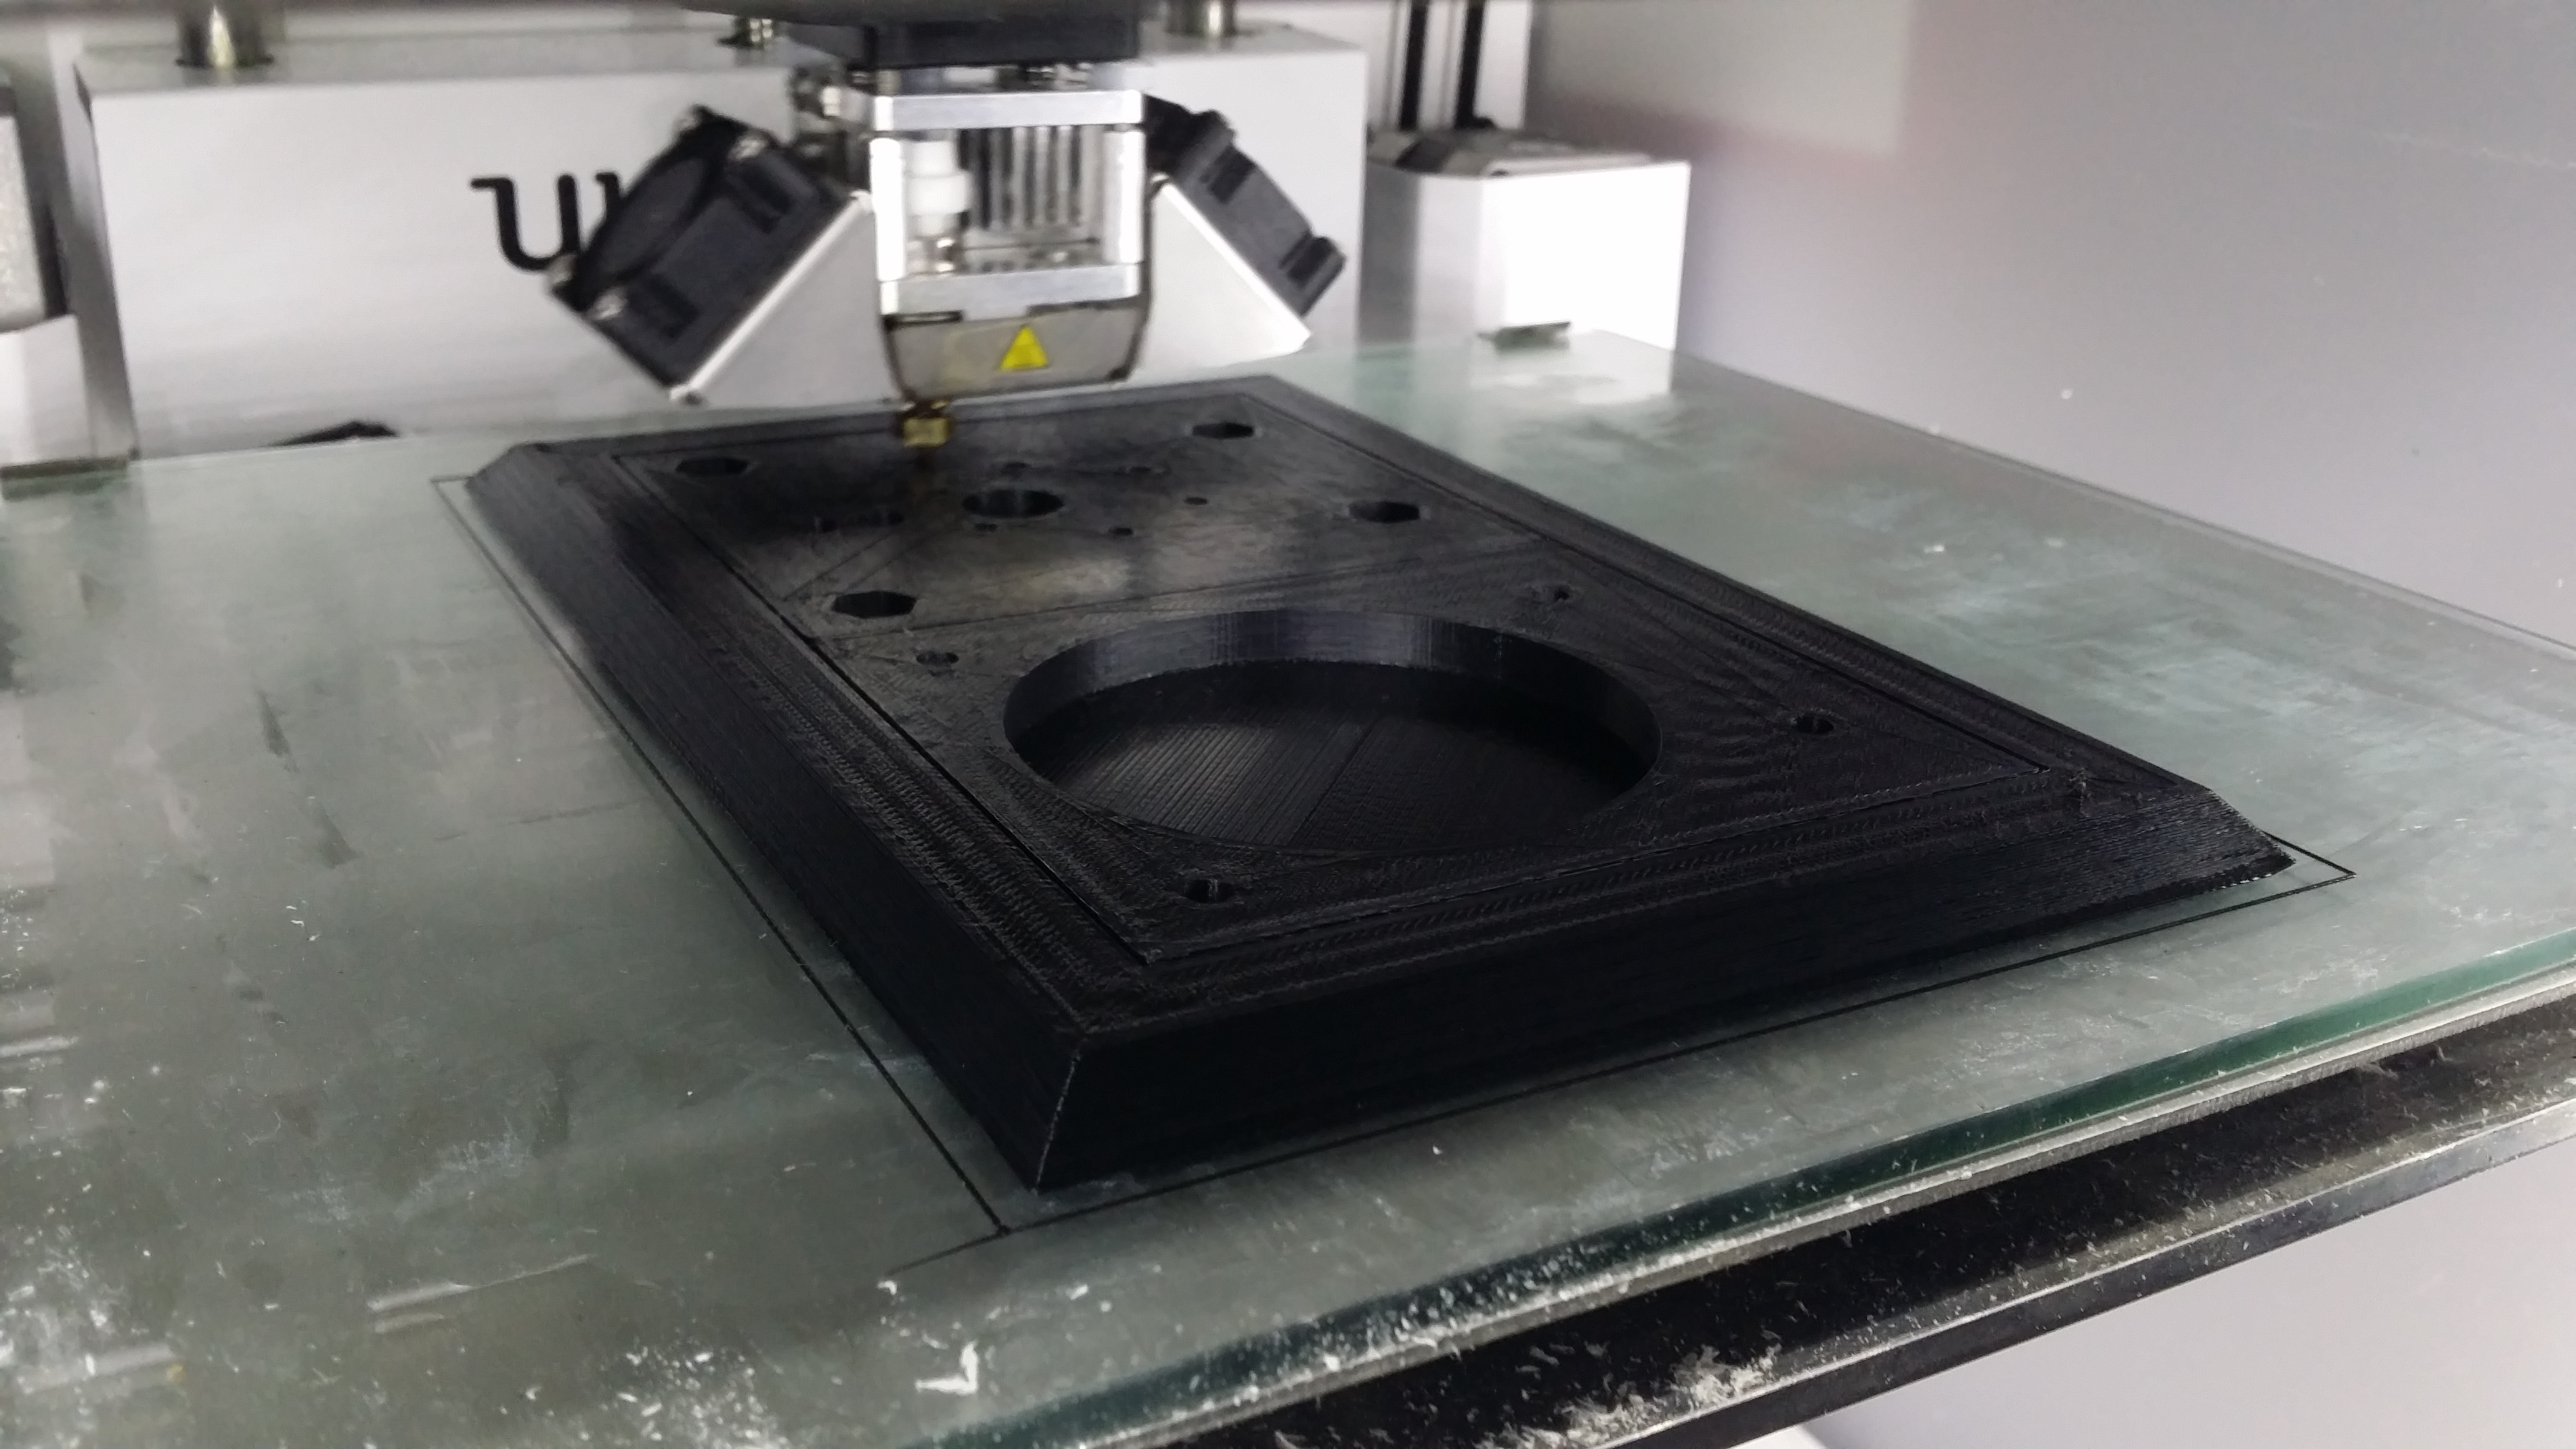
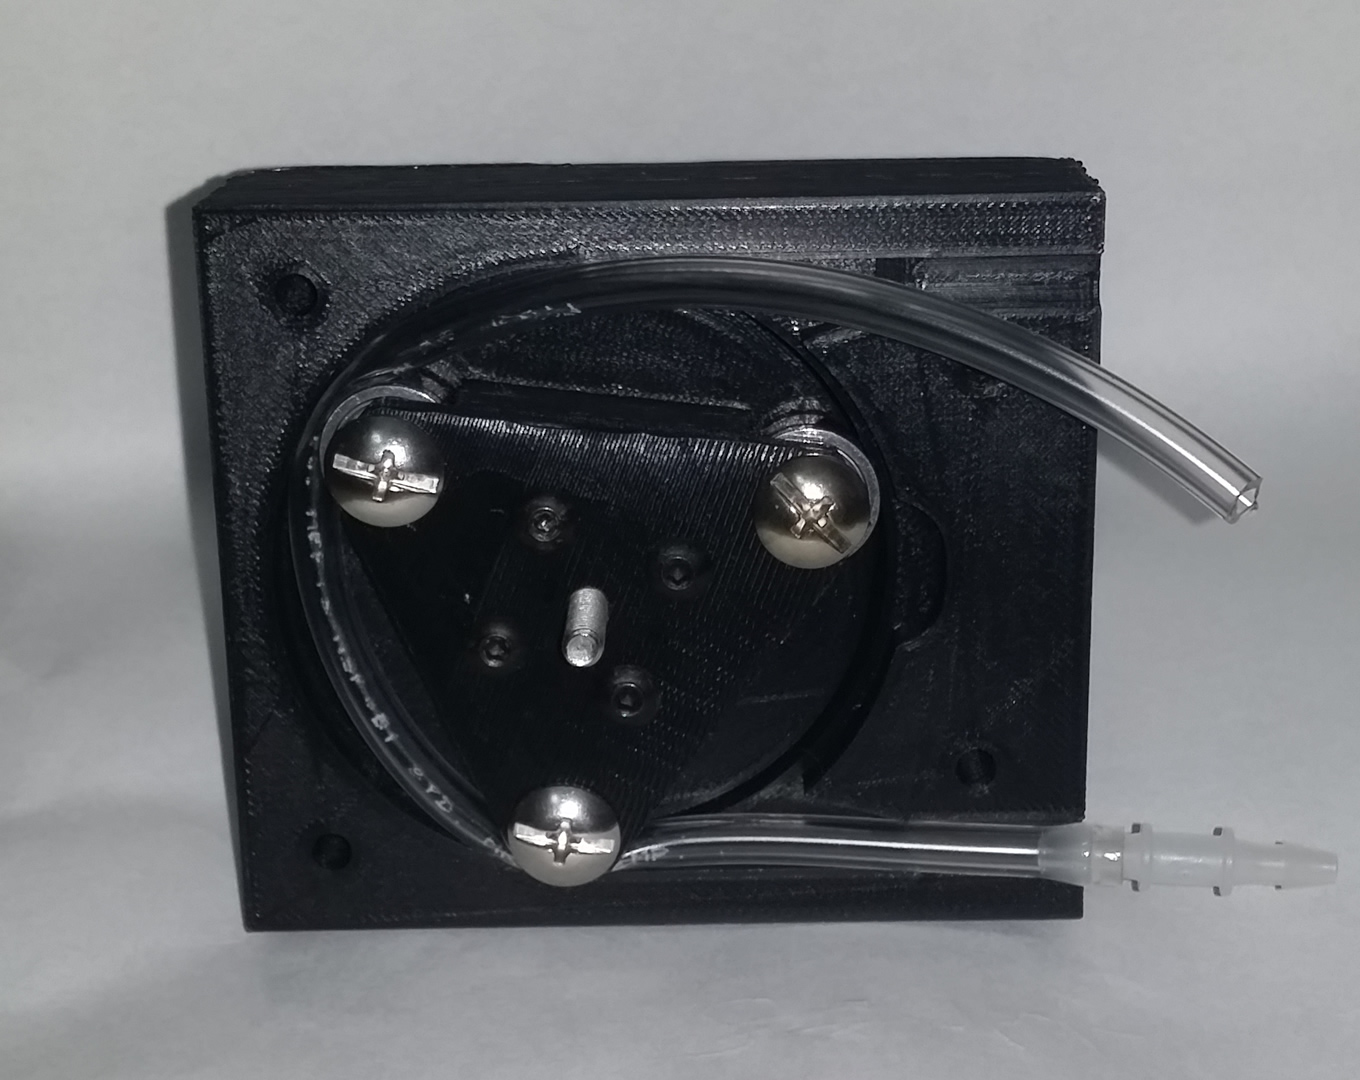
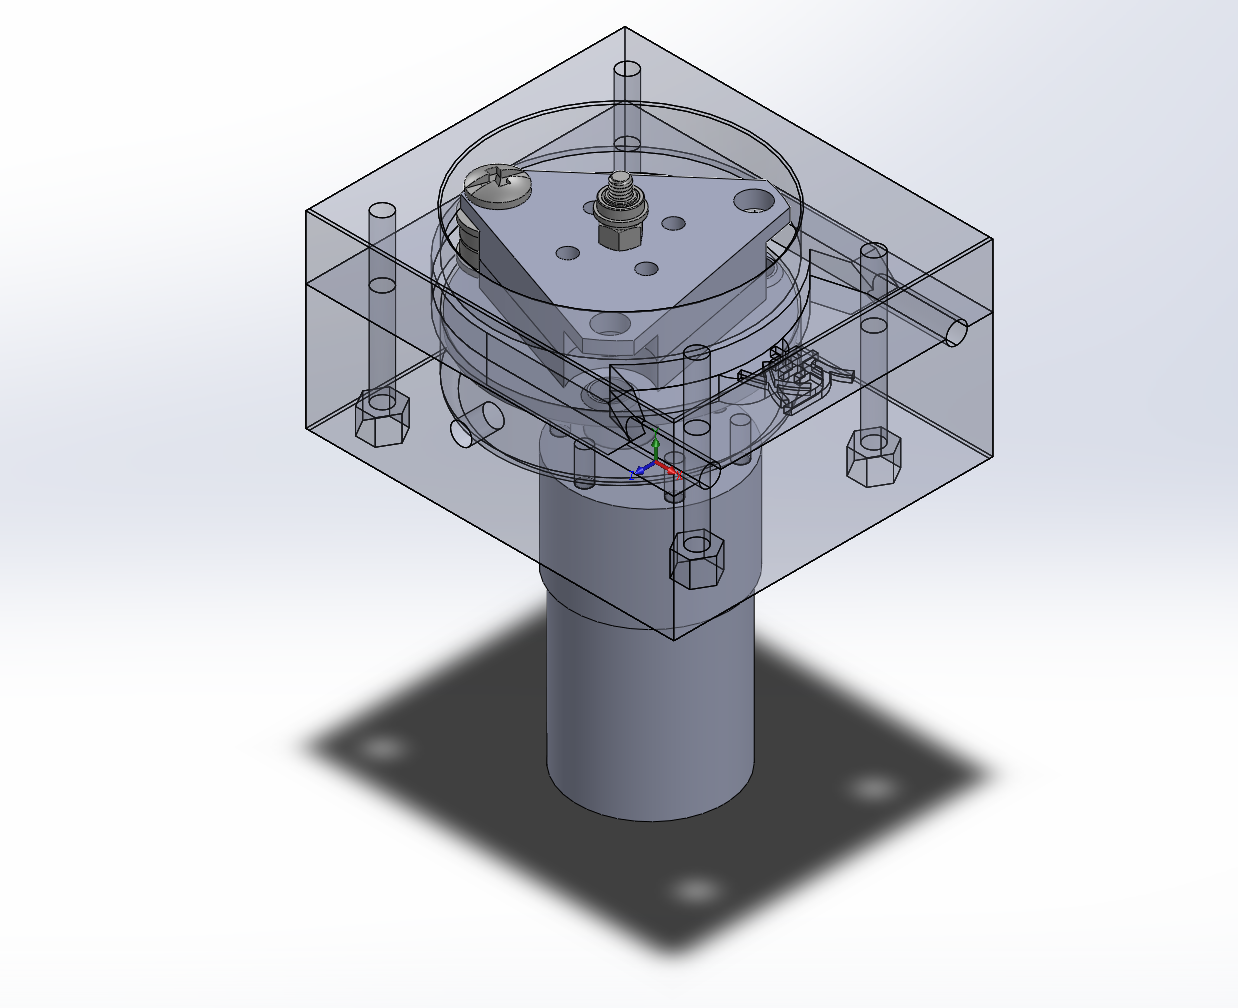
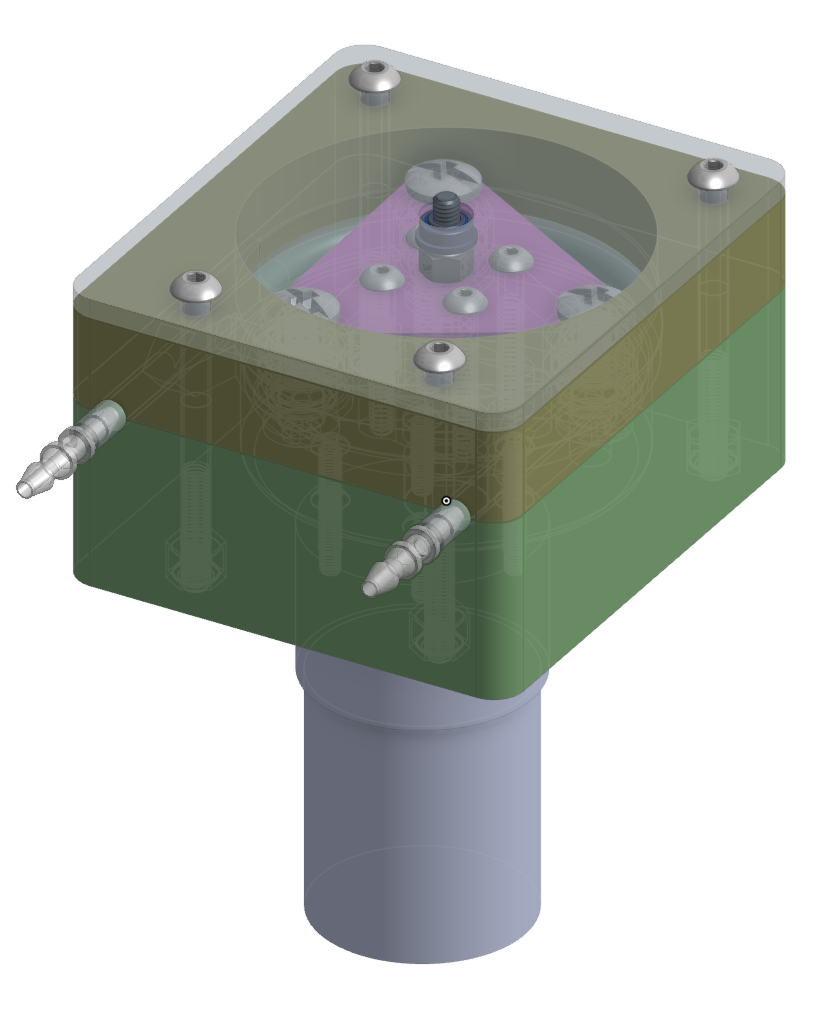
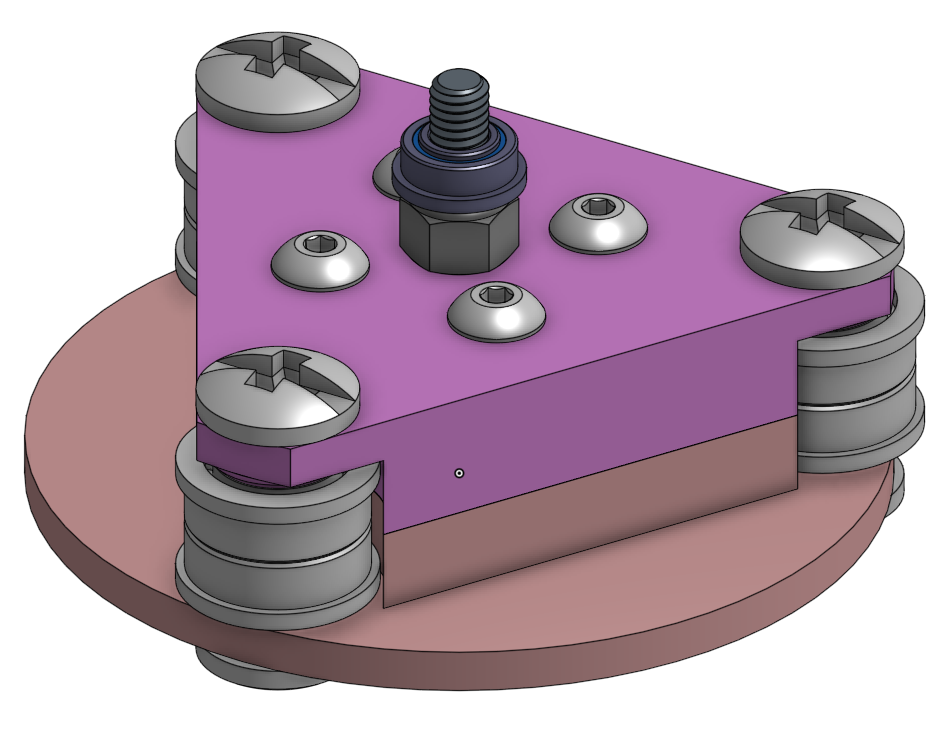

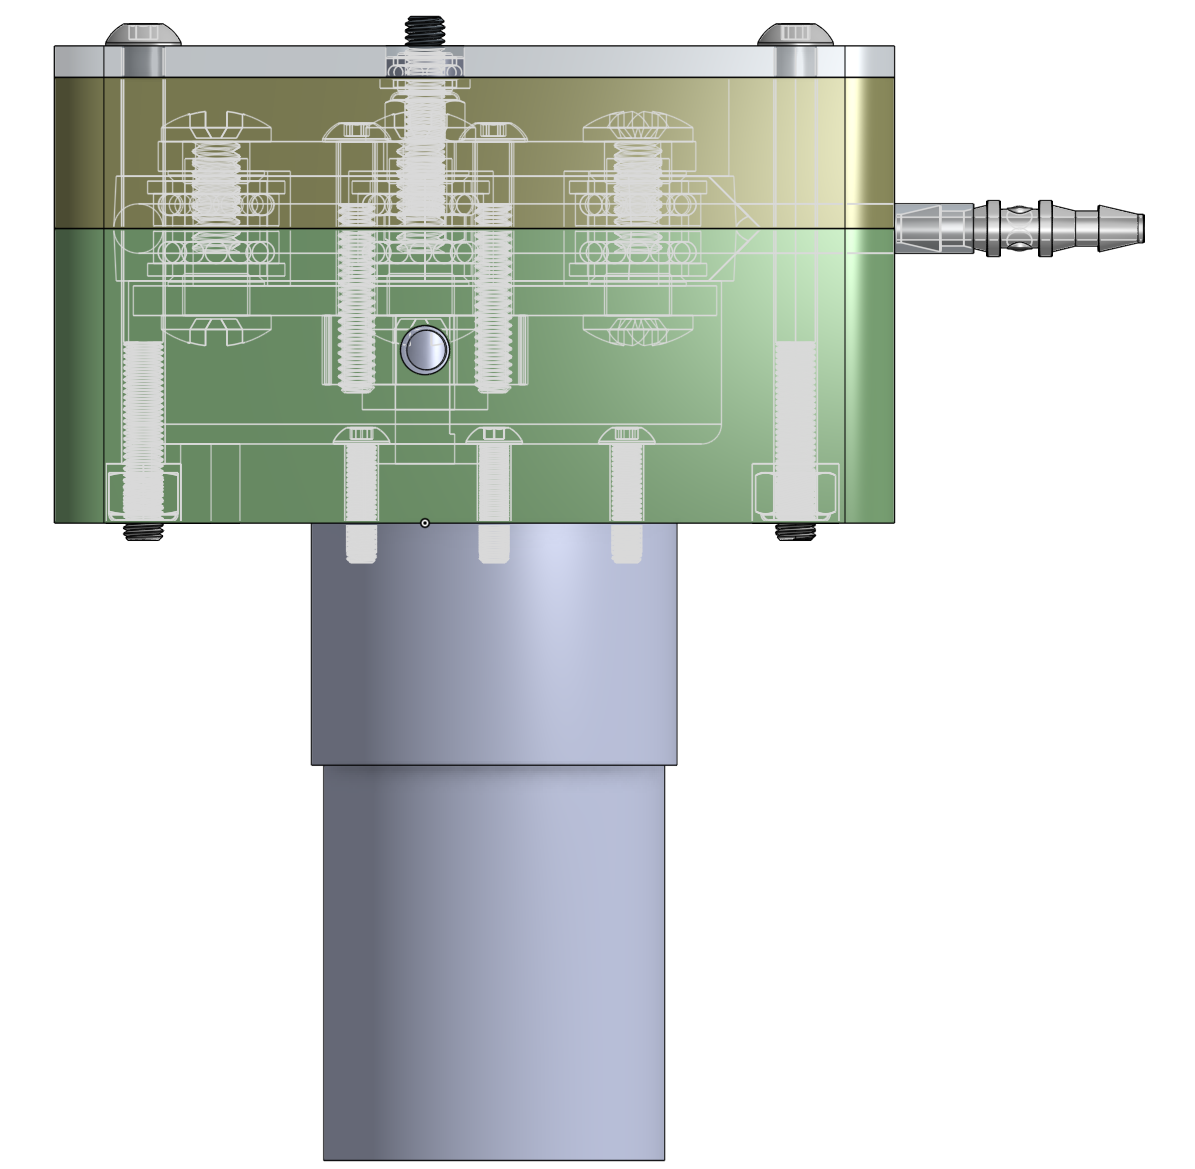
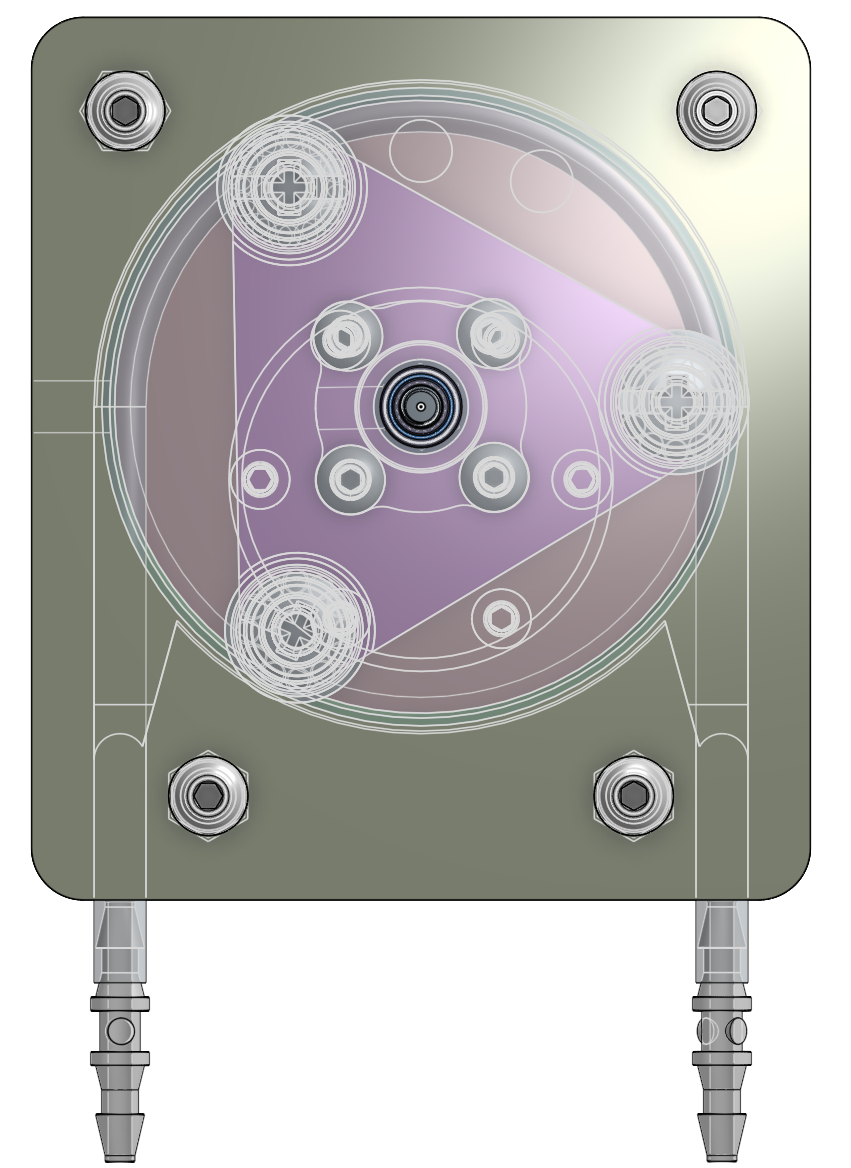
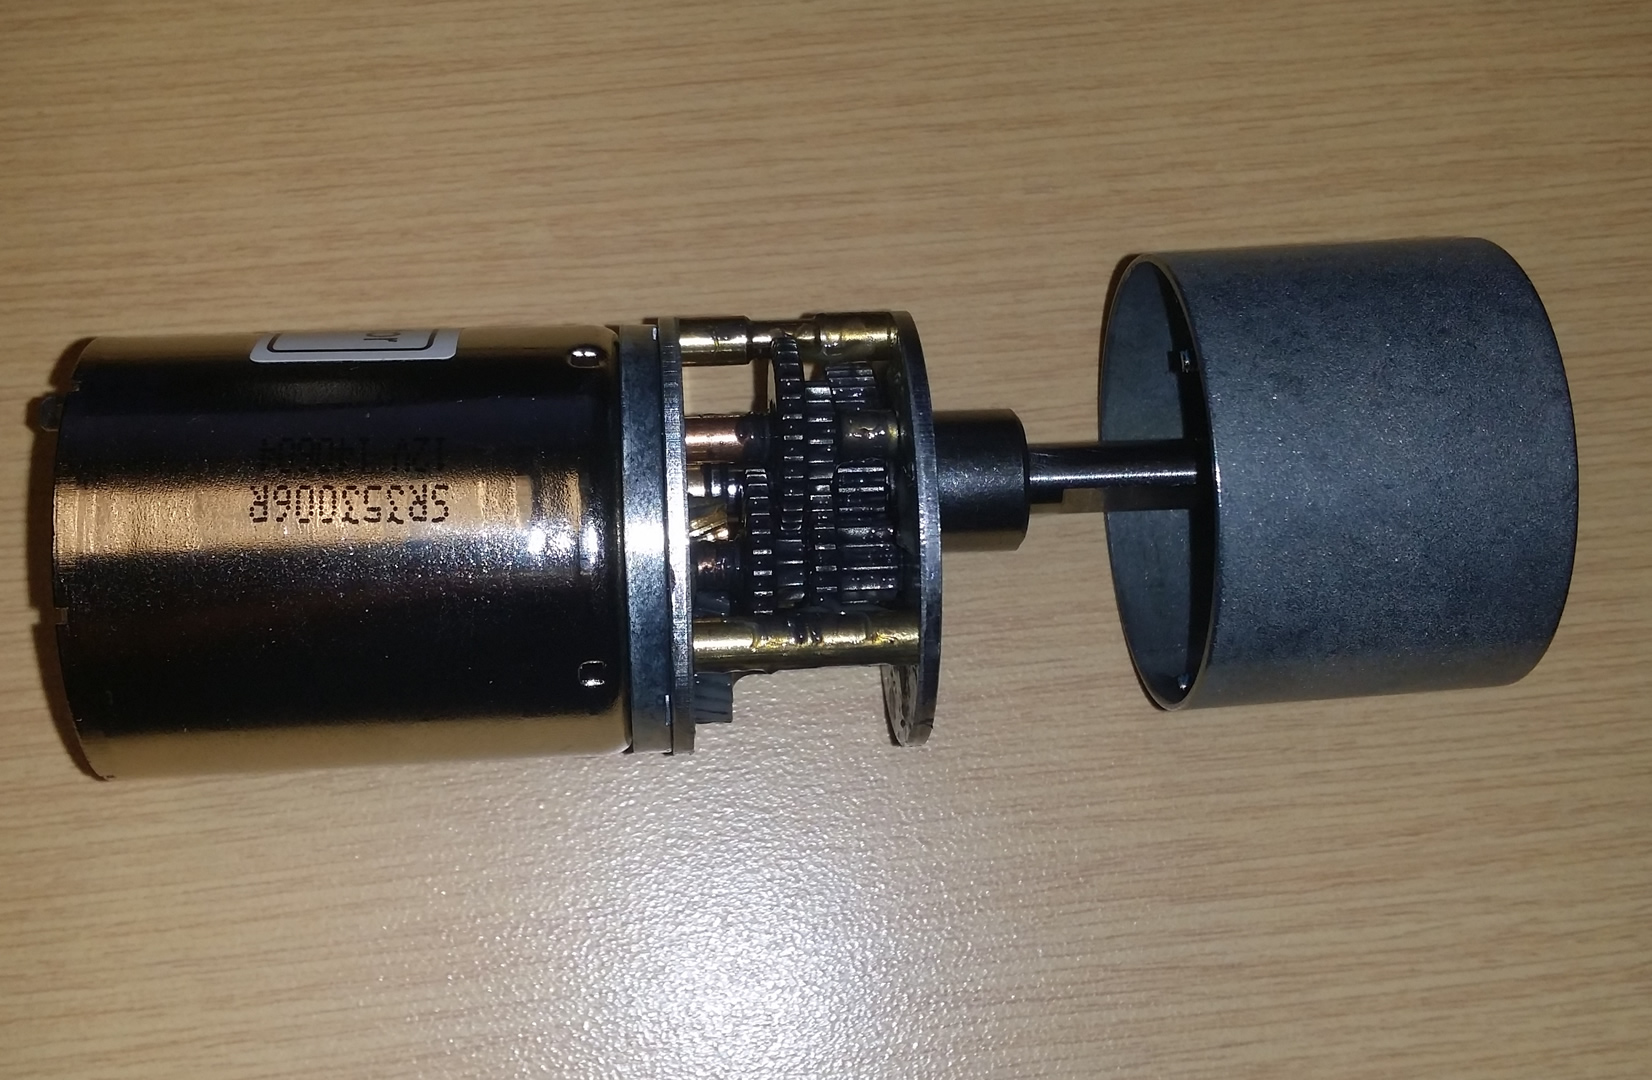
For design files and more details, please continue reading.
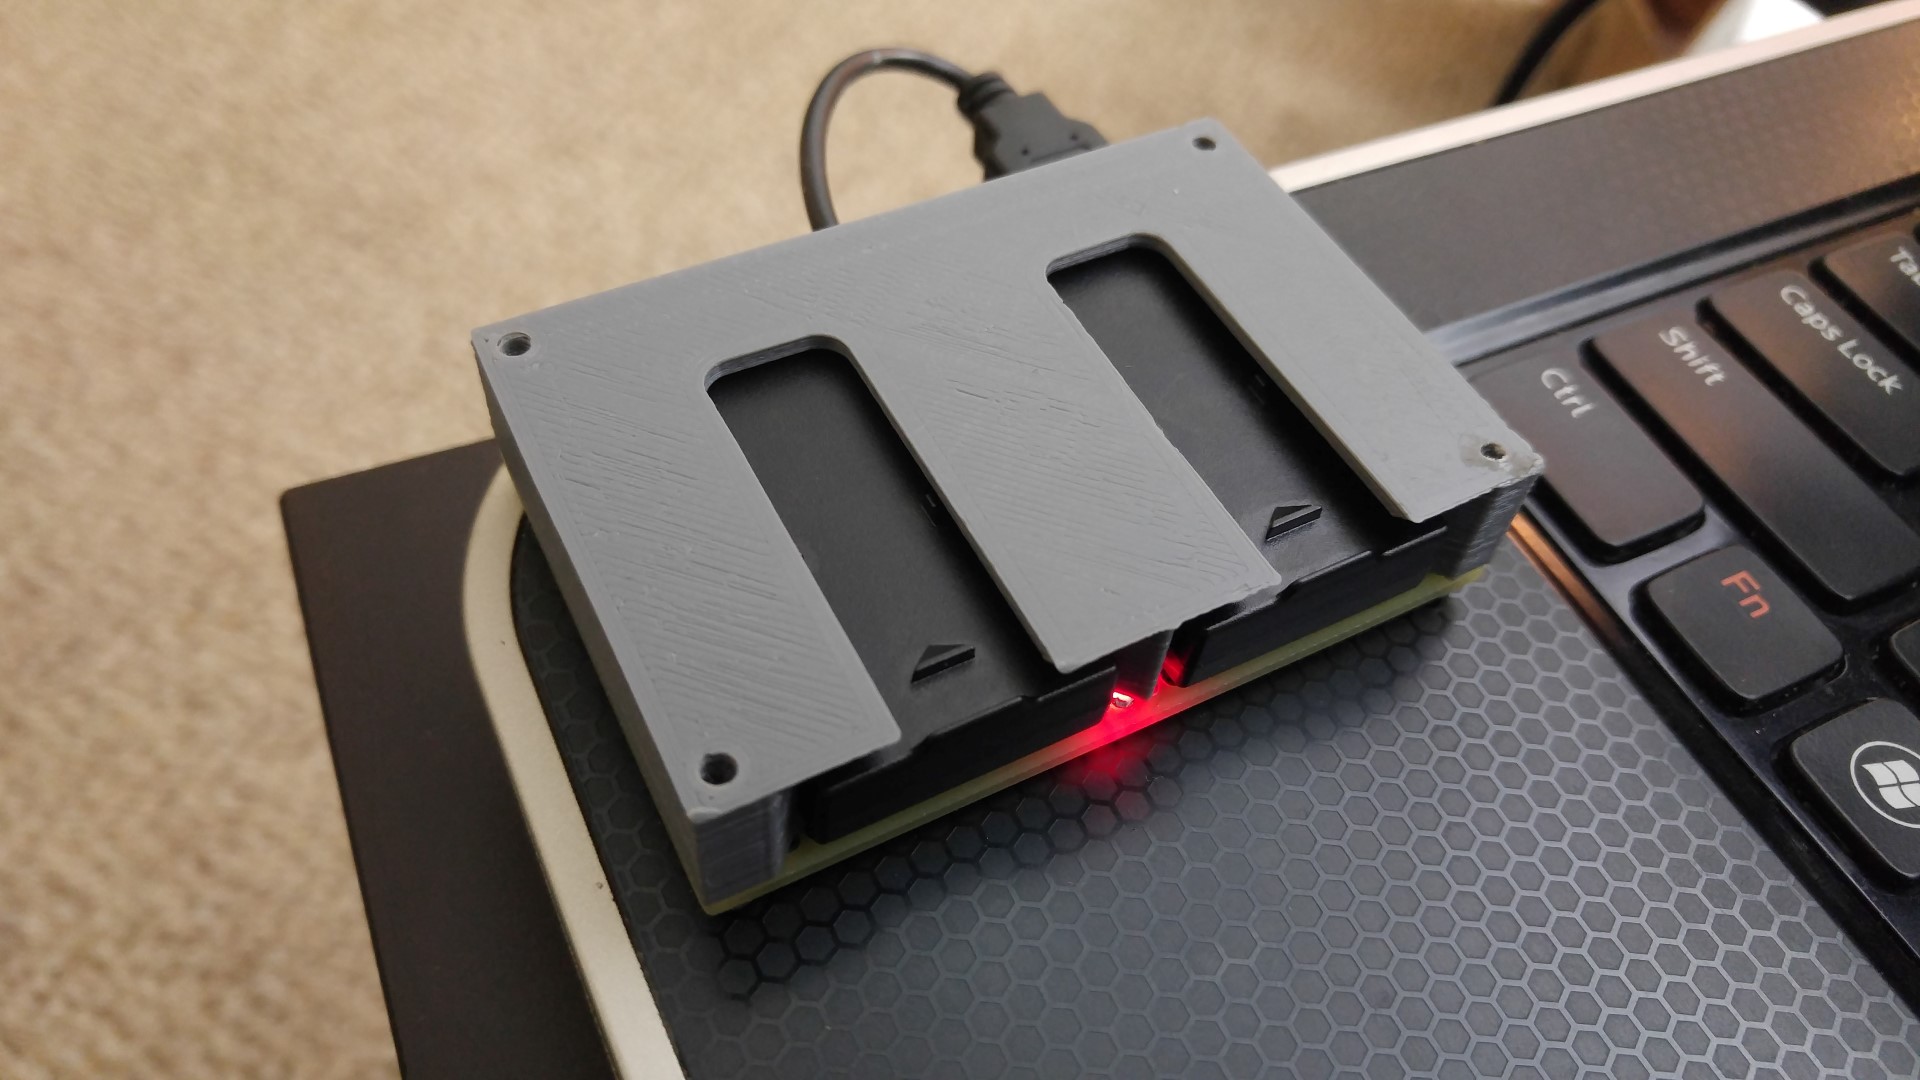
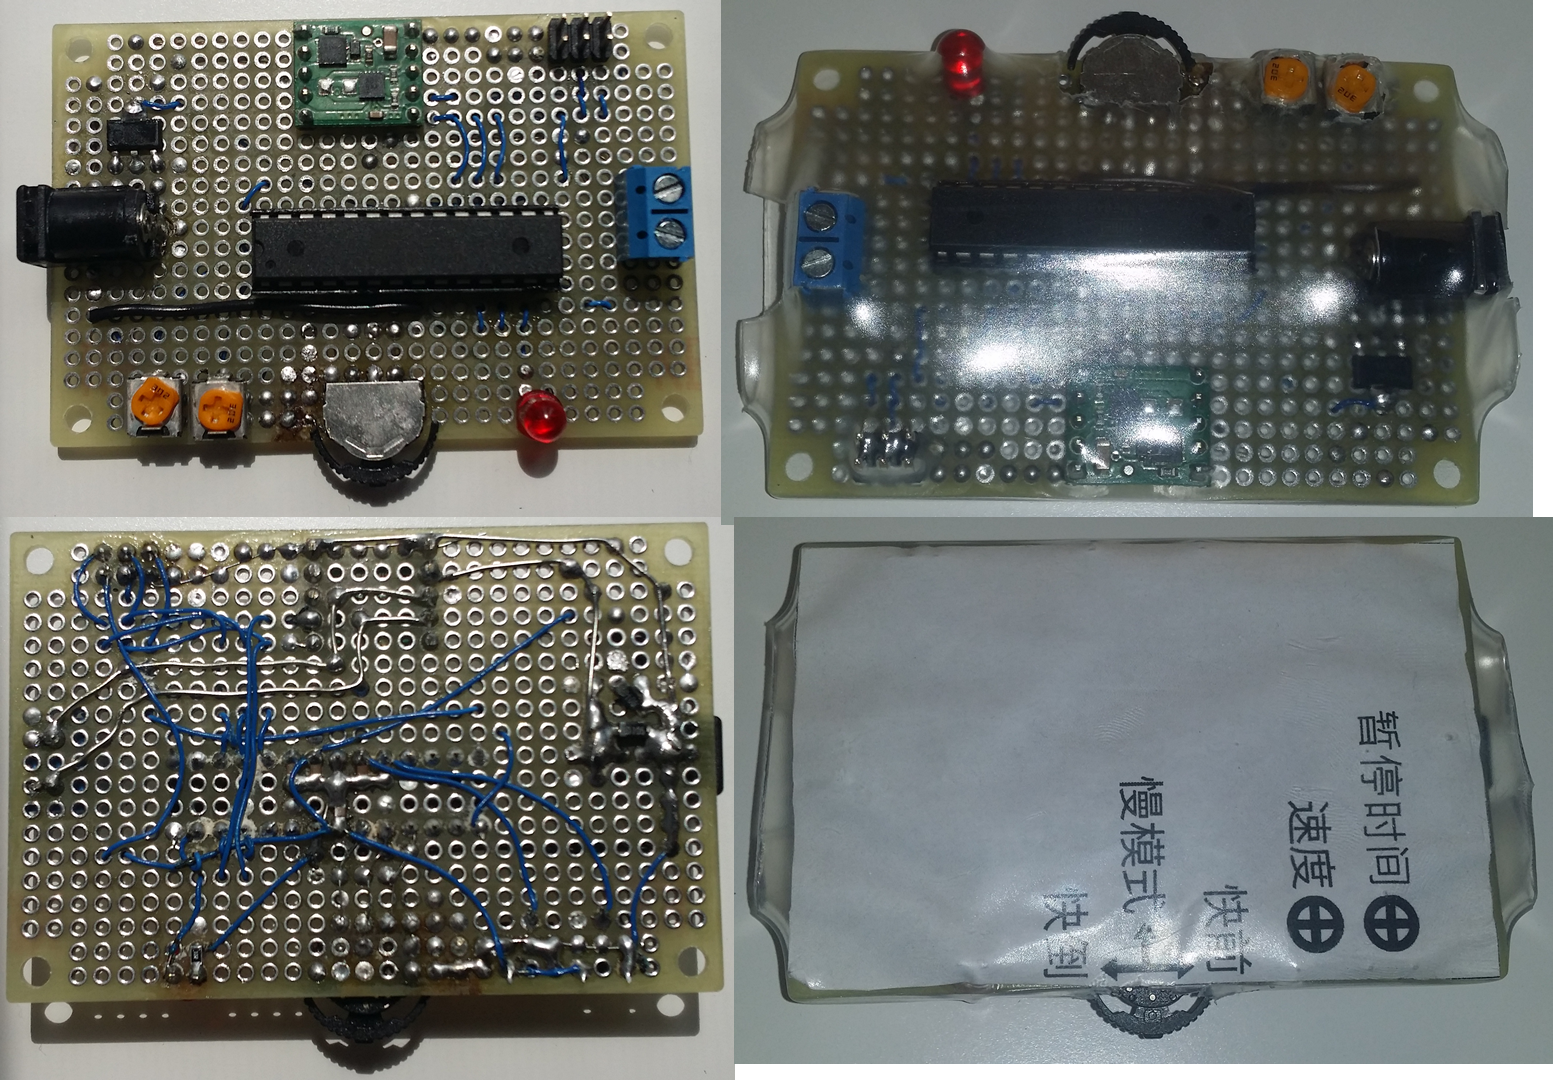
I got a Parrot Rolling Spider for fun. The batteries are 570mAH and the life is under 10 minutes, plus the reviews often mention that the batteries will lose their capacity quickly. Further research into this problem indicated that charging them slowly will alleviate this problem.
I wanted a few spare batteries and a way to recharge them. I decided to DIY a dock for them. I had a handful of spare parts, such as the MCP73831 and plenty of small perfboards. All I needed to do was 3D print something to hold the batteries in place, and this is what I came up with.
More pictures if you continue reading.
Continue reading
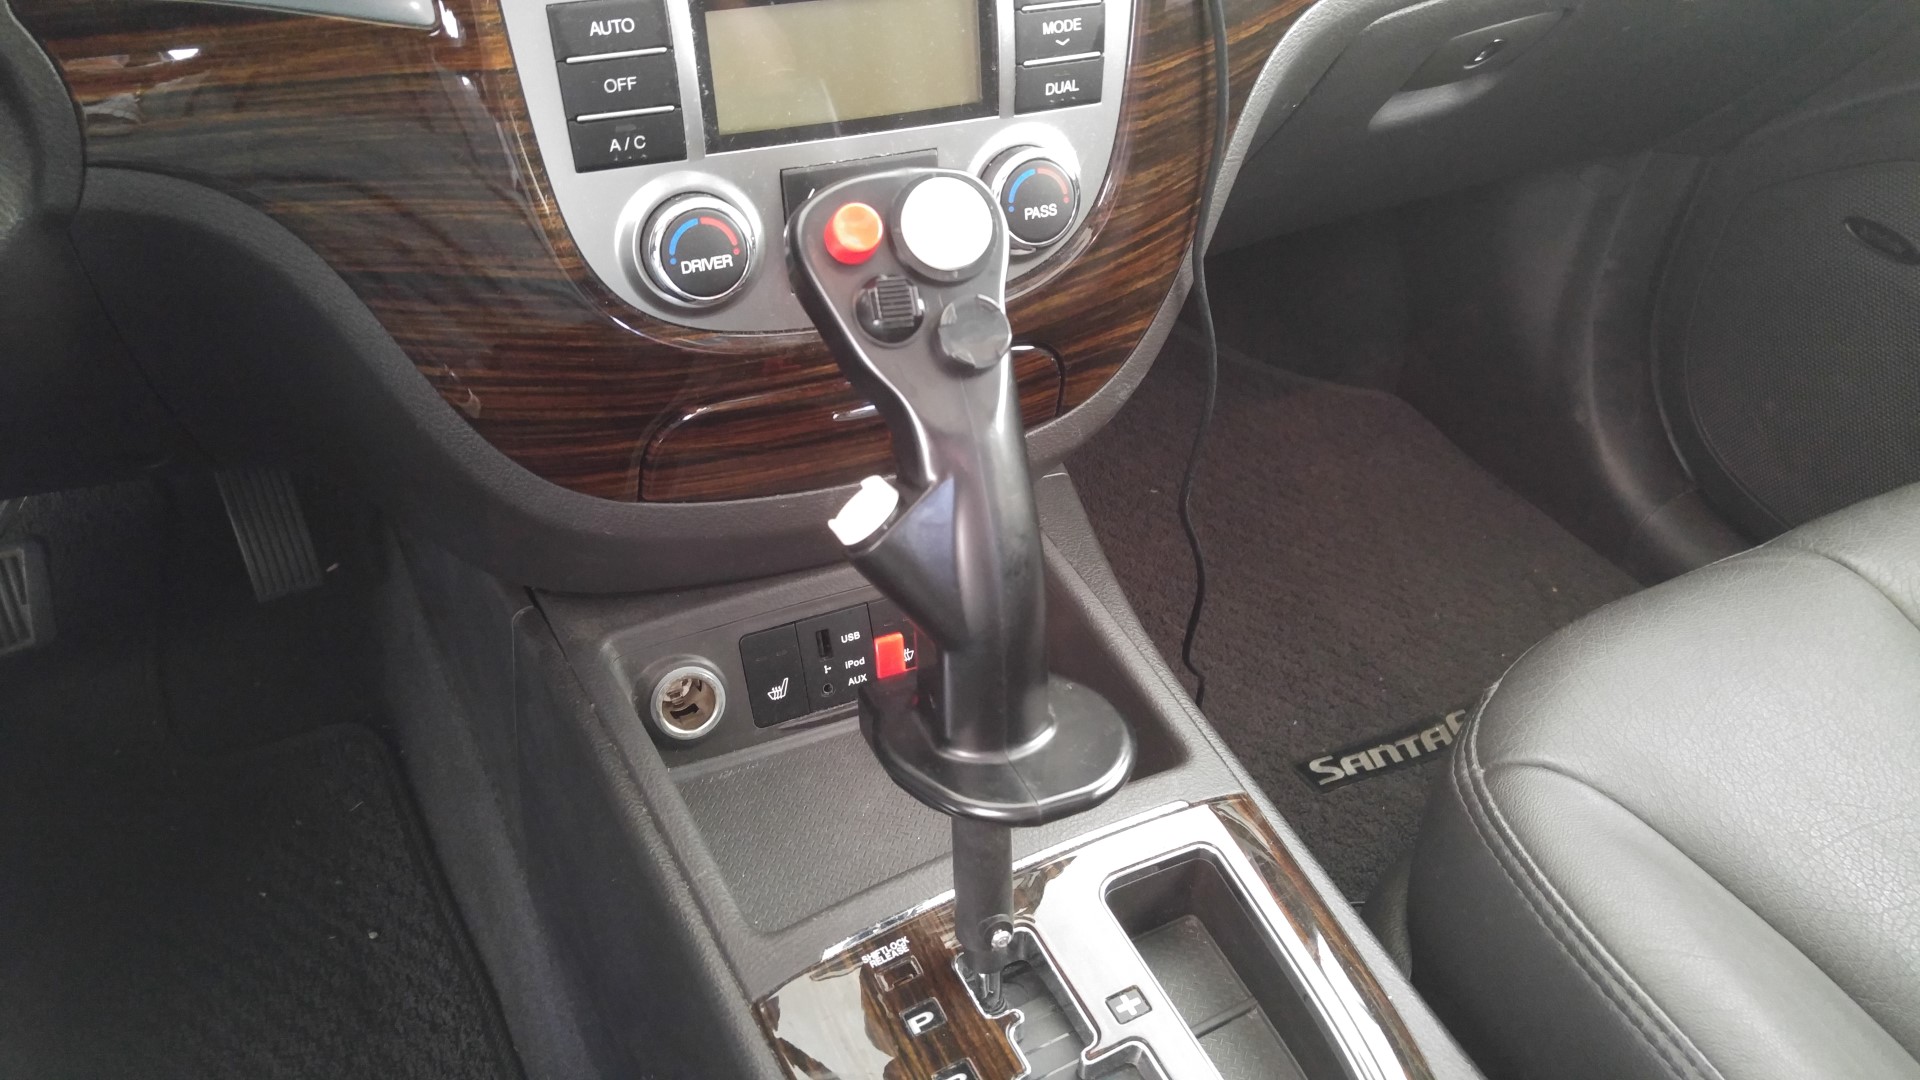
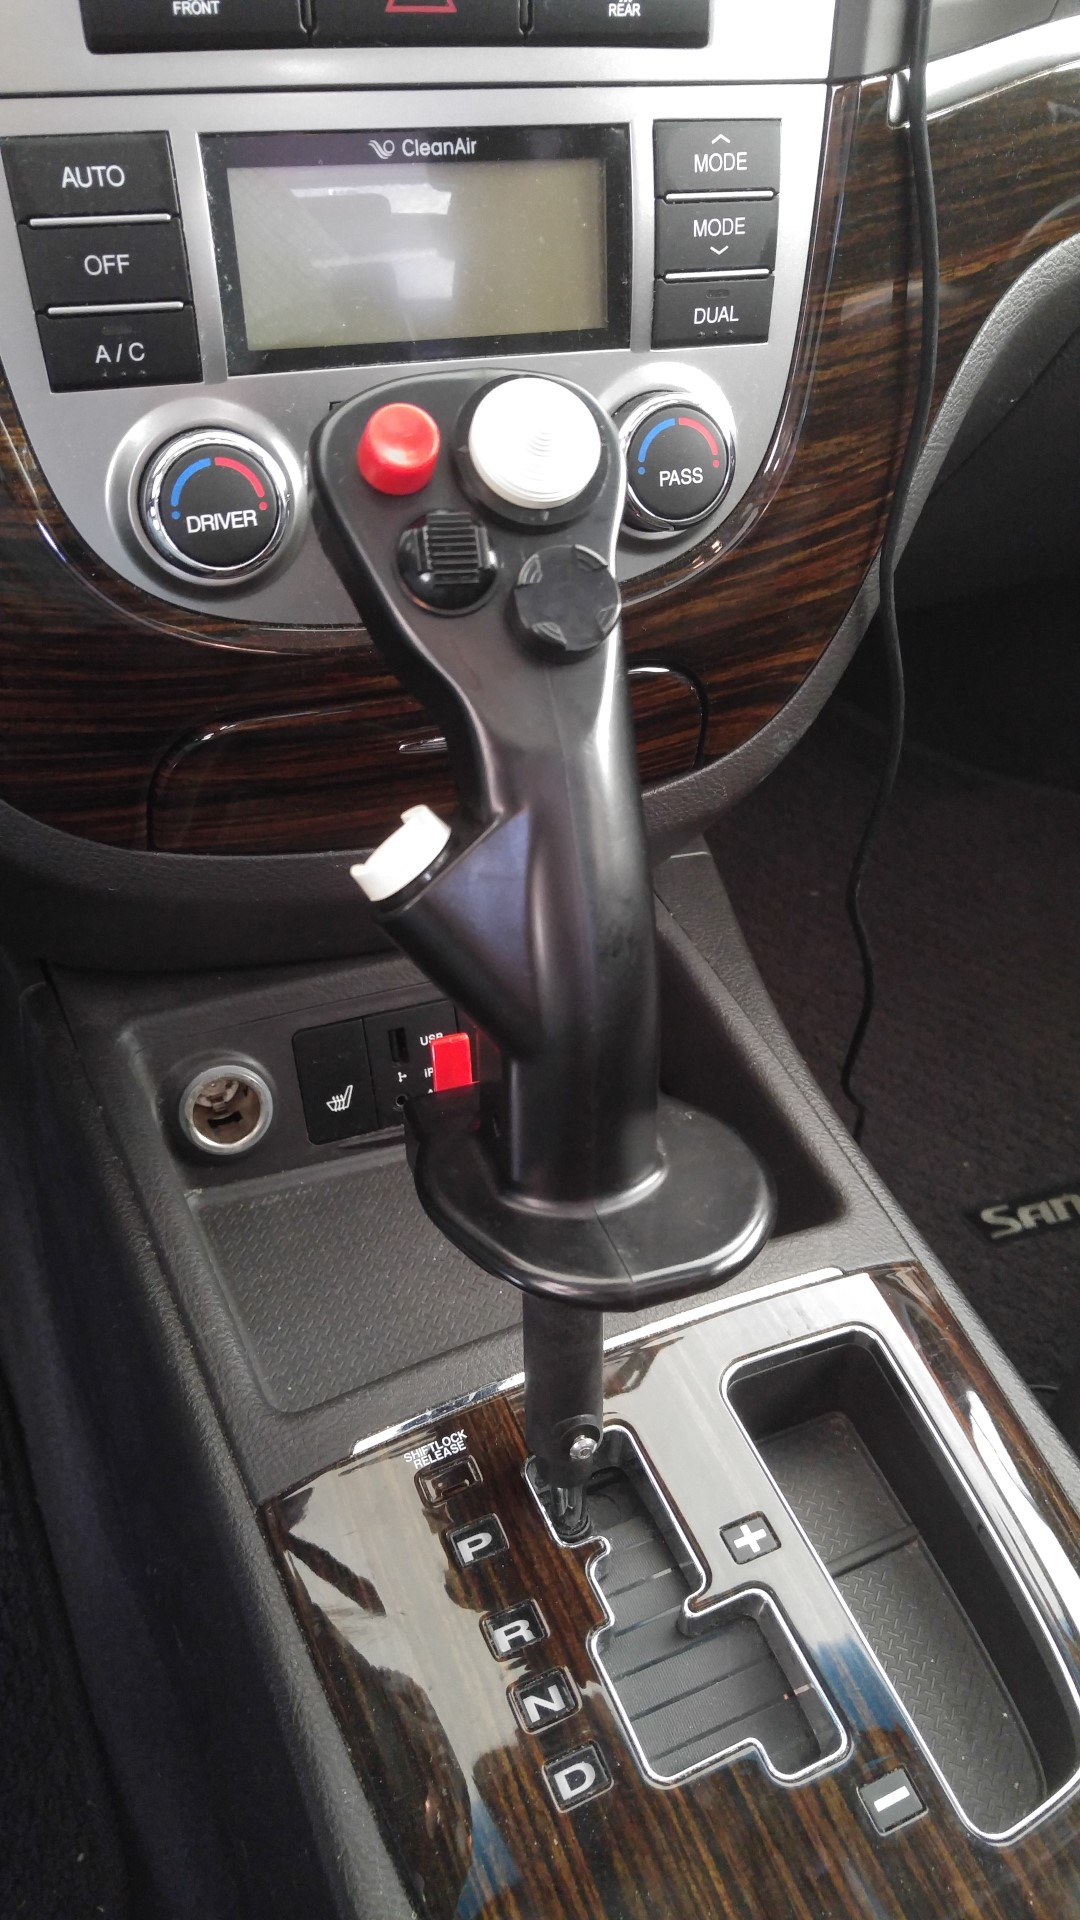
Well… I was originally going to use a dummy grenade instead, but I didn’t want to get shot when I get pulled over, or get the bomb squad in my car when I’m parked.
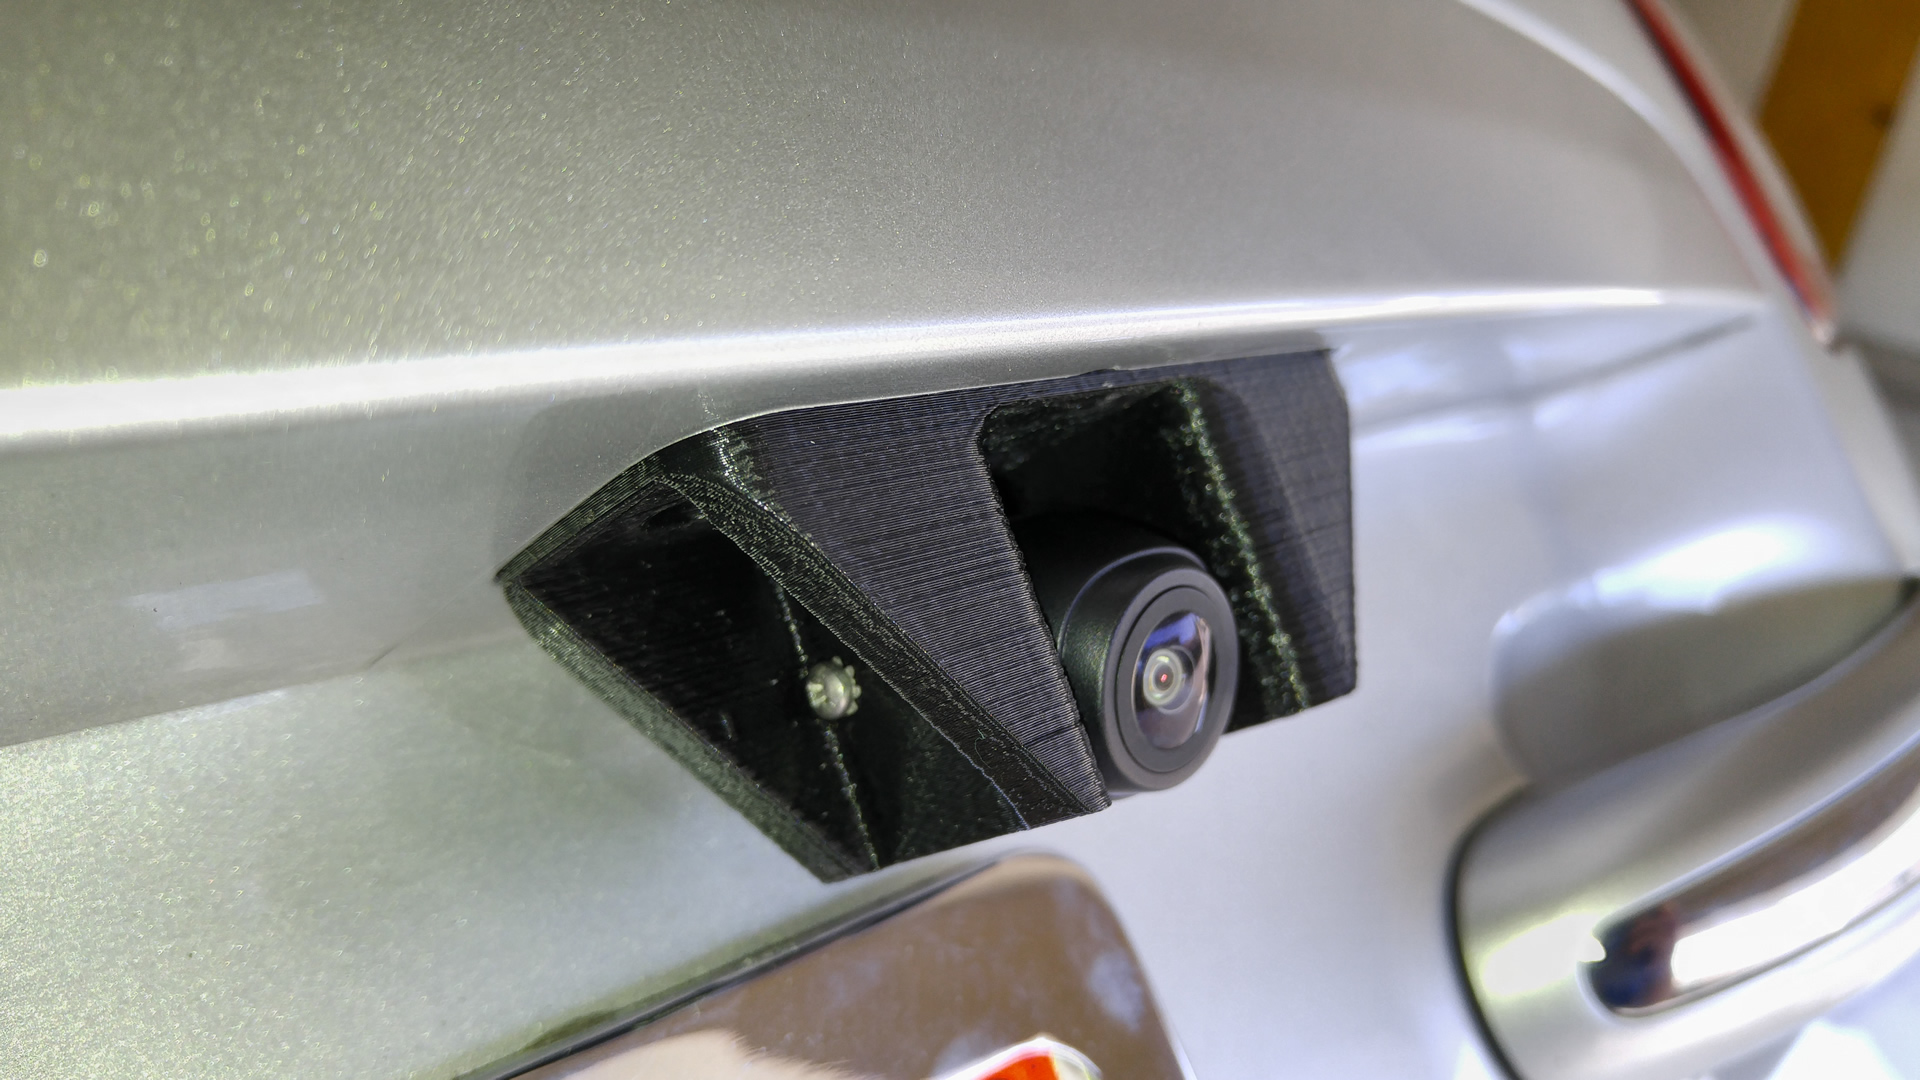
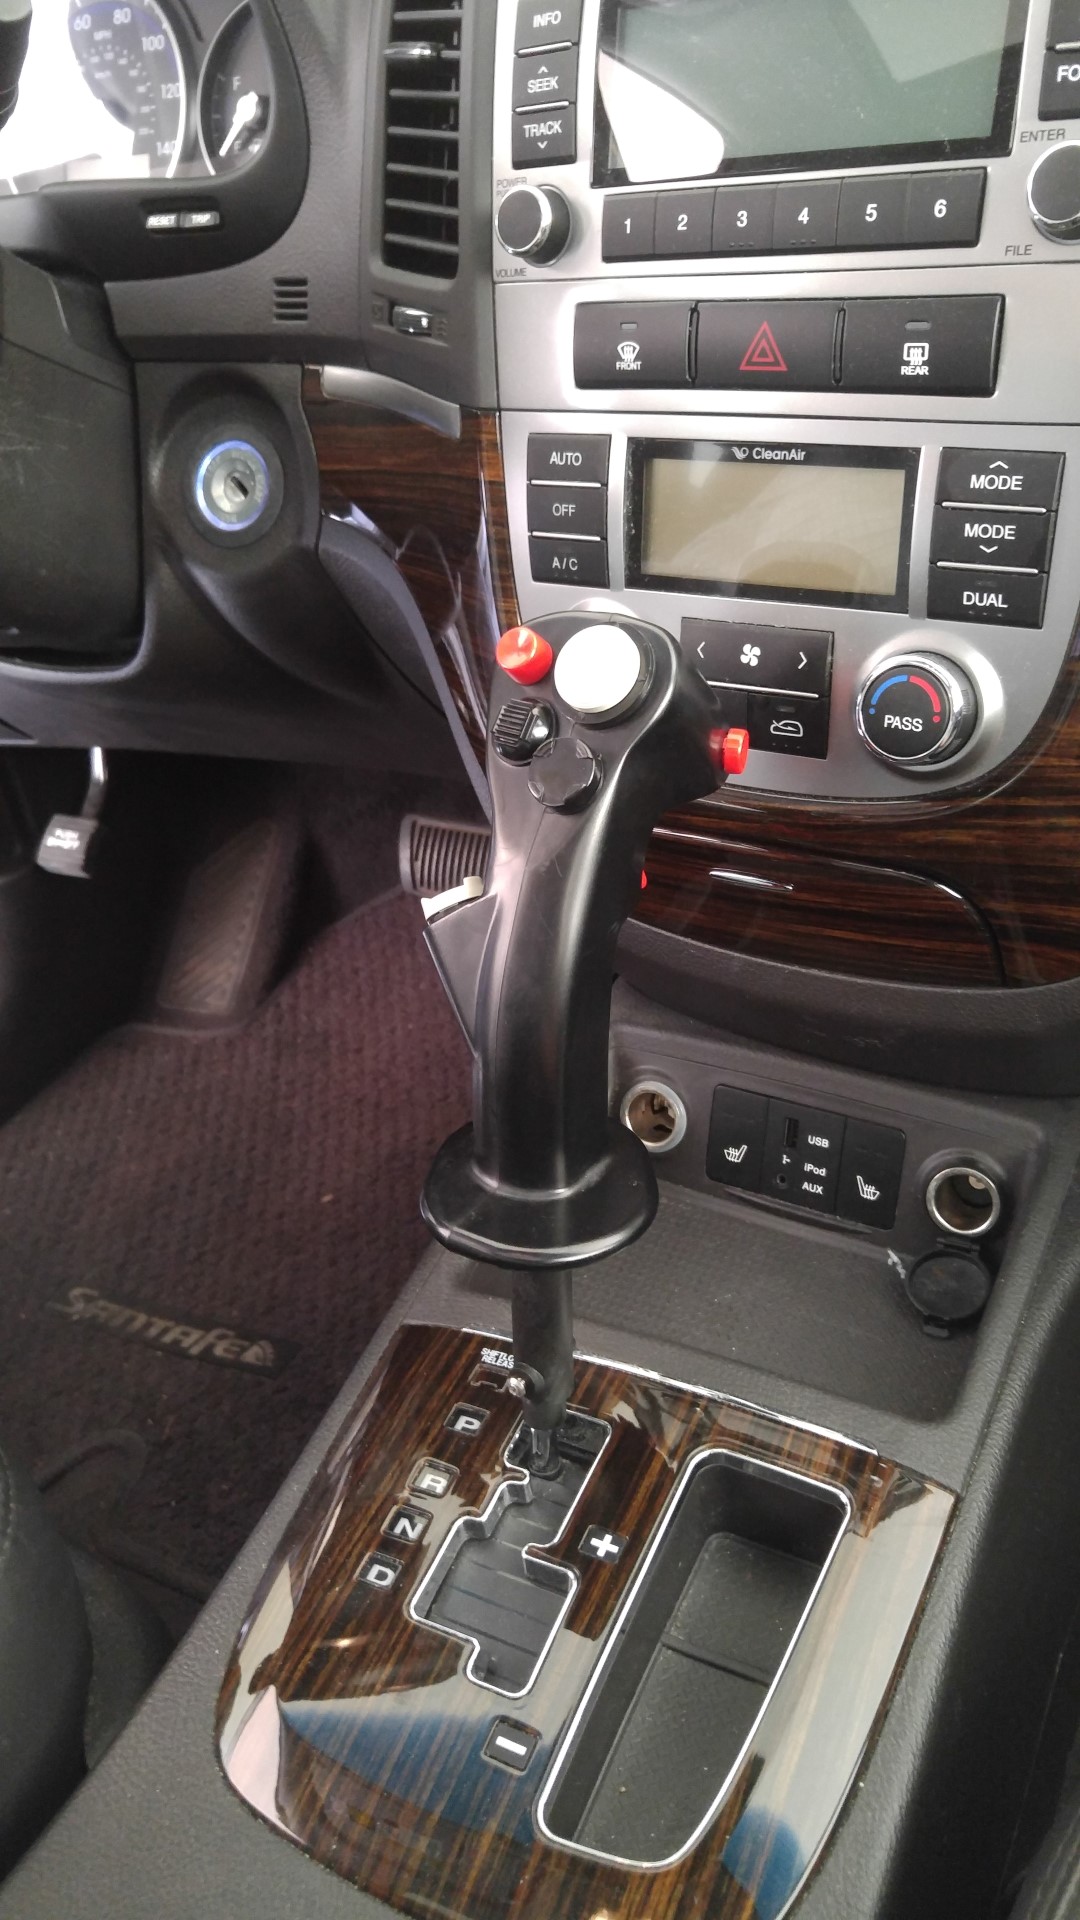
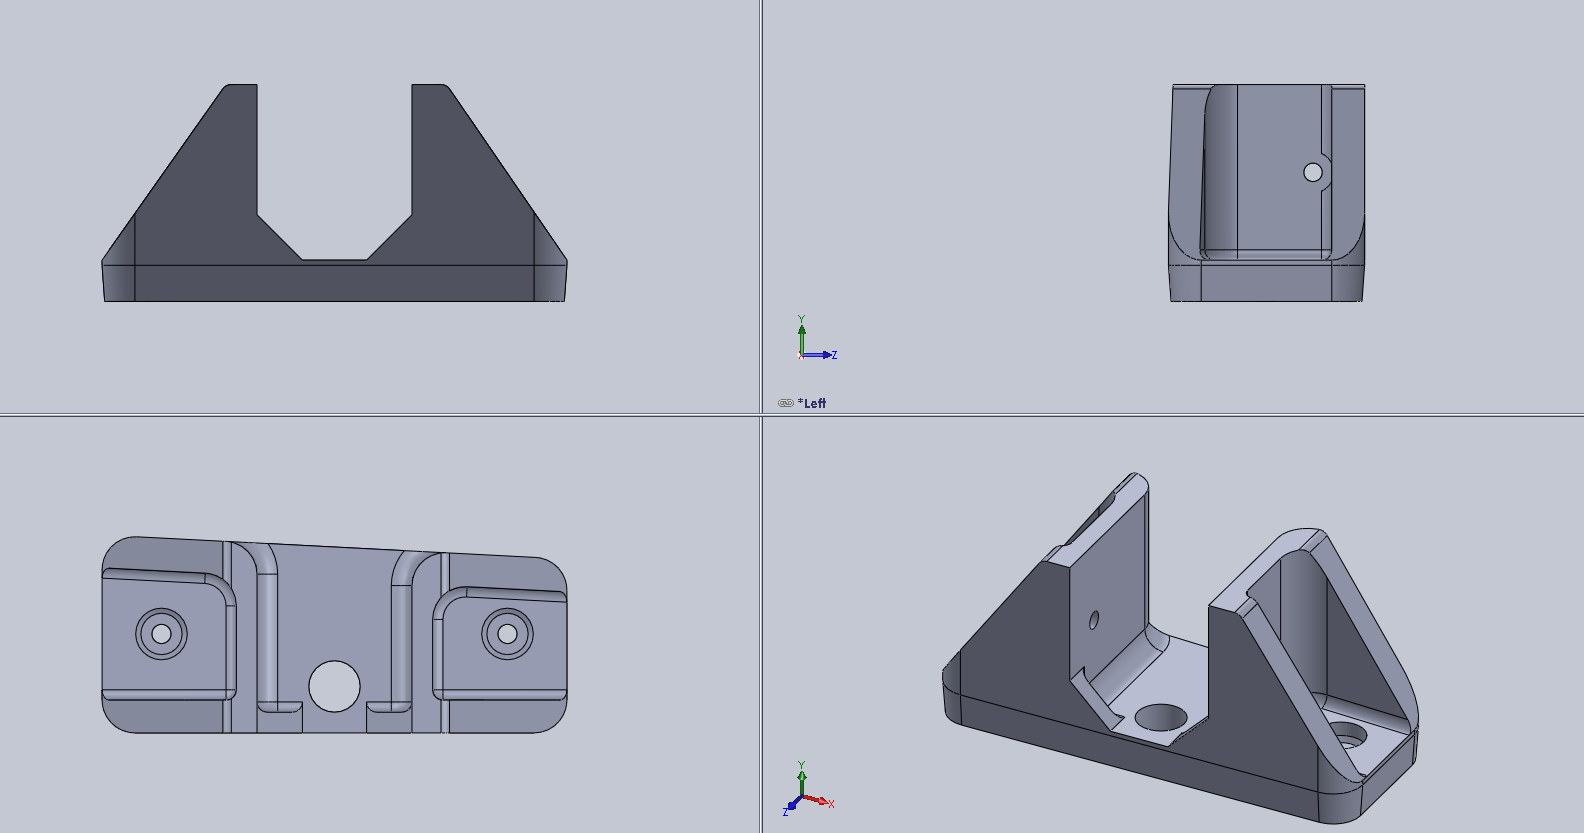
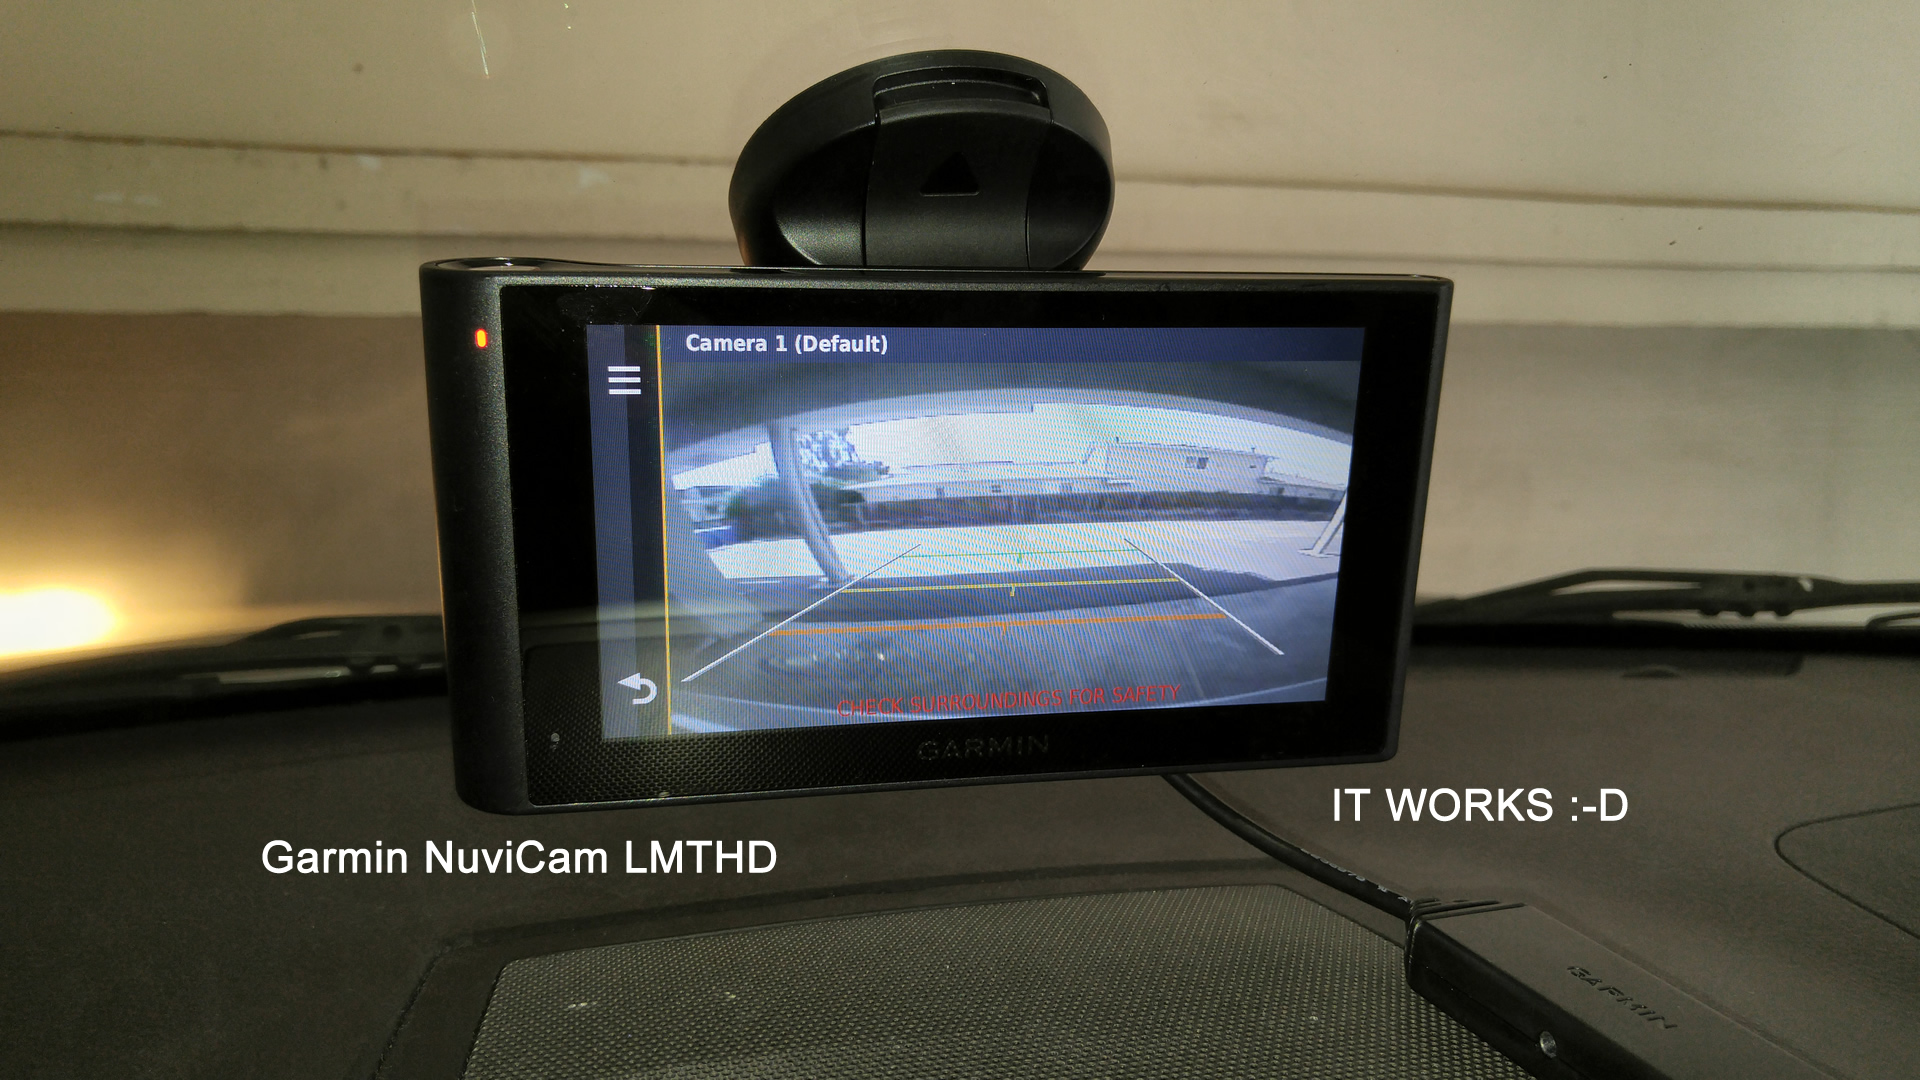
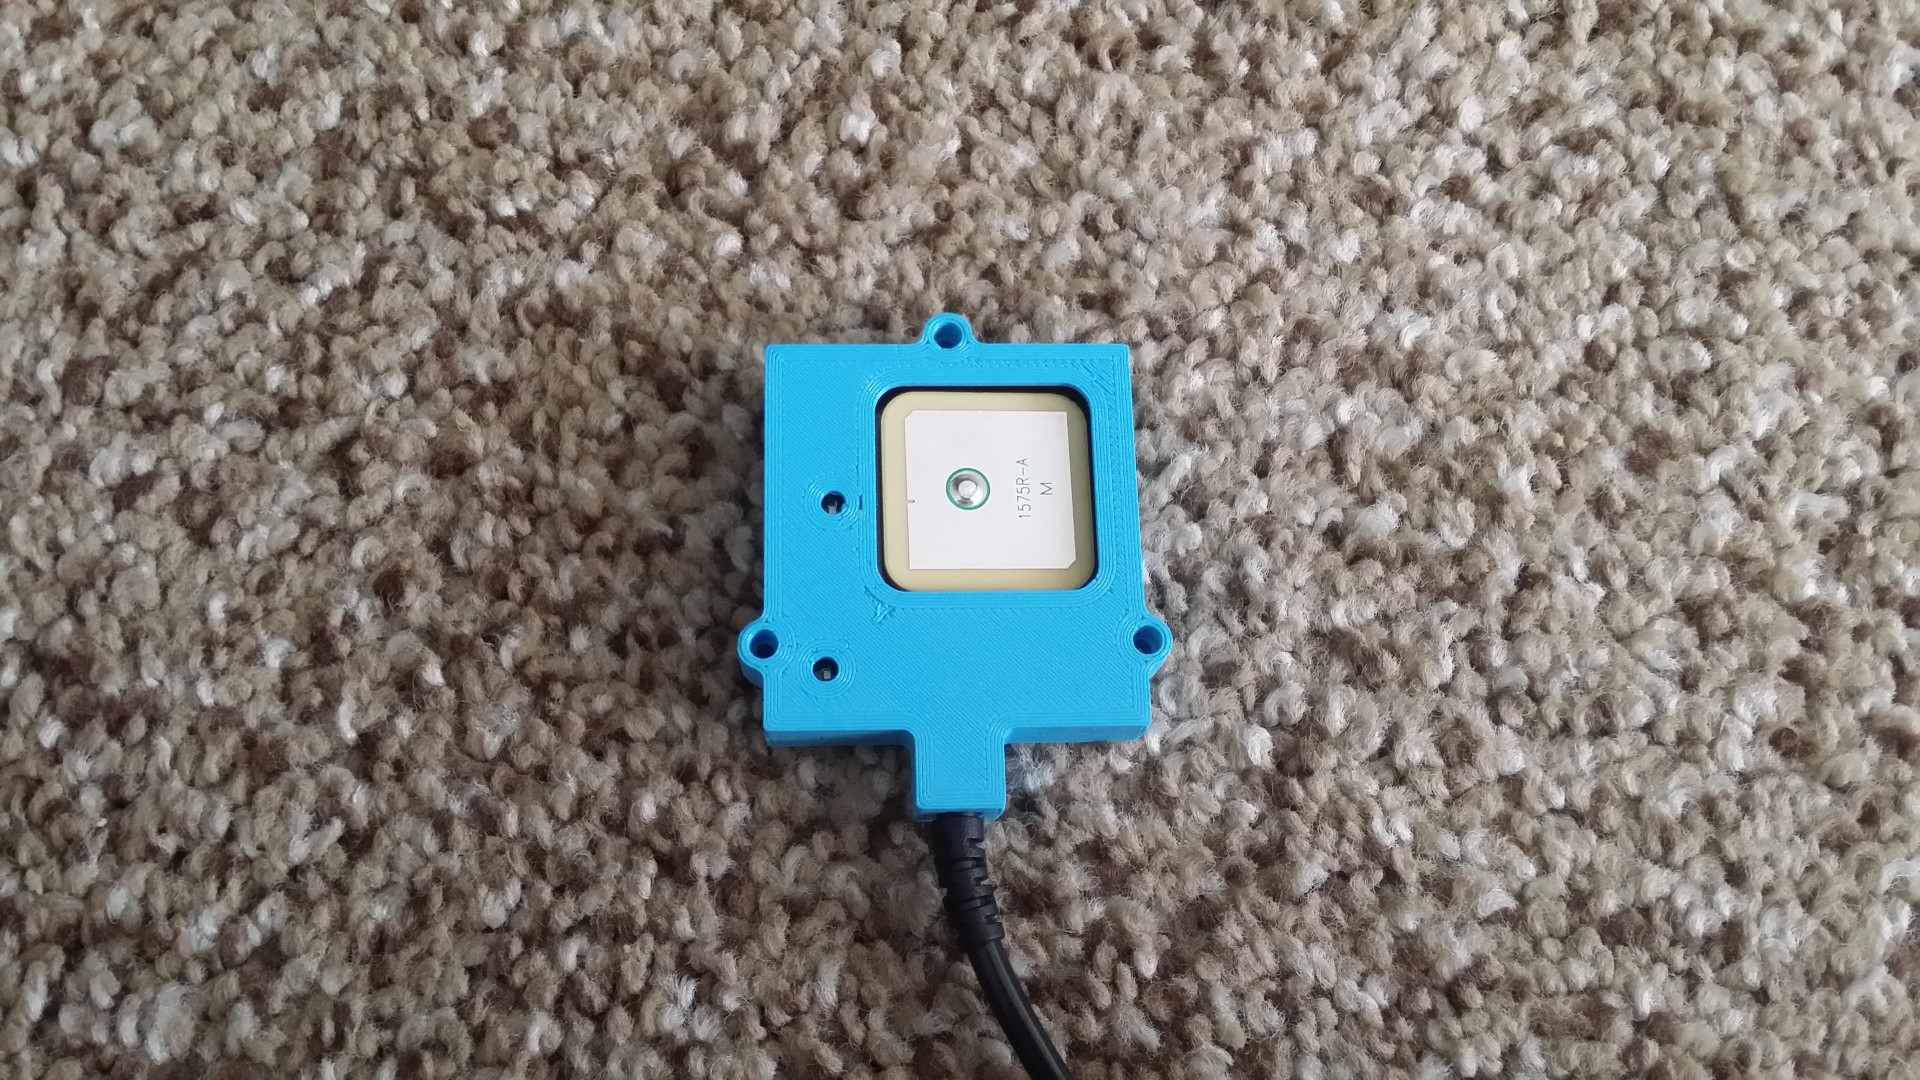
3D printed a mount for my Garmin BC 30 wireless camera to go along with my Garmin NuviCam LMTHD GPS navigator. My car is a 2011 Hyundai Santa Fe.

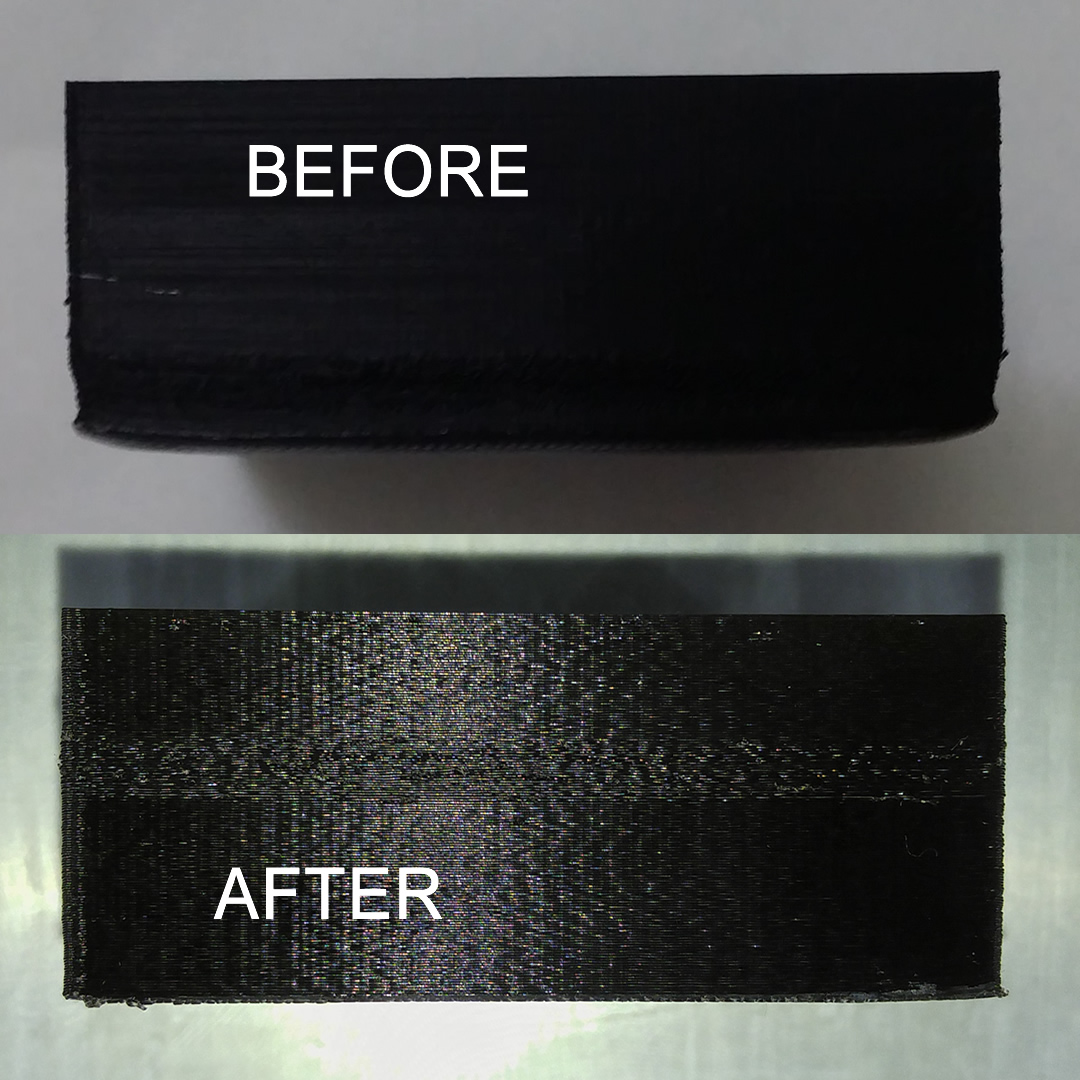
A brief explanation of why corners of large 100% infill solids lift off the print bed during 3D printing, and my way of solving the problem.
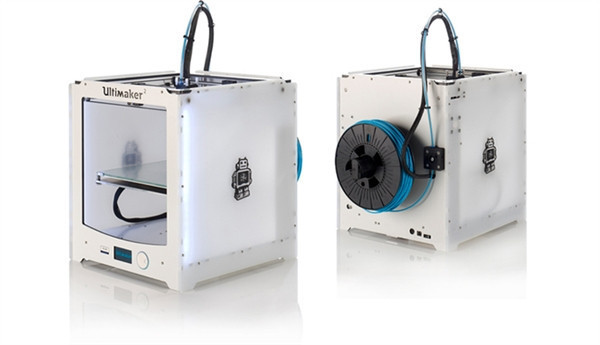
In my quest to have the best Ultimaker 2 possible, I have installed a Flex3Drive kit and Olsson Block kit.
Recently I have been having issues with inter-layer adhesion. I tried a speed test and would consistently fail them, either due to jamming or inter-layer splits… This is a story of how somebody more experienced in electrical and software engineering tackles a thermodynamics problem.
Bonus: this article contains a picture of my extra power 400W supply for the Ultimaker 2
After around 100 hours of printing, the teflon coupler above the nozzle of my Ultimaker2 started to deform under heat, causing friction on the filament. Combined with the relatively weak and not-gear-reduced feeder motor, this resulted in a frustrating amount of underextrusion.
So I decided to buy some replacement parts, and some upgrade parts in the process. Obviously I ordered a replacement teflon coupler. Second, I ordered a Flex3Drive kit. Third, I ordered a Olsson Block. After all of these were installed, I can honestly say my printer is now print-and-forget. In 30 hours and 5 filament swaps, I haven’t had any imperfections at all, and the only failed print was due to bad bed adhesion due to the model curling up. I haven’t had to touch the tuning menu once, and I never had to use my extruder floss. Continue reading to learn more about these upgrades and my experience with them. Continue reading
I went to spectate RoboGames 2015. If you didn’t go, WHY THE HELL NOT?!

I live literally a 10 minute walk away so I went both Saturday and Sunday. Since I walked in, I accidentally walked through the back entrance, so I snuck into the pits without a badge 😀 but I did still pay for a ticket after. I got some pictures in the pits, not stuff I see every day.
I put together a highlights video. Actually probably only missed Friday, and missed 4 matches from Saturday and Sunday, I have about 20 GB of video… I’m putting a few up just as teasers but you should really come check out RoboGames next time or buy their DVD when they release it.
The combat is the only event where I could get good video without raising my arms. There were a ton of other competitions, like minisumo, line following, humanoids, soccer, hockey, etc. It really reminds me of the Canadian National Robot Games back in 2007, which I entered as a highschool student. The Canadian competition has long since been cancelled but it’s amazing how alive the Silicon Valley competition is.
Continue reading for more videos and pictures
For various reasons, I decided to try writing a SD card bootloader for my Ultimaker2.
The project is open source and on my GitHub here.
My goal was to install this new bootloader without having physical access to the circuitry. Thus I cannot use a ISP tool and must be done through the bootloader that is already present on the Ultimaker2. The only way to do this is to partition off a portion of application memory region for a secondary bootloader that executes after the original bootloader. But the ATmega2560 has a restriction that prevents anything in the application memory region from modifying the flash memory at all. Overcoming this restriction is what this hack is all about, continue reading if you are interested in learning more.
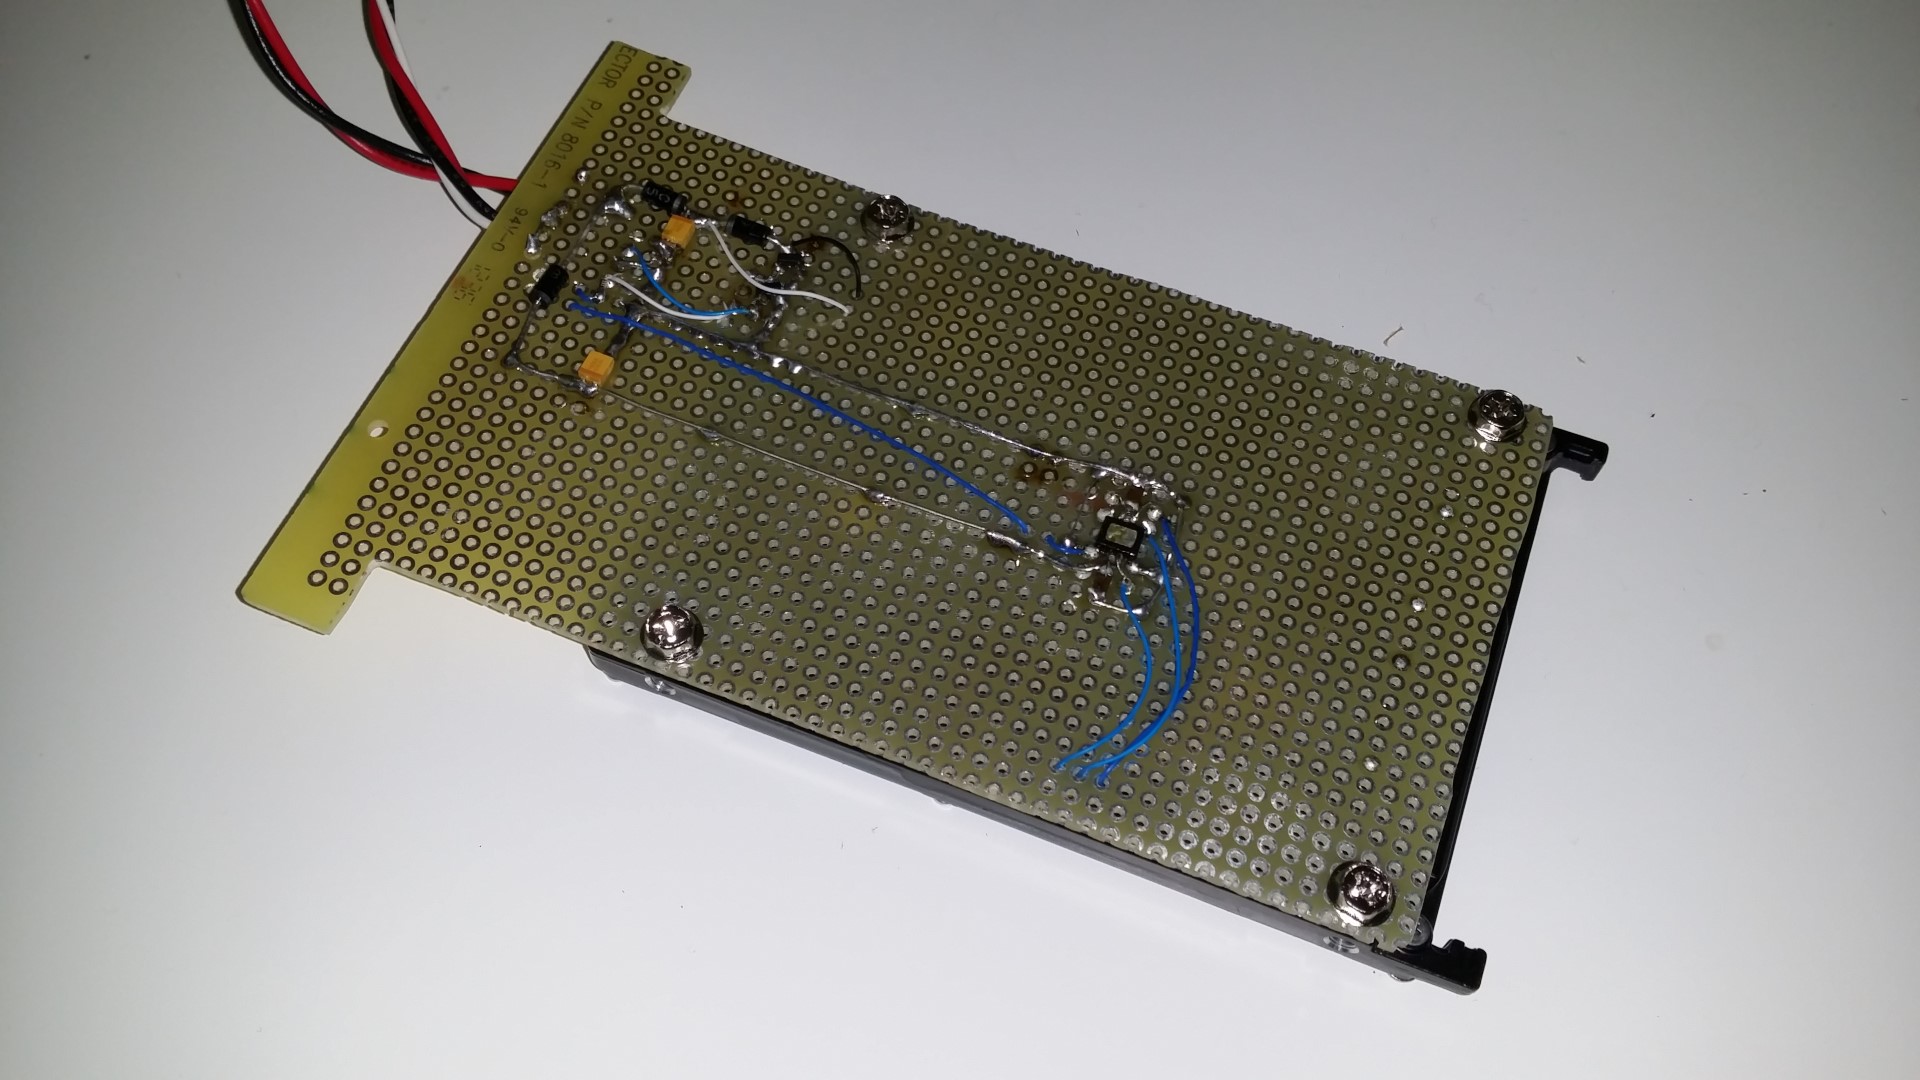
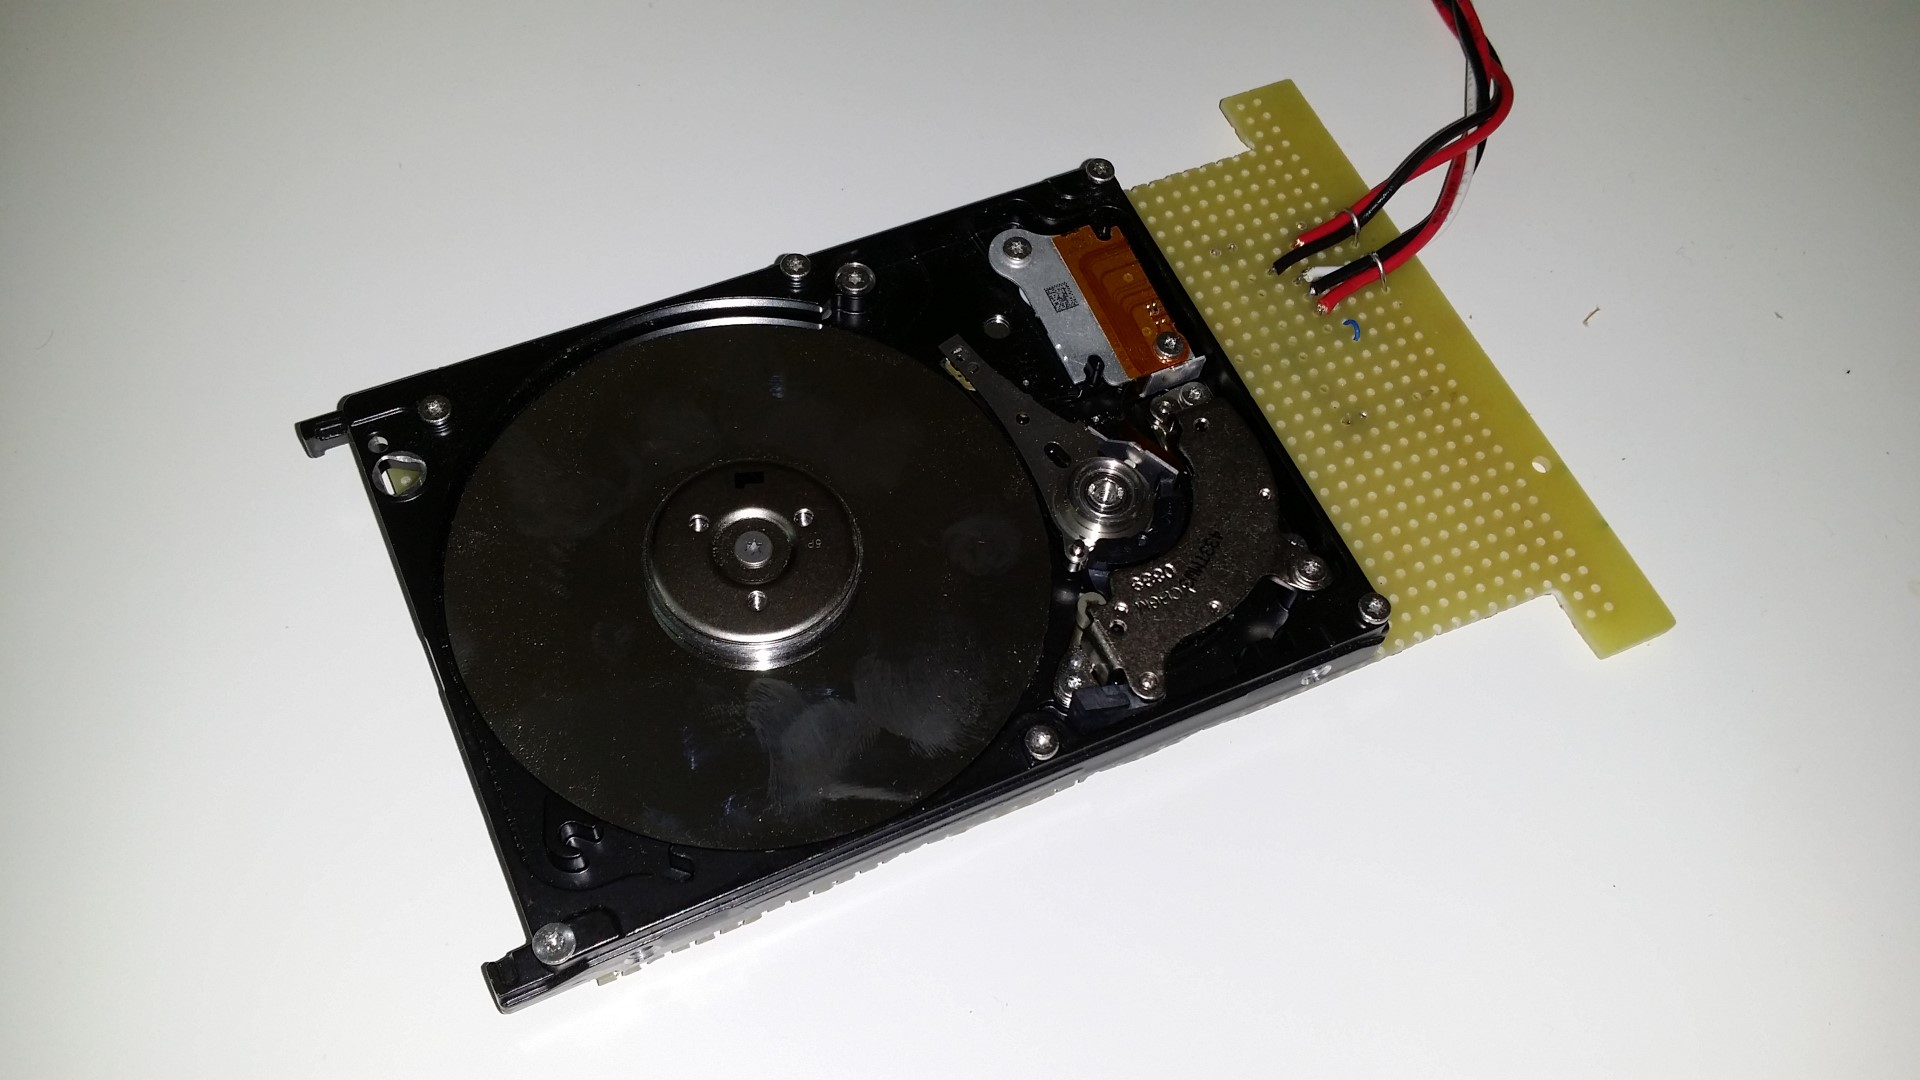
Remember my Aquarium Computer? I thought the SSD looked boring, so I put a old-school HDD inside with all the guts exposed, and wired it electrically to spin and swing when there is hard drive activity (when the HDD activity LED blinks).
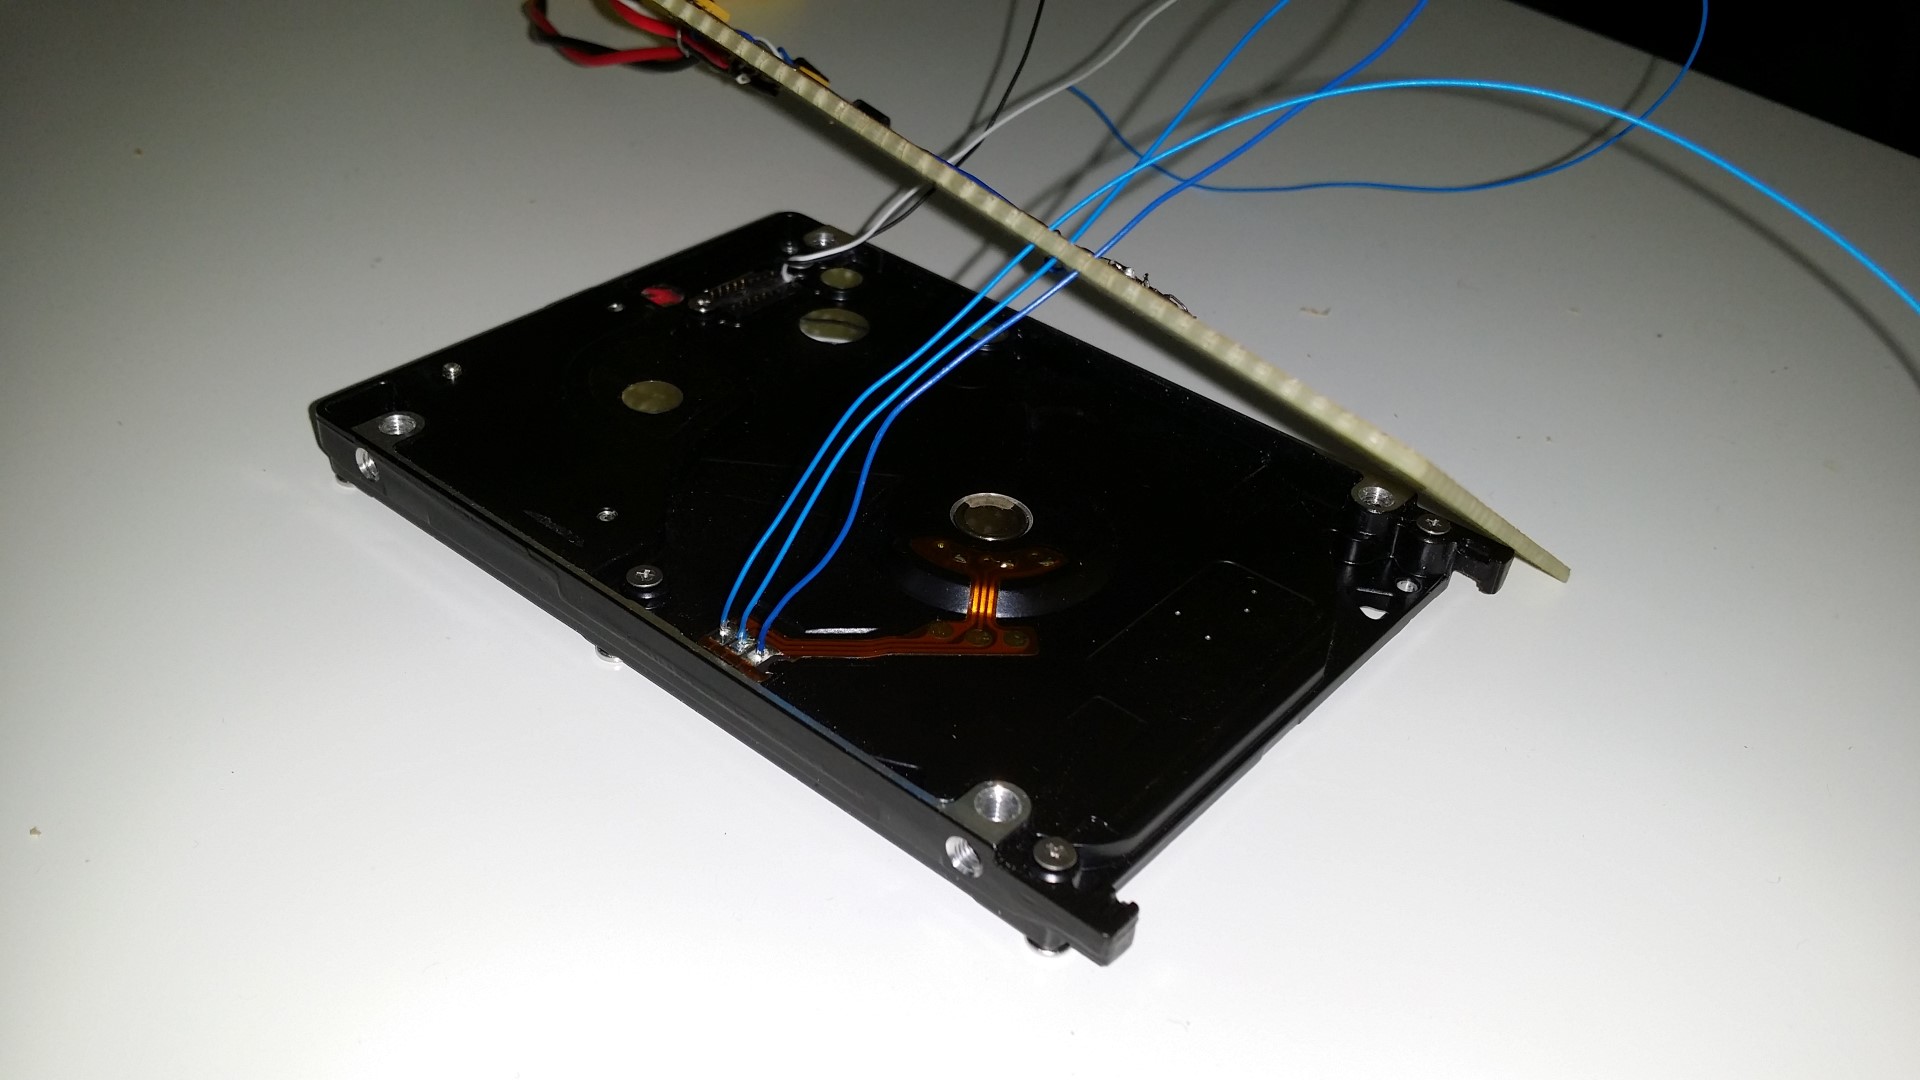
But I have a deep dark secret…
This project won 2nd place in this Reddit contest about functional 3D printed projects. Thank you very much to ToyBuilder Labs for being the sponsor.
You want files? Click Here. I hosted the files on YouMagine, and I provided the STEP file format, which you should be able to open with most 3D modeling software. So if you want to change the design for 3.5″ drives, or chose another cartridge shape, you can!
NOTE: the dimensions of the fake NES cartridge I used are not the same dimensions as genuine NES cartridges, so genuine cartridges will not fit in this project, and the fake cartridges will not fit inside a genuine NES deck.
I will talk about 3D modelling software that I have tried, and point to this page whenever somebody asks for this info. Comments are extremely welcome.
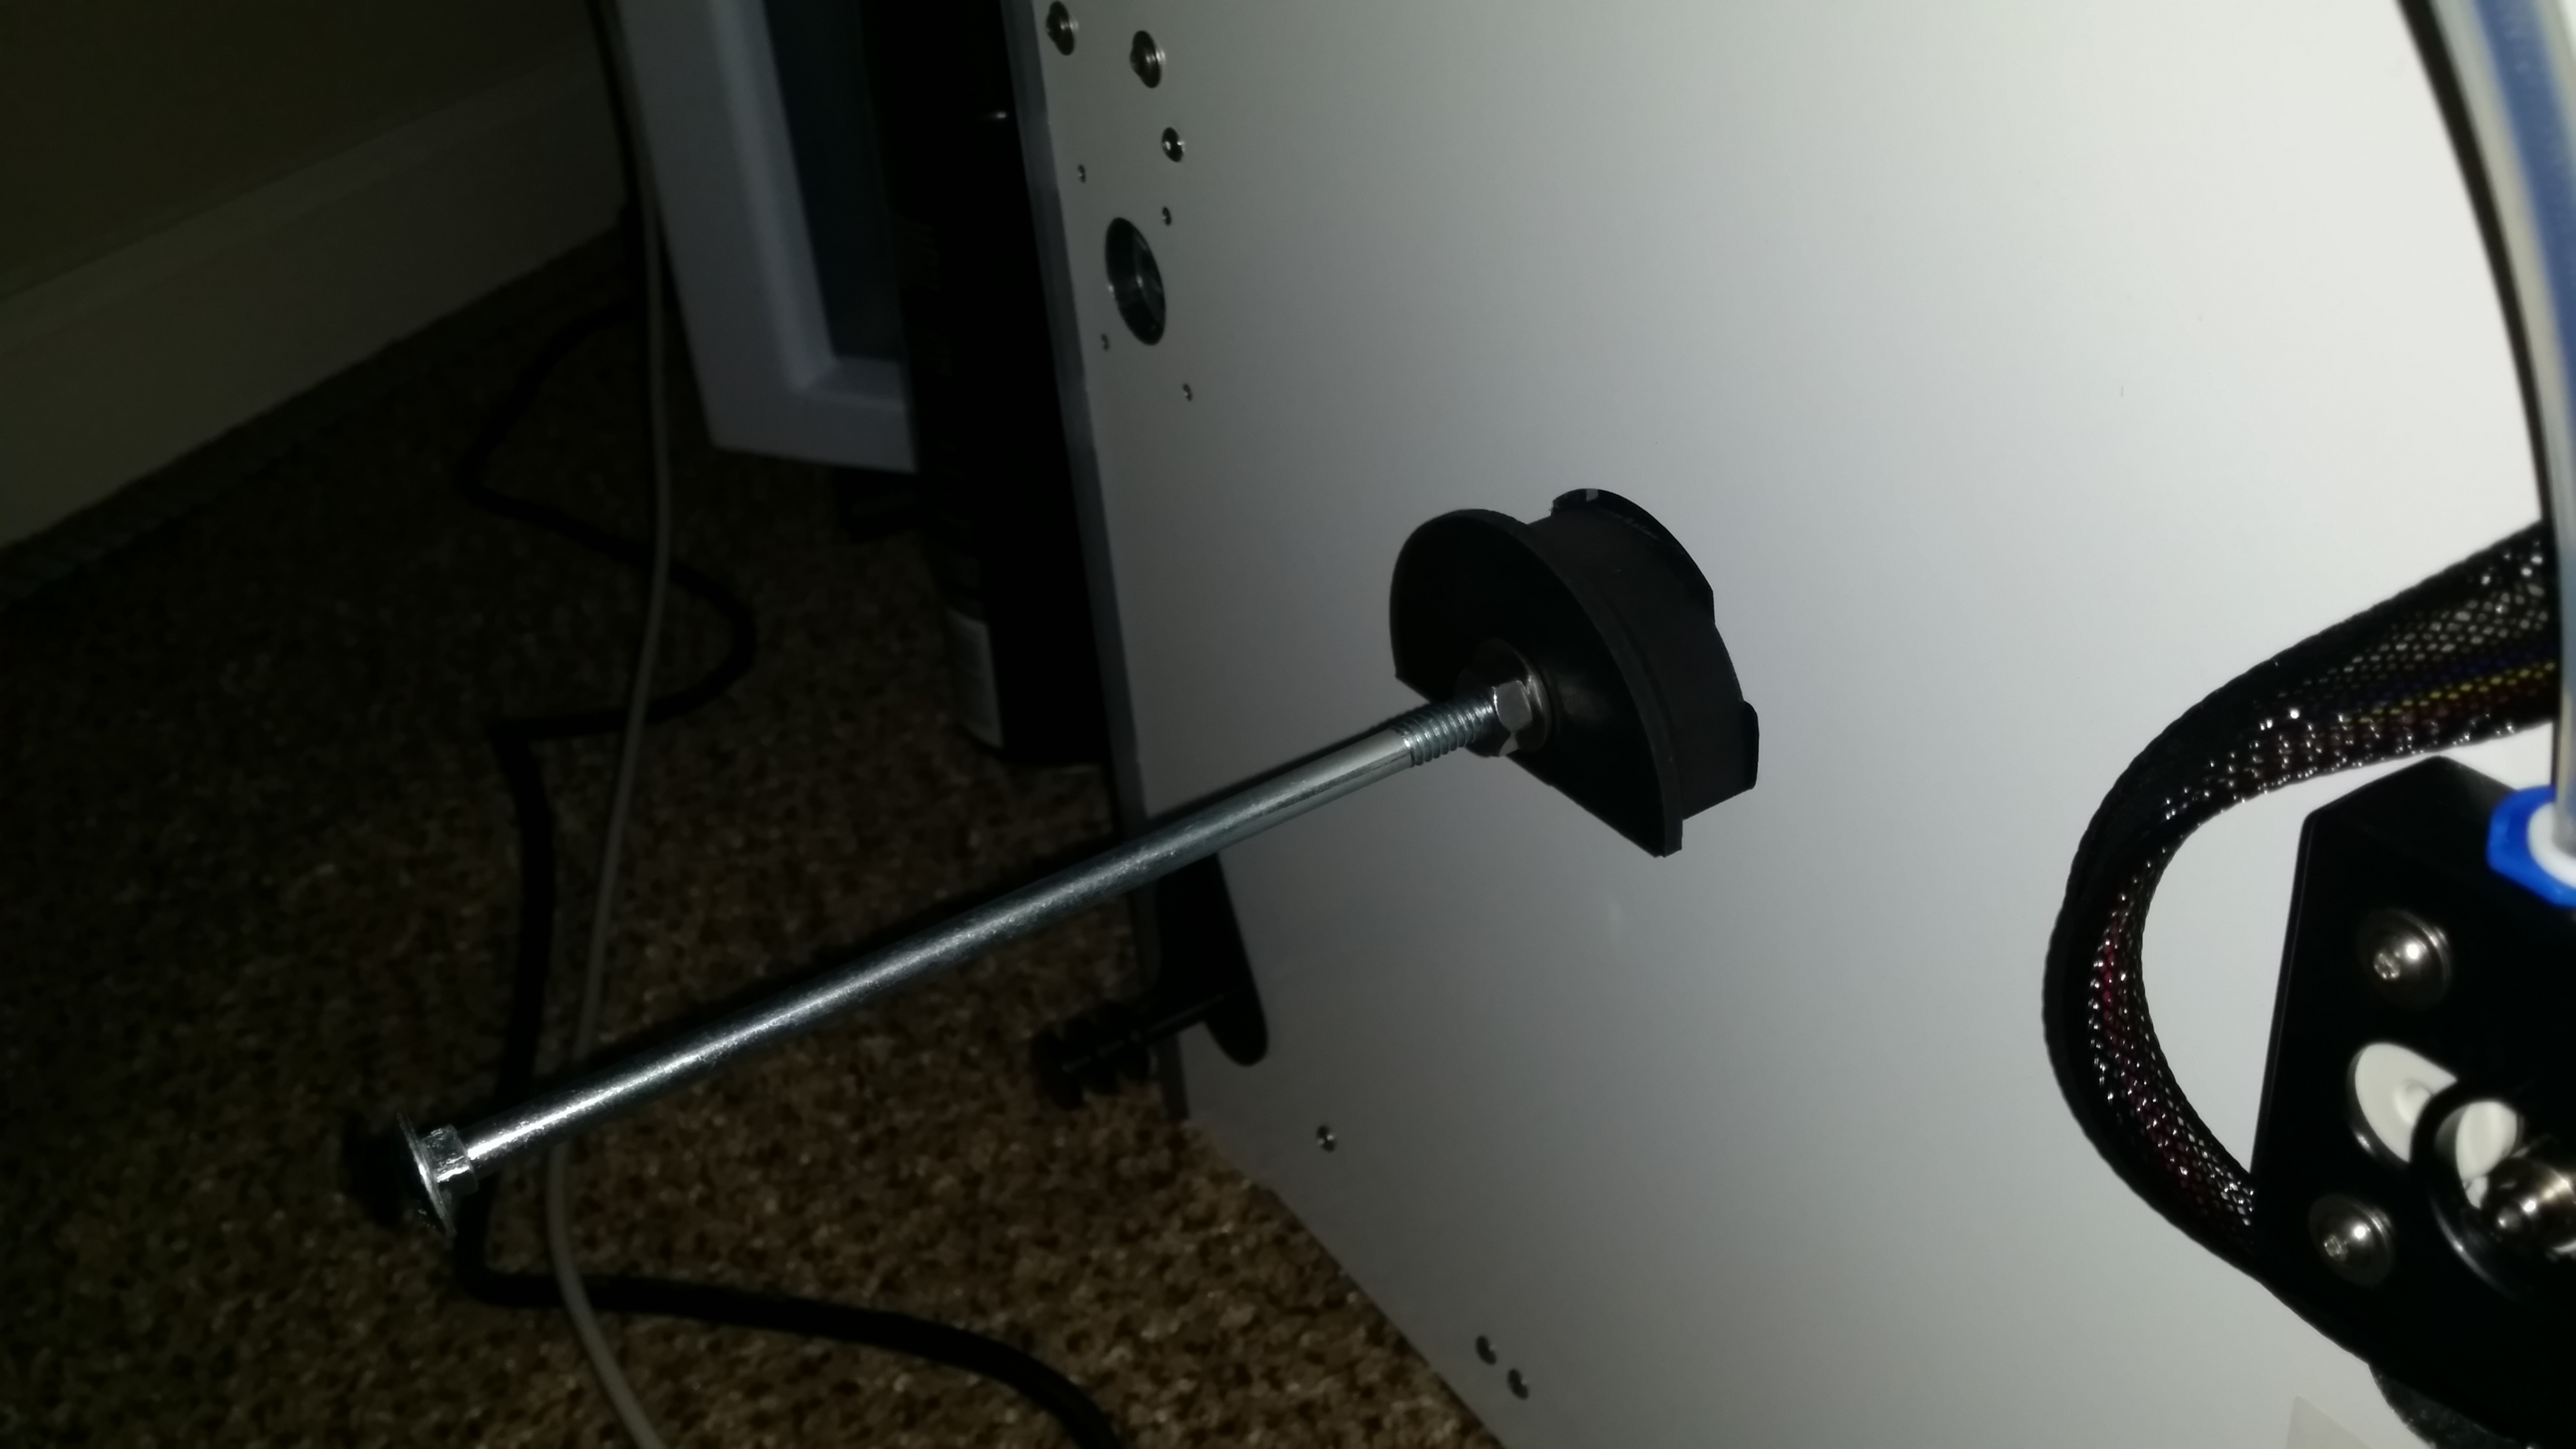
This is an upgrade to the Ultimaker2 3D printer for people who have spools that do not fit the original spool holder, and spools that are too tight and thus do not feed smoothly, causing under-extrusion.
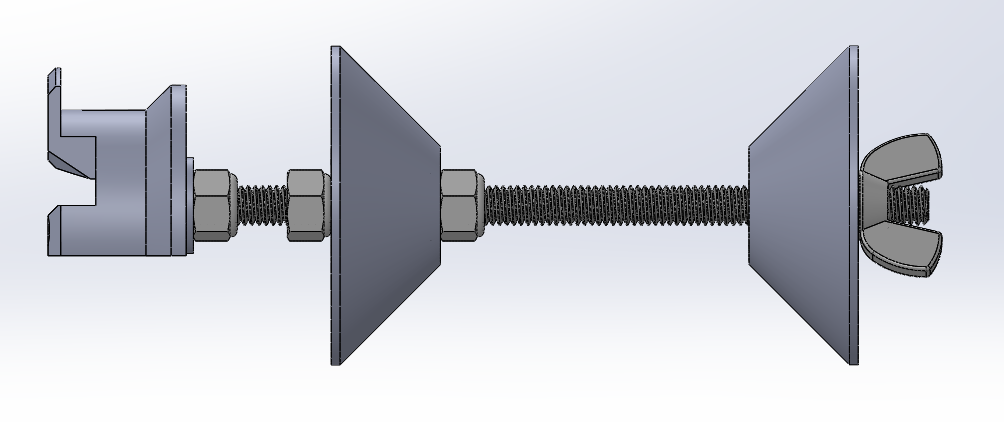
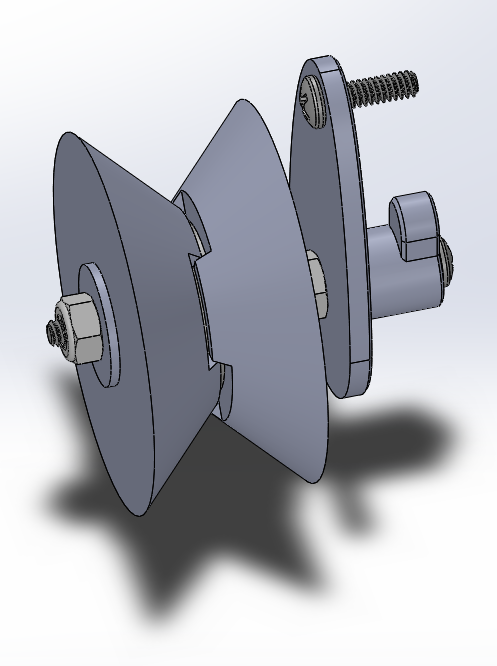
It is composed of two assemblies: a replacement for the filament guide and a replacement for the spool holder. Both utilizes ordinary skateboard bearings to achieve smooth rotation. The conical shape of the spool holder allows for any sized spool to be used, easily swapped because it uses a wing nut.
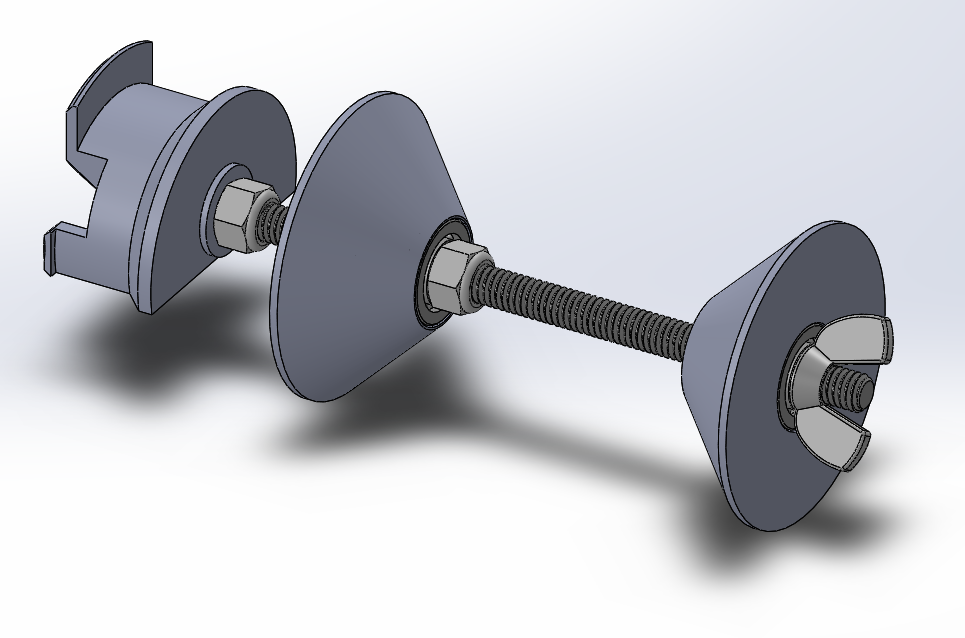
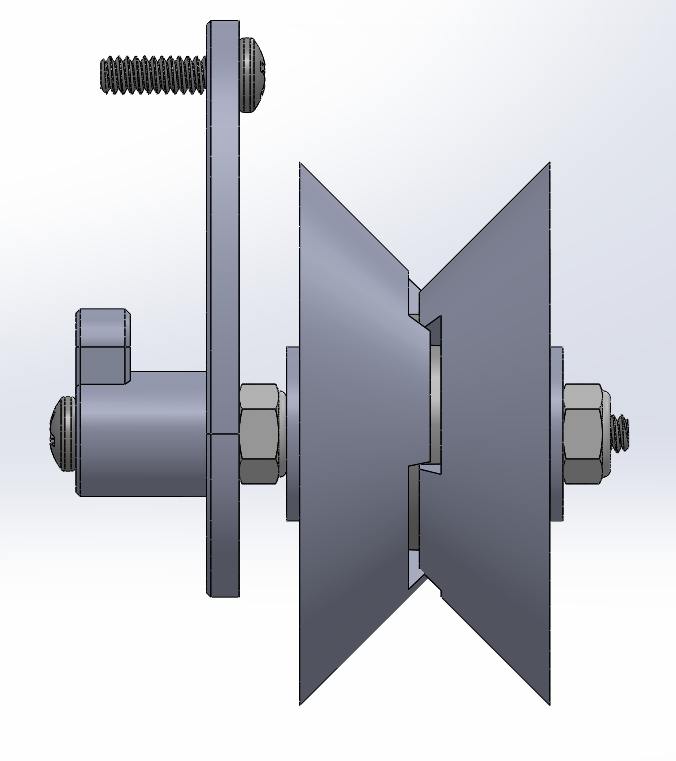

Files are available on YouMagine. I want to emphasize that I am sharing the STEP files, not just STL, because STL are harder for people to import and modify than STEP files. SolidWorks files are also provided.
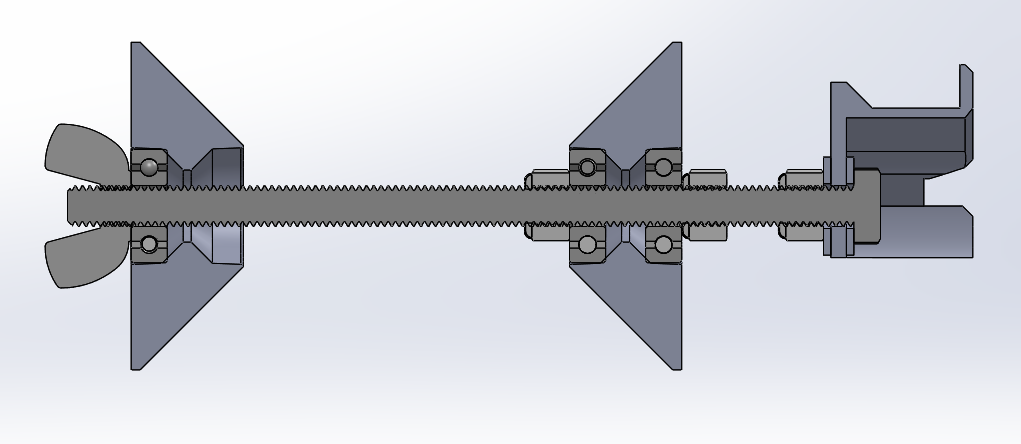
The cross section images shows you how to assemble the upgrade parts. The screw diameters are #6 for the filament guide and 5/16″ for the spool holder. Please figure everything else out from the cross section images.
You should probably go to other tech websites for all the details but I’m using my own blog to jot down my thoughts. (I will update this post with each passing day of CES 2015) Continue reading
I have been using my new Aquarium Computer for a week now. It’s performance is great, but that is subjective, because I built it for my own needs and I feel that it meets them perfectly. The circuit I built for it is having problems, I will investigate further.
My trusty laptop is showing its age. 8 GB of RAM is not enough for the amount of 3D stuff I do now, and it can’t run the latest games at all any more. Since I got a full time job now (instead of a constantly travelling student), it’s time to get a desktop PC (first PC build, yay). But the process of building a PC is pretty boring, it’s just an exercise of picking out compatible parts for the right price. I decided to make it slightly more interesting by submerging the entire computer in a fish tank full of mineral oil.
UPDATE March 2015, I added a funny naked HDD activity indicator
Some pictures from the build process
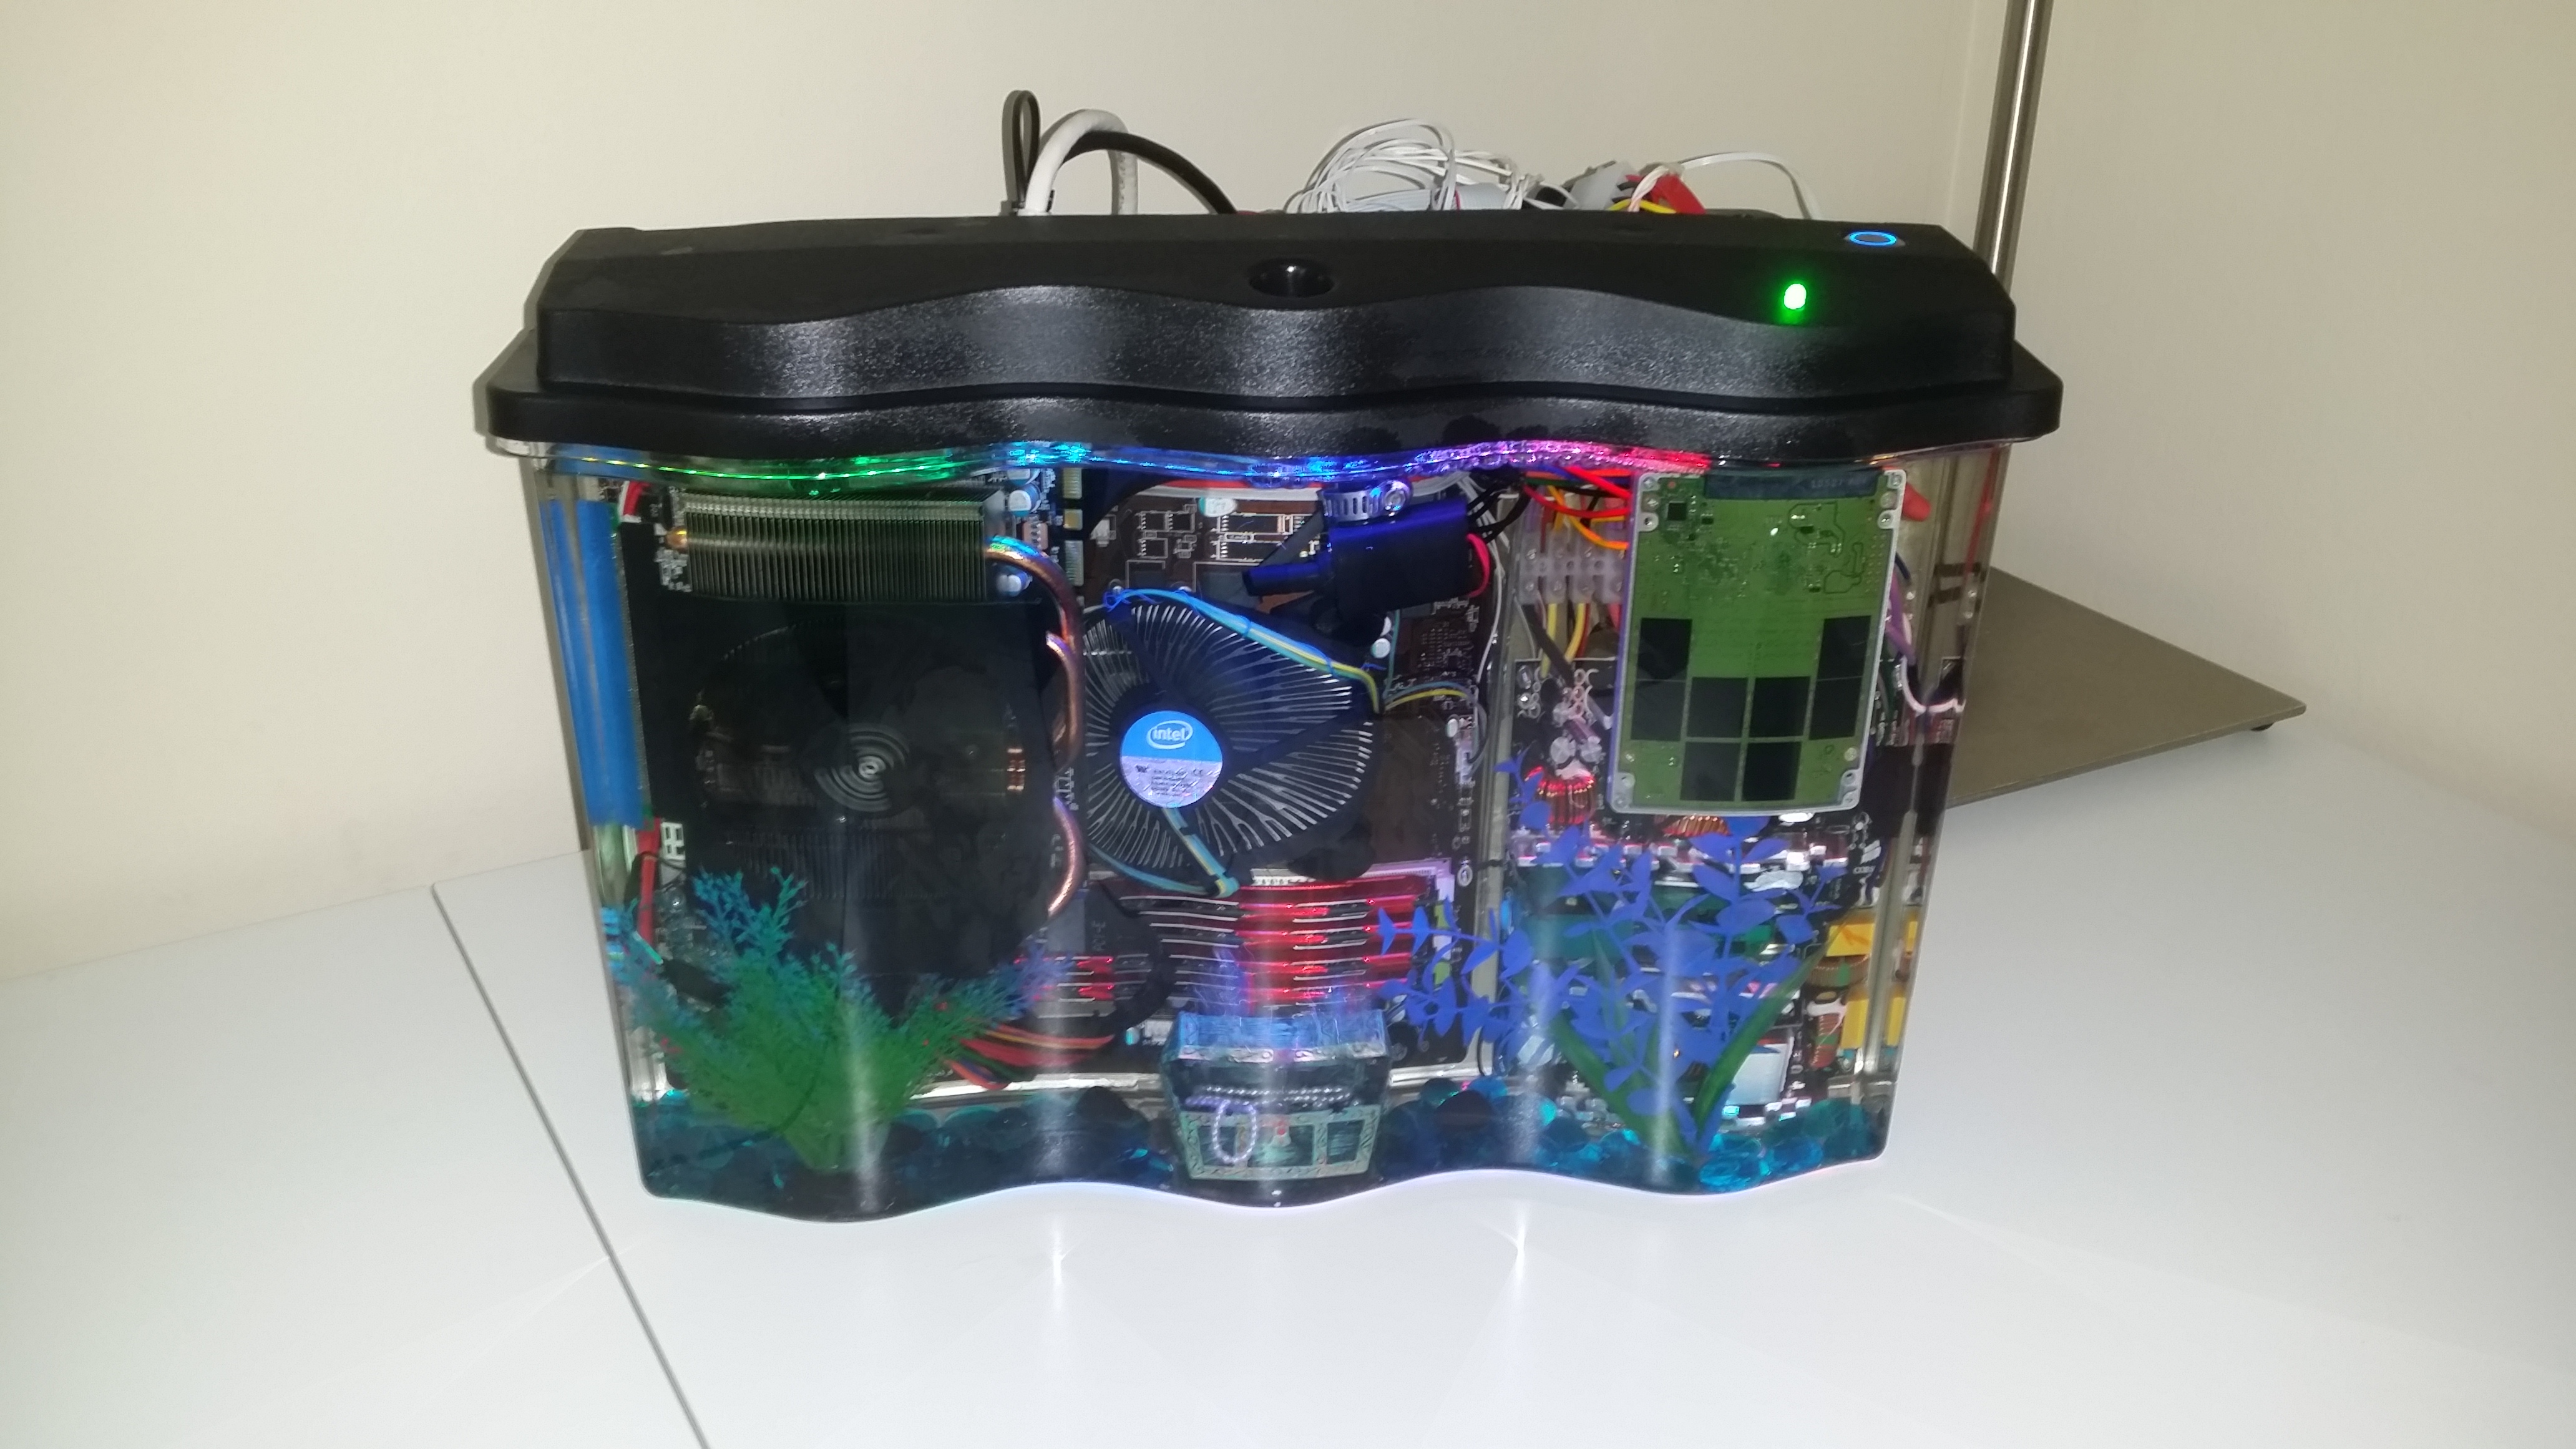
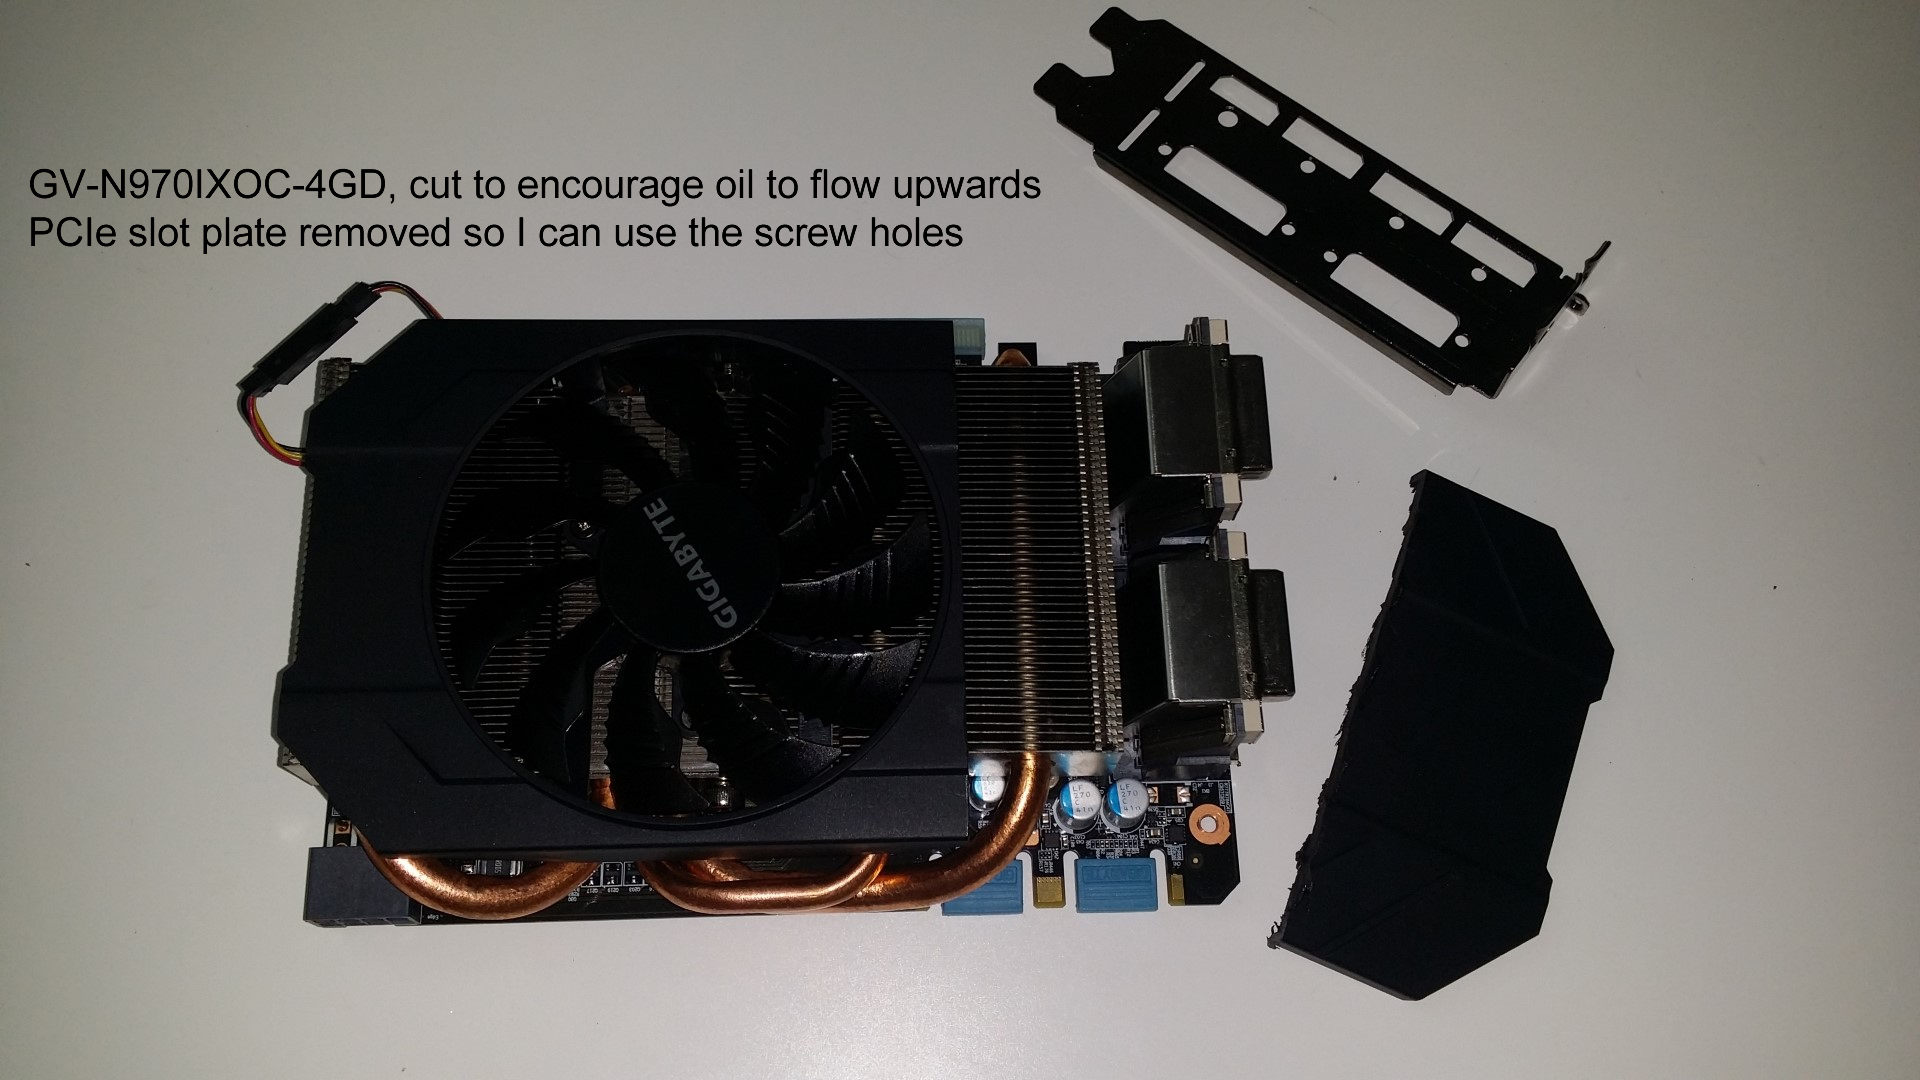
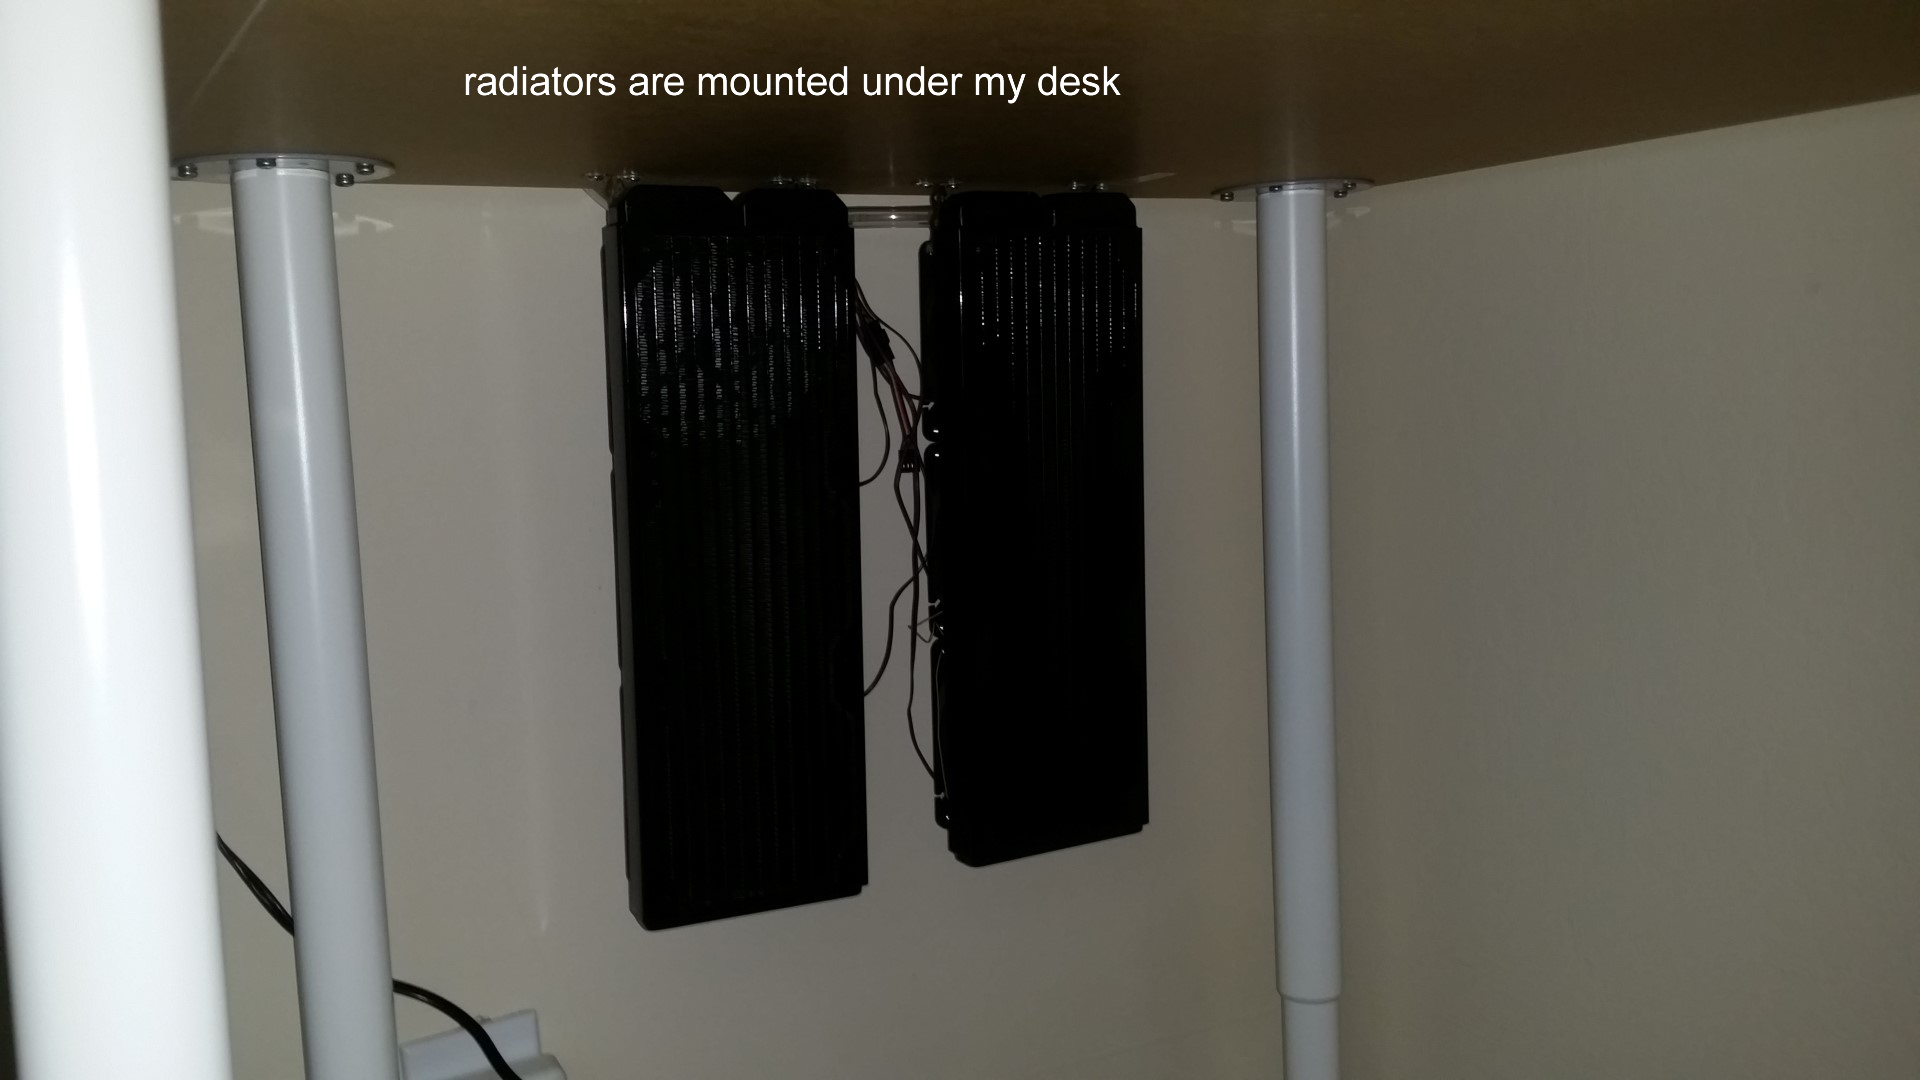

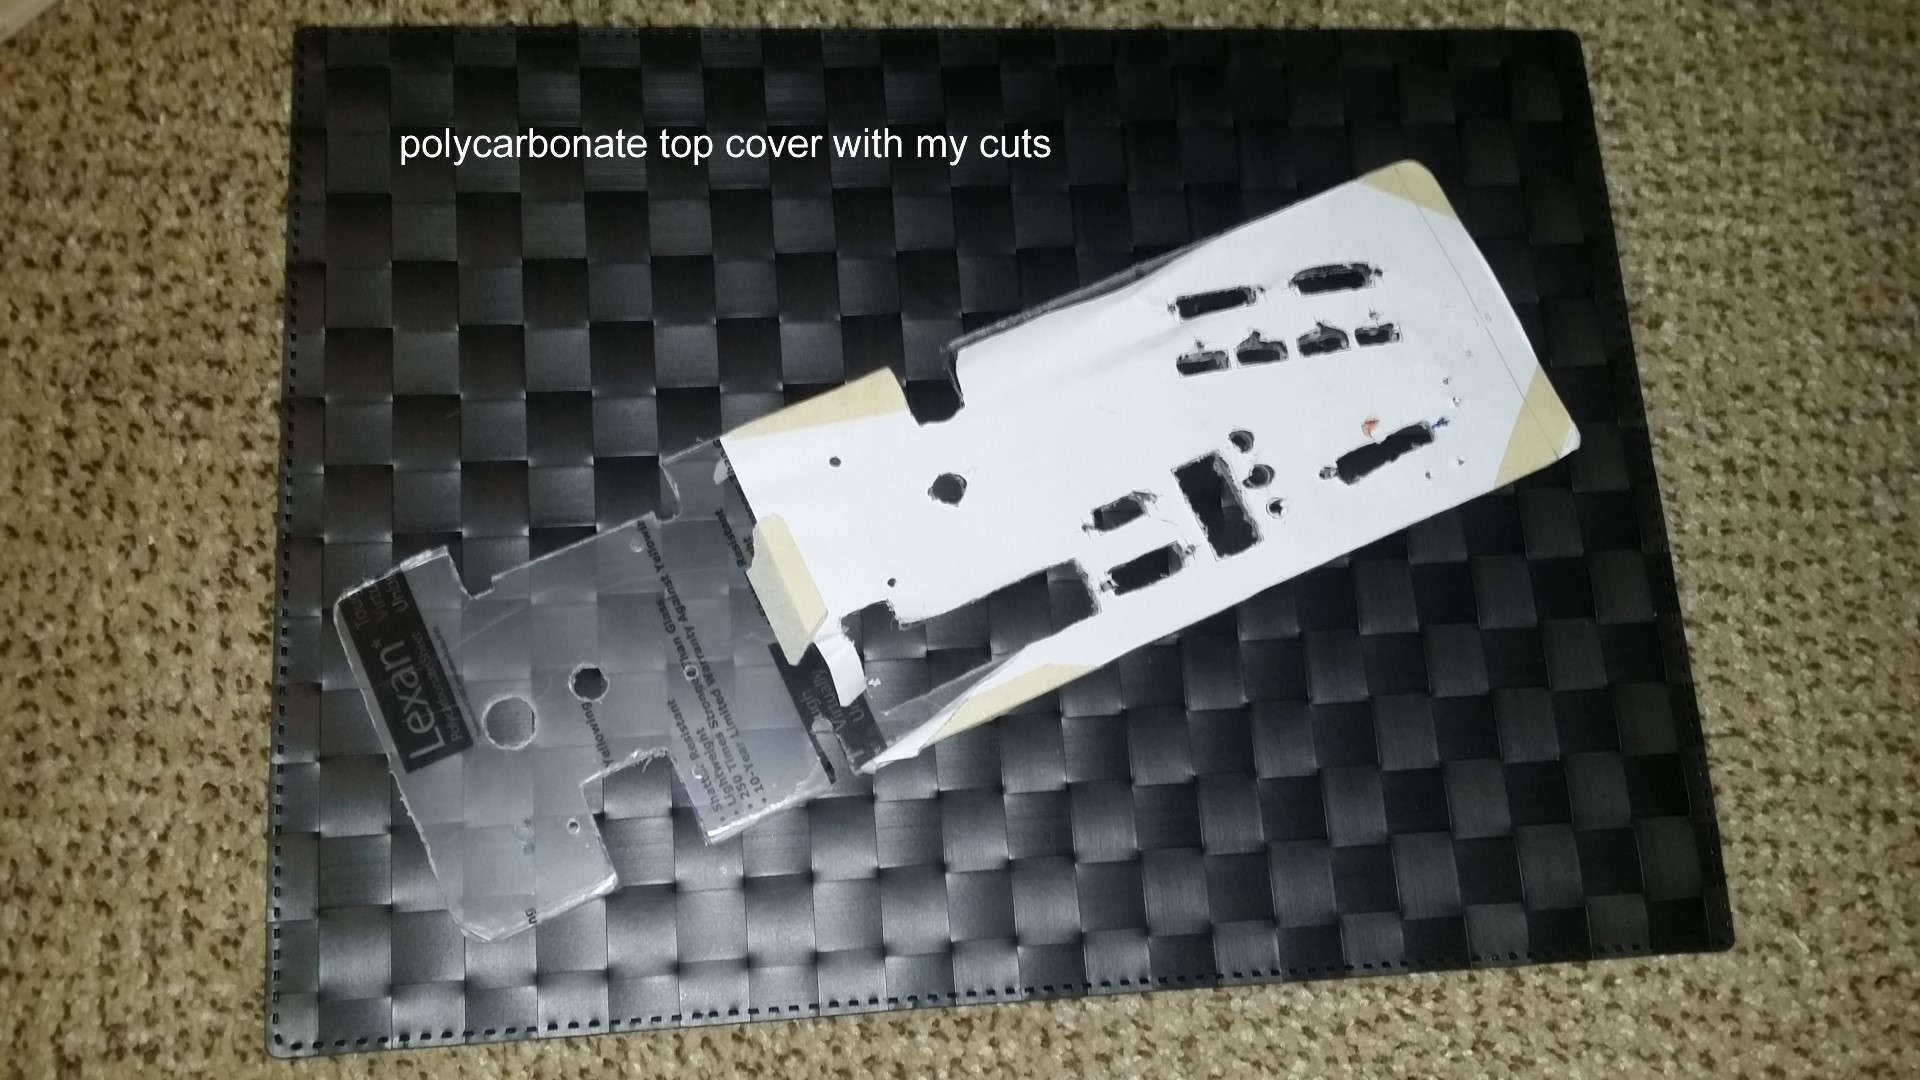
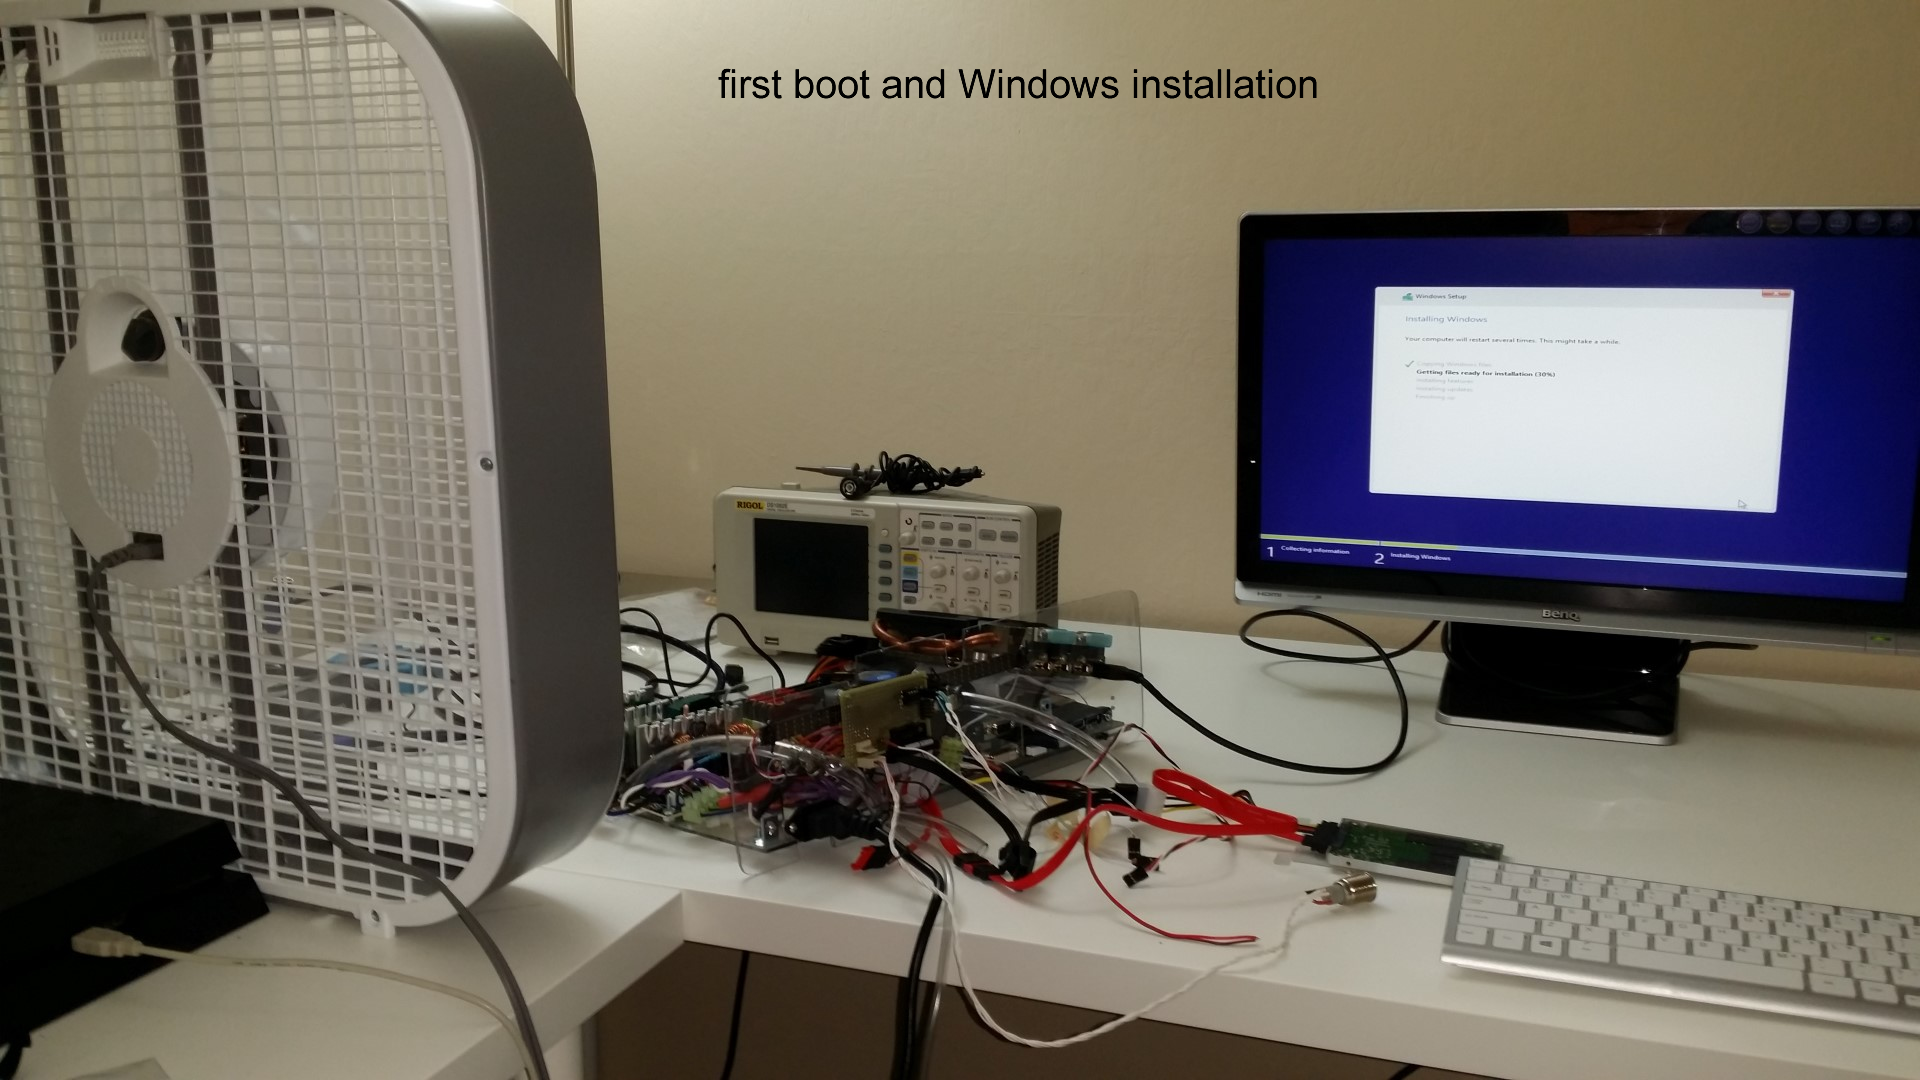
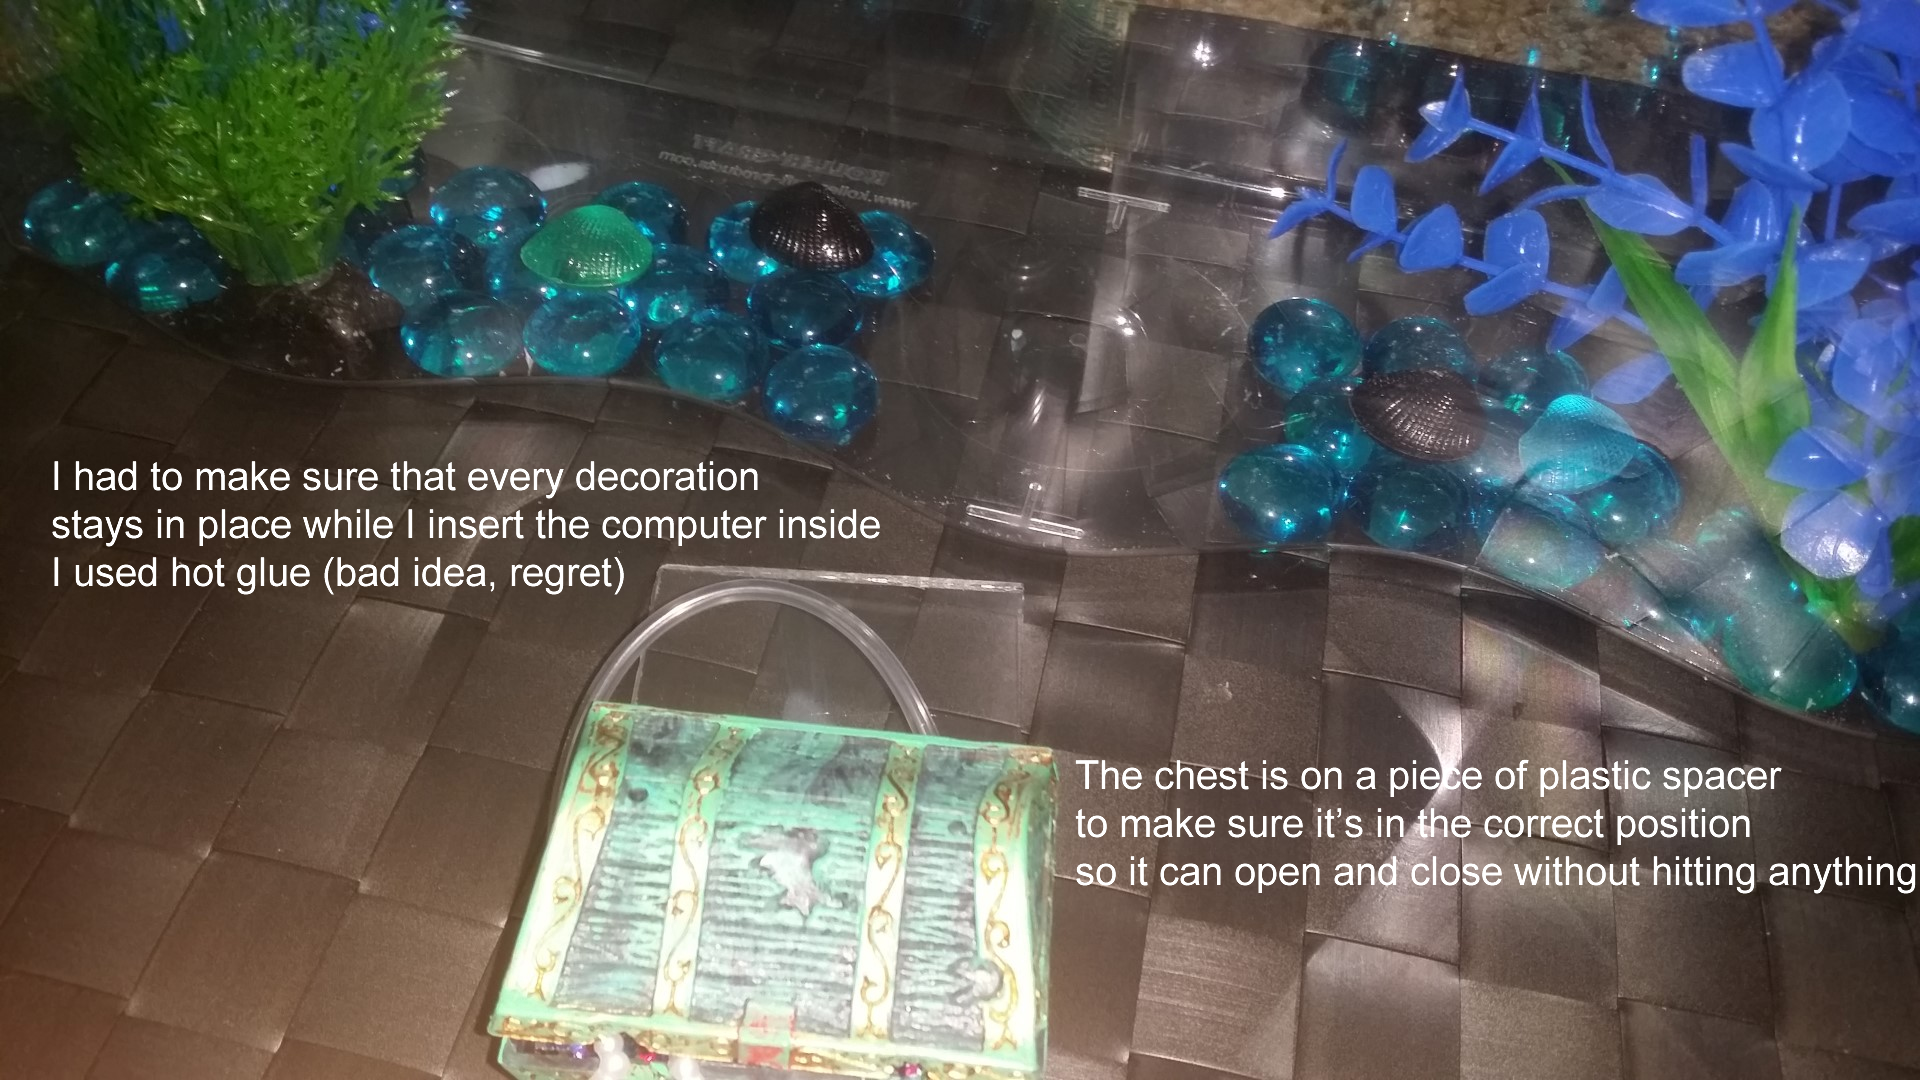
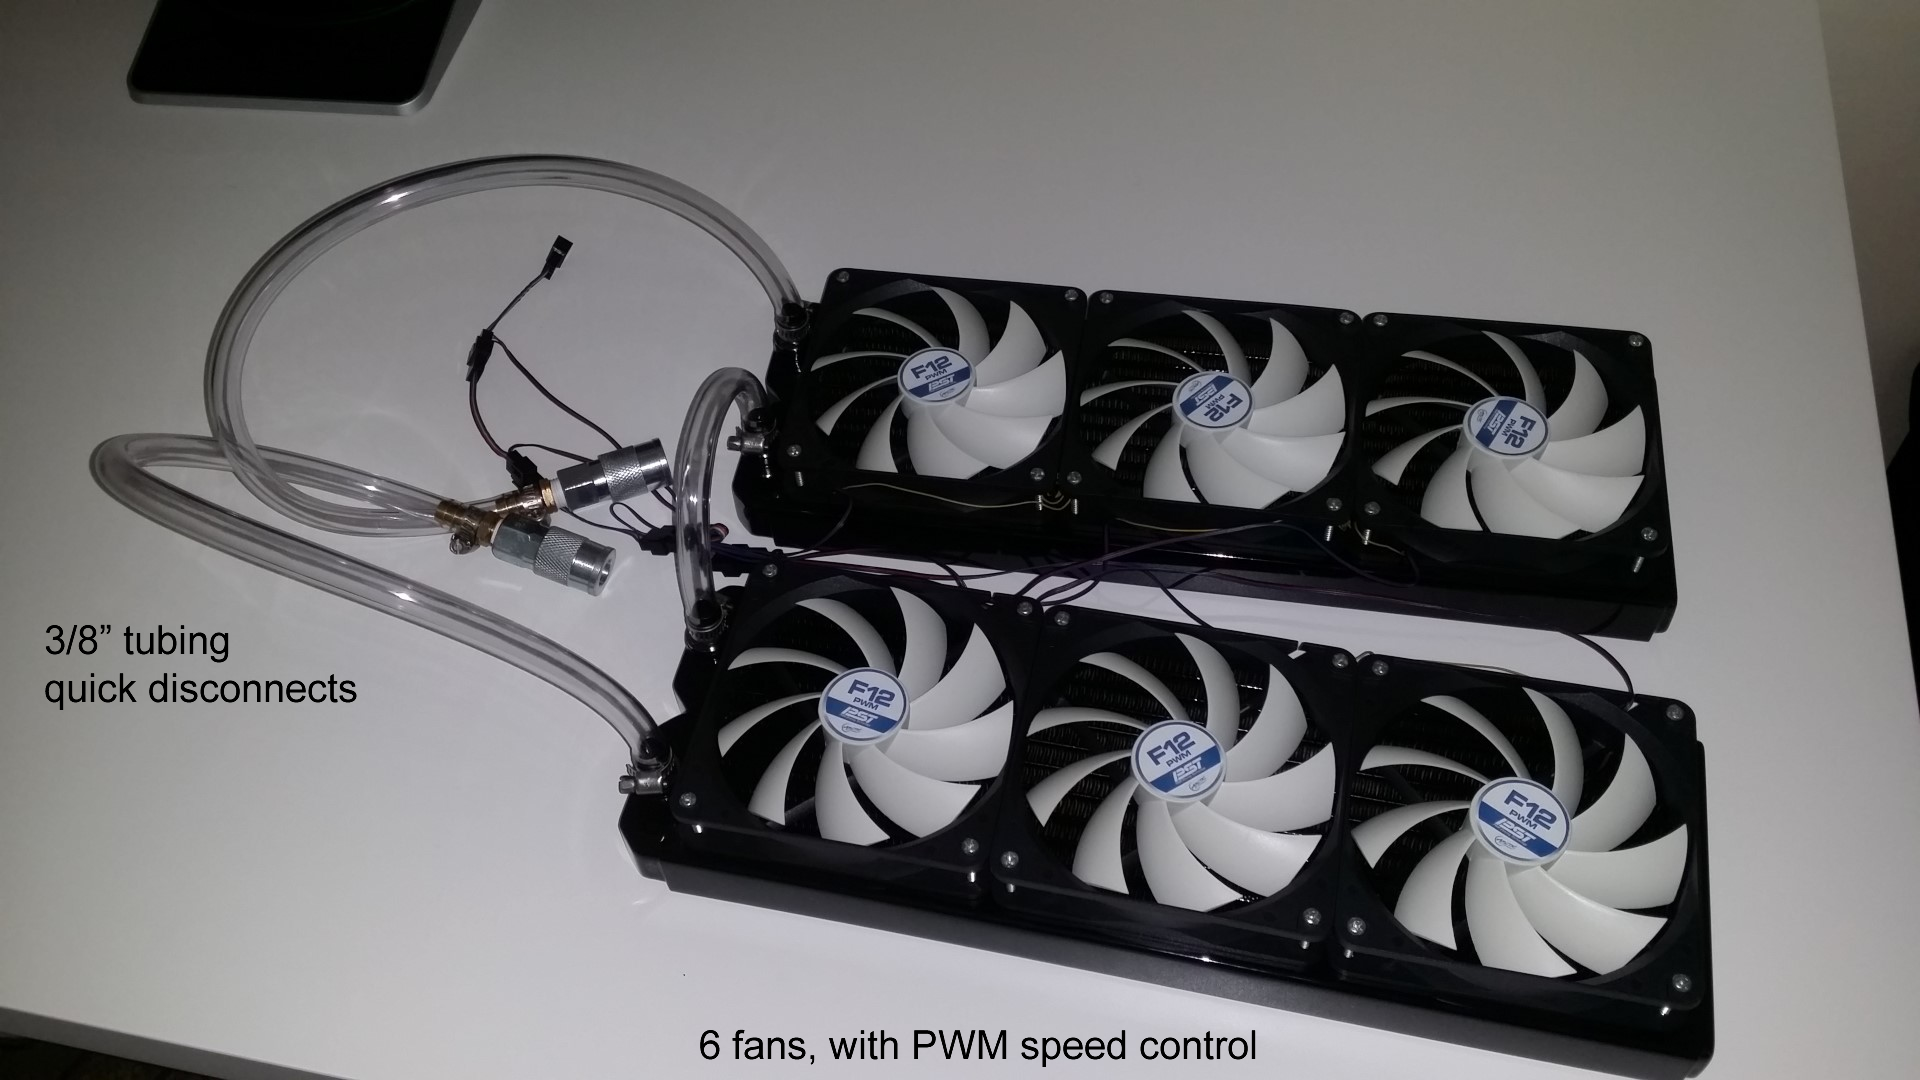
Intel i7 4790S, Nvidia GTX 970, H97M chipset, Corsair CX600M. Built onto a polycarbonate tray that is then dipped into a fish tank full of mineral oil. Fancy features like bubbling treasure chest, NeoPixel LED strip, oil pump+radiator, temperature monitoring, removable SSD.
(part list? fine… here… these are not the prices I paid but here it is http://pcpartpicker.com/user/frank26080115/saved/HFDmP6)
Comments and questions are welcome, I would love to chat with you!
Reddit posts, please upvote: http://www.reddit.com/r/battlestations/comments/2pdd3q/aquarium_computer_mineral_oil_submerged_details/ and http://www.reddit.com/r/buildapc/comments/2pdeak/build_complete_aquarium_computer_mineral_oil/
Hi Hack a Day visitors, small correction: there’s 32 GB of RAM, I just didn’t put the same item twice in the part list.
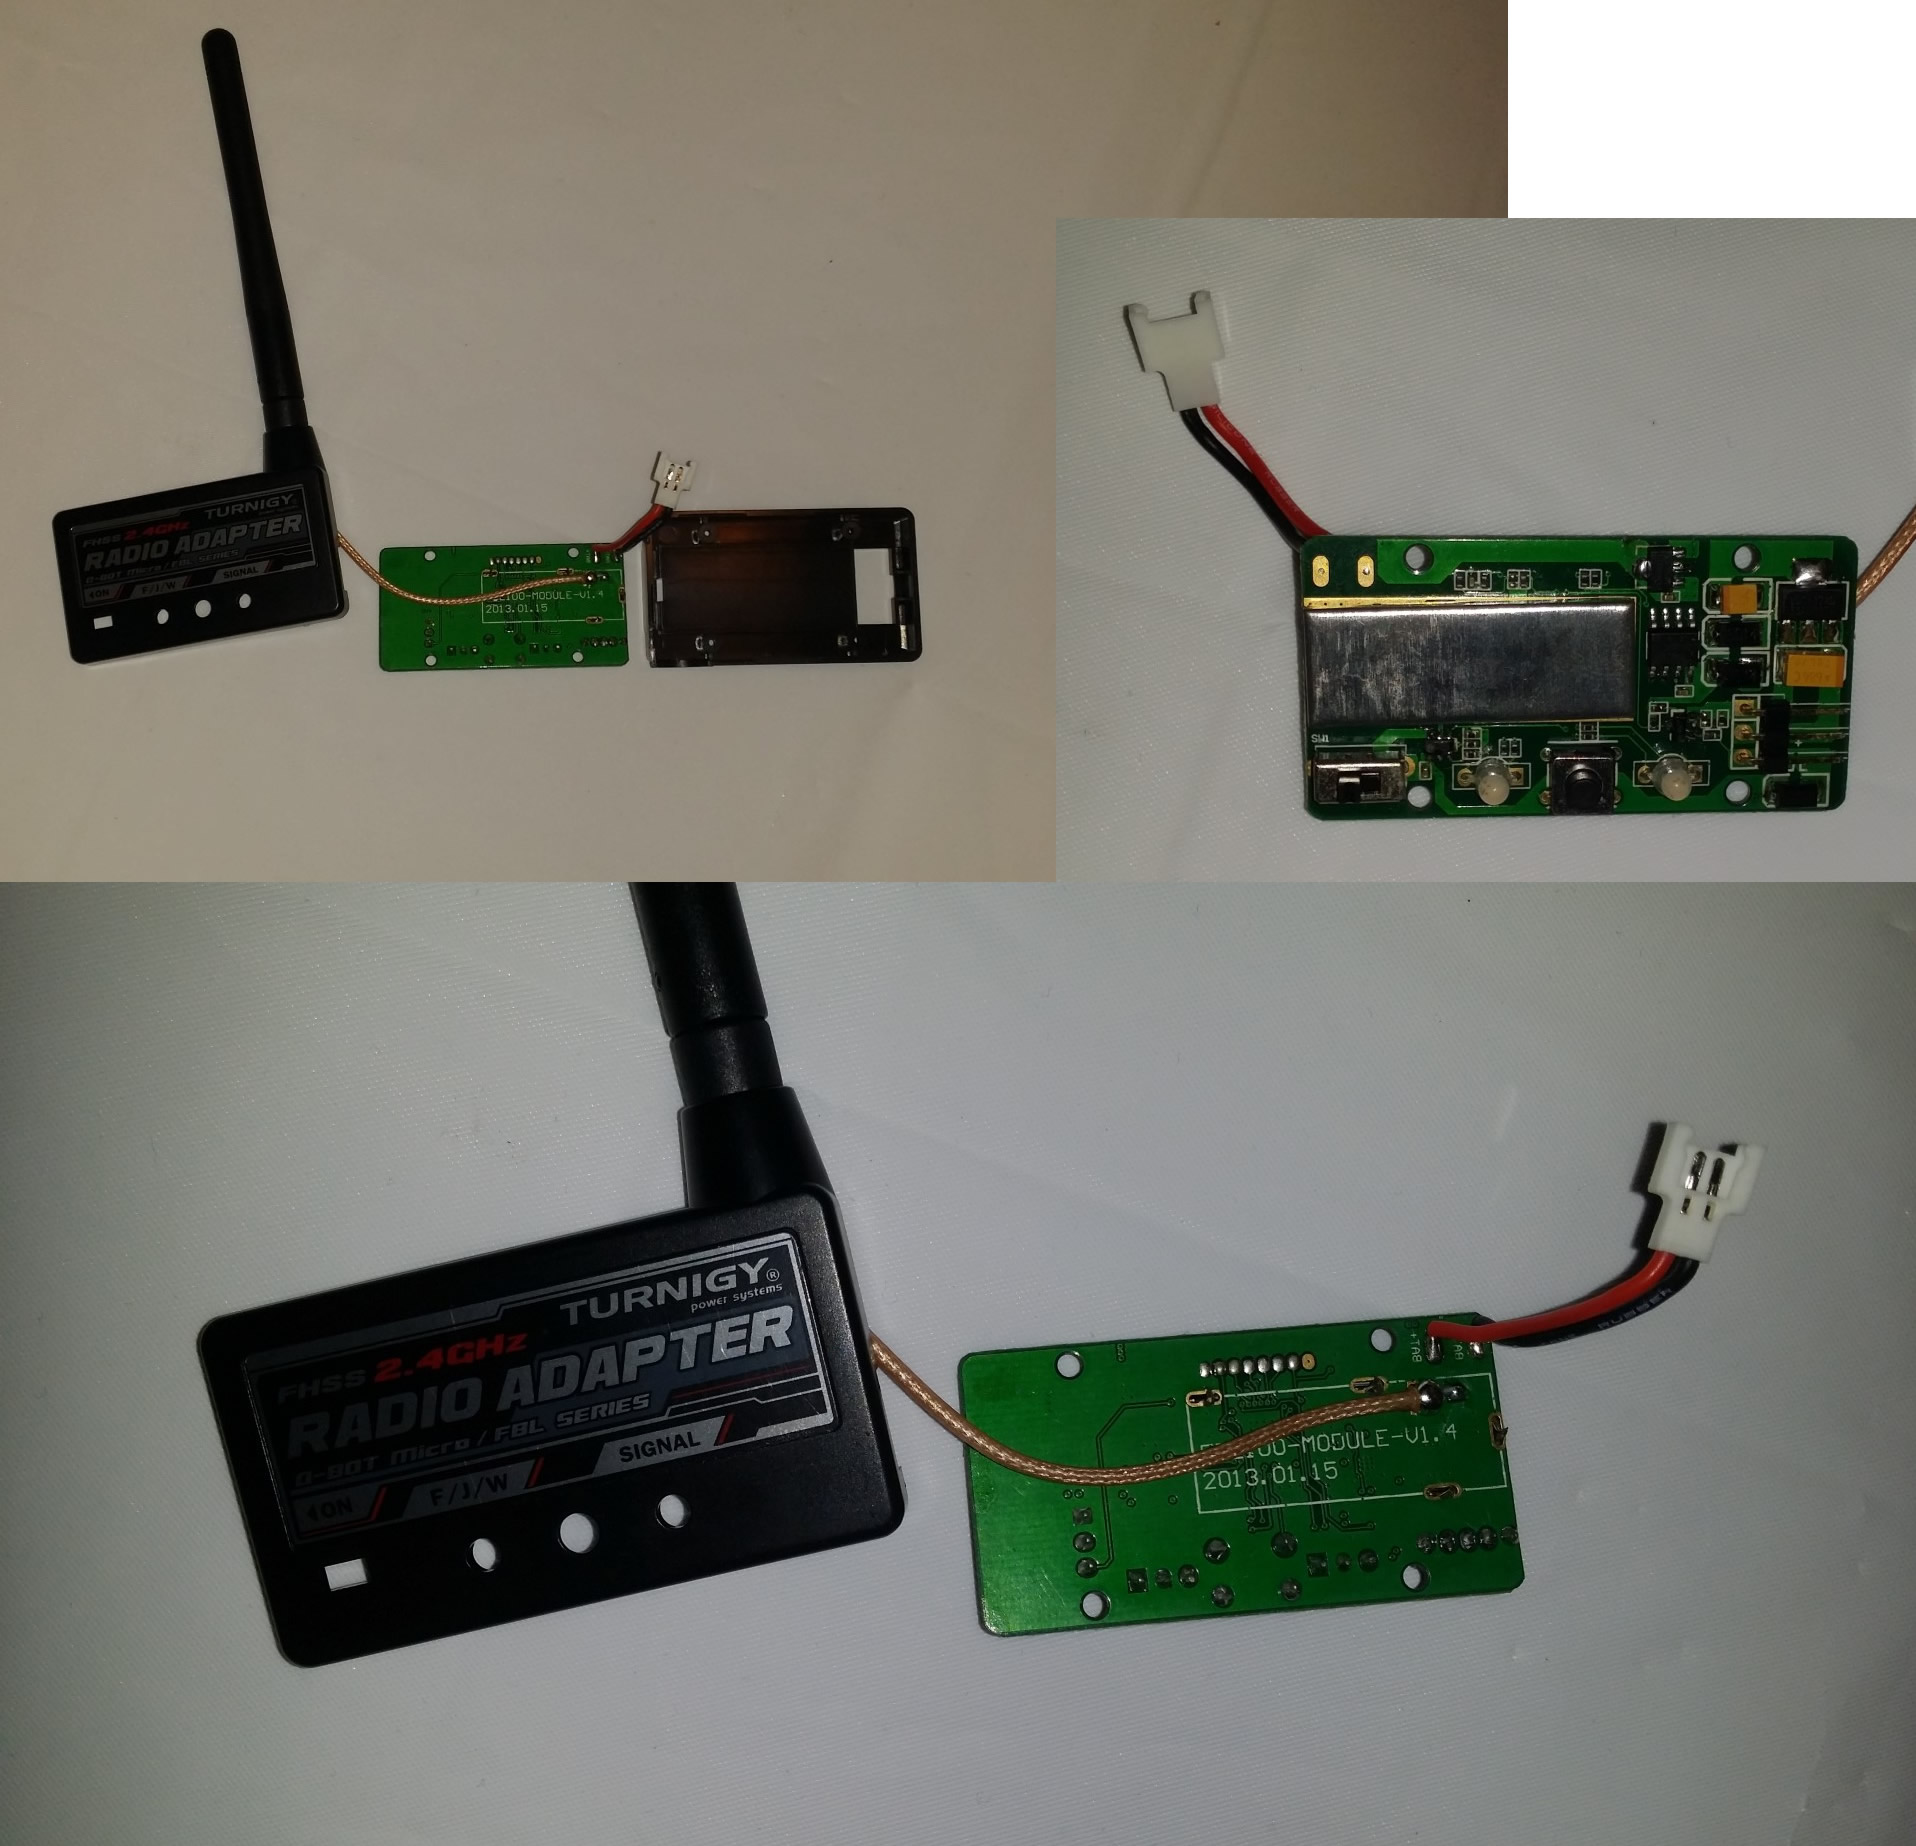
Most micro (palm sized) quadcopters are RTF and comes with a crappy cheap transmitter, and I really want to use my awesome expensive Taranis. I found out that Q-Bot comes with a tiny transmitter module that I can connect to my Taranis.
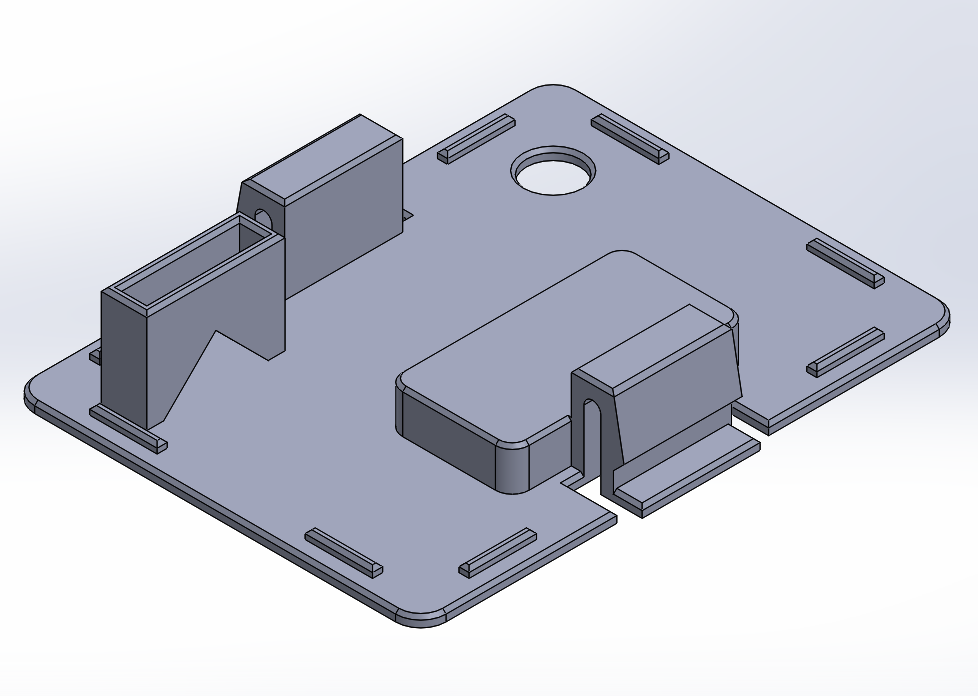
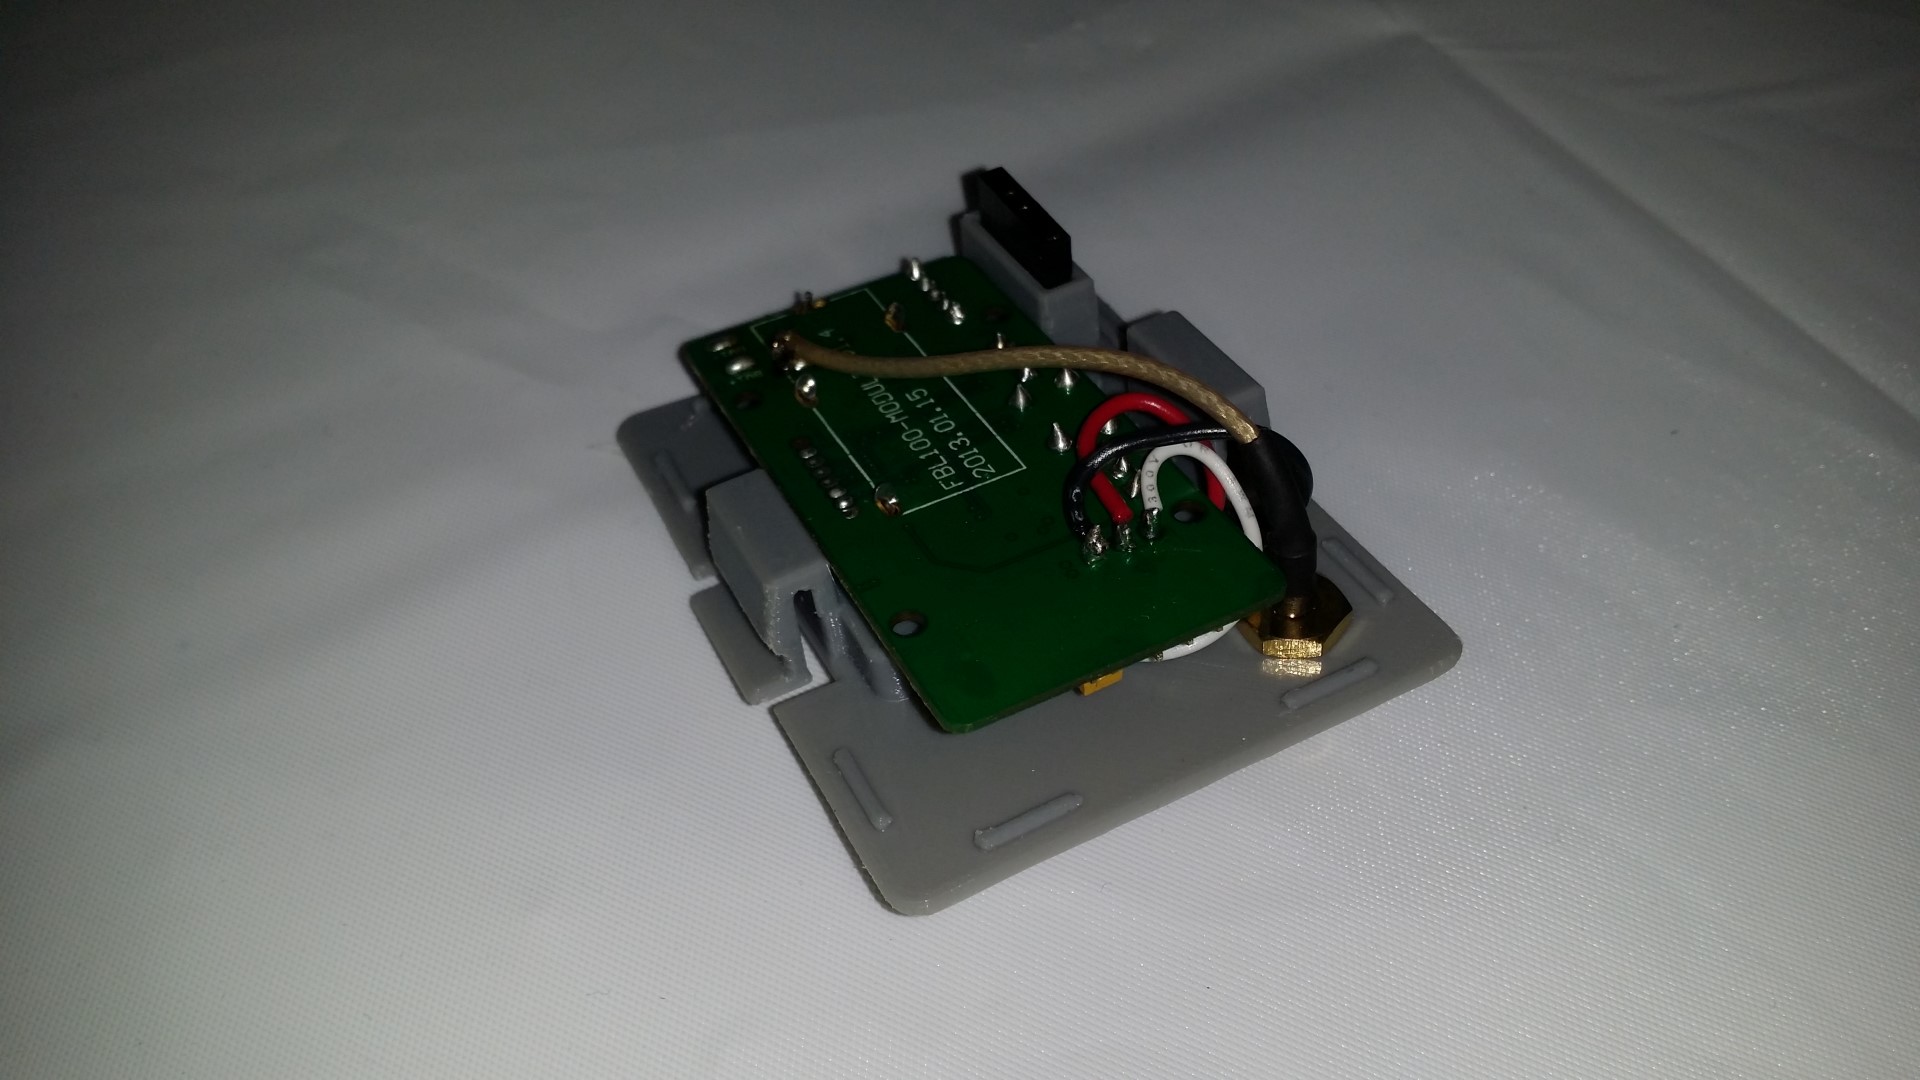
I didn’t want some ugly thing dangling off of my Taranis so I decided to 3D print a module that will contain the Q-Bot transmitter circuitry and plug into the Taranis’ module bay, which fits “JR” style transmitter modules.
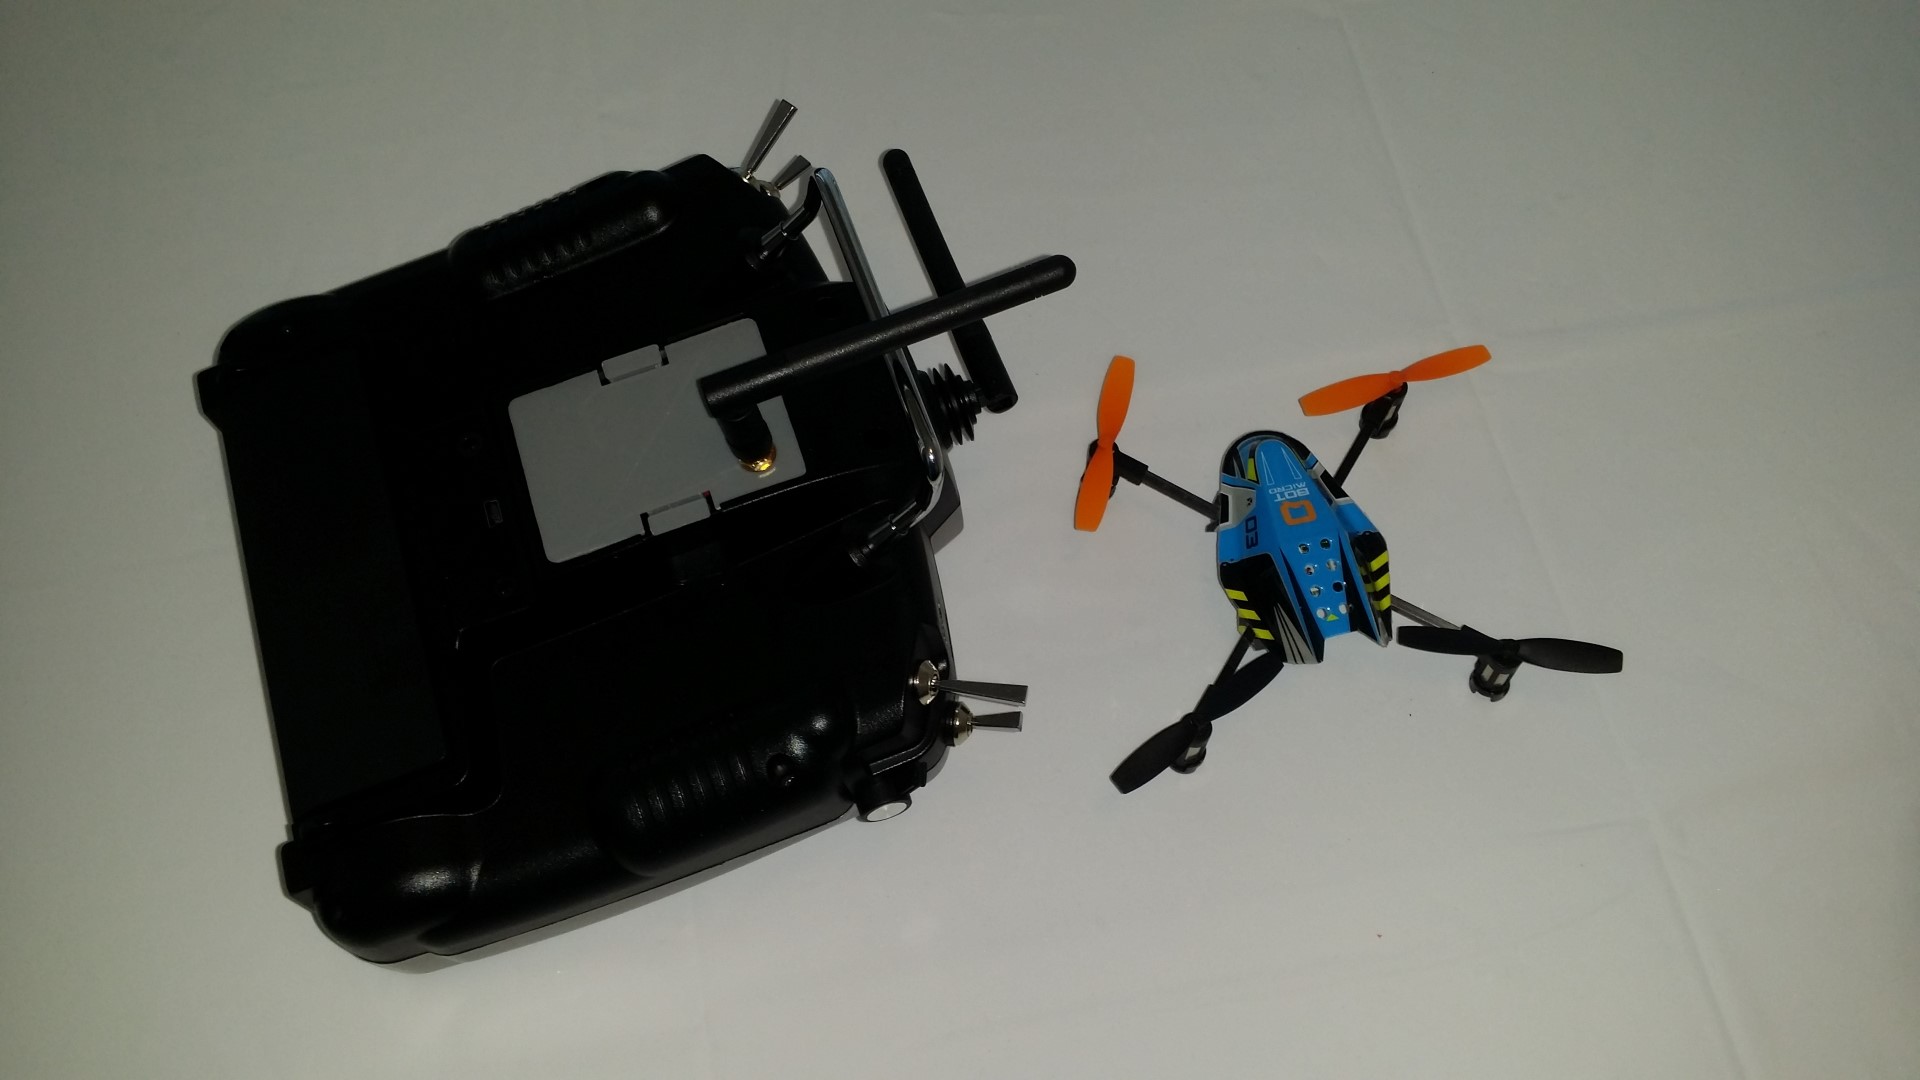
and here is what it looked like before:
The 3D files (SLDPRT, STEP, STL) Continue reading
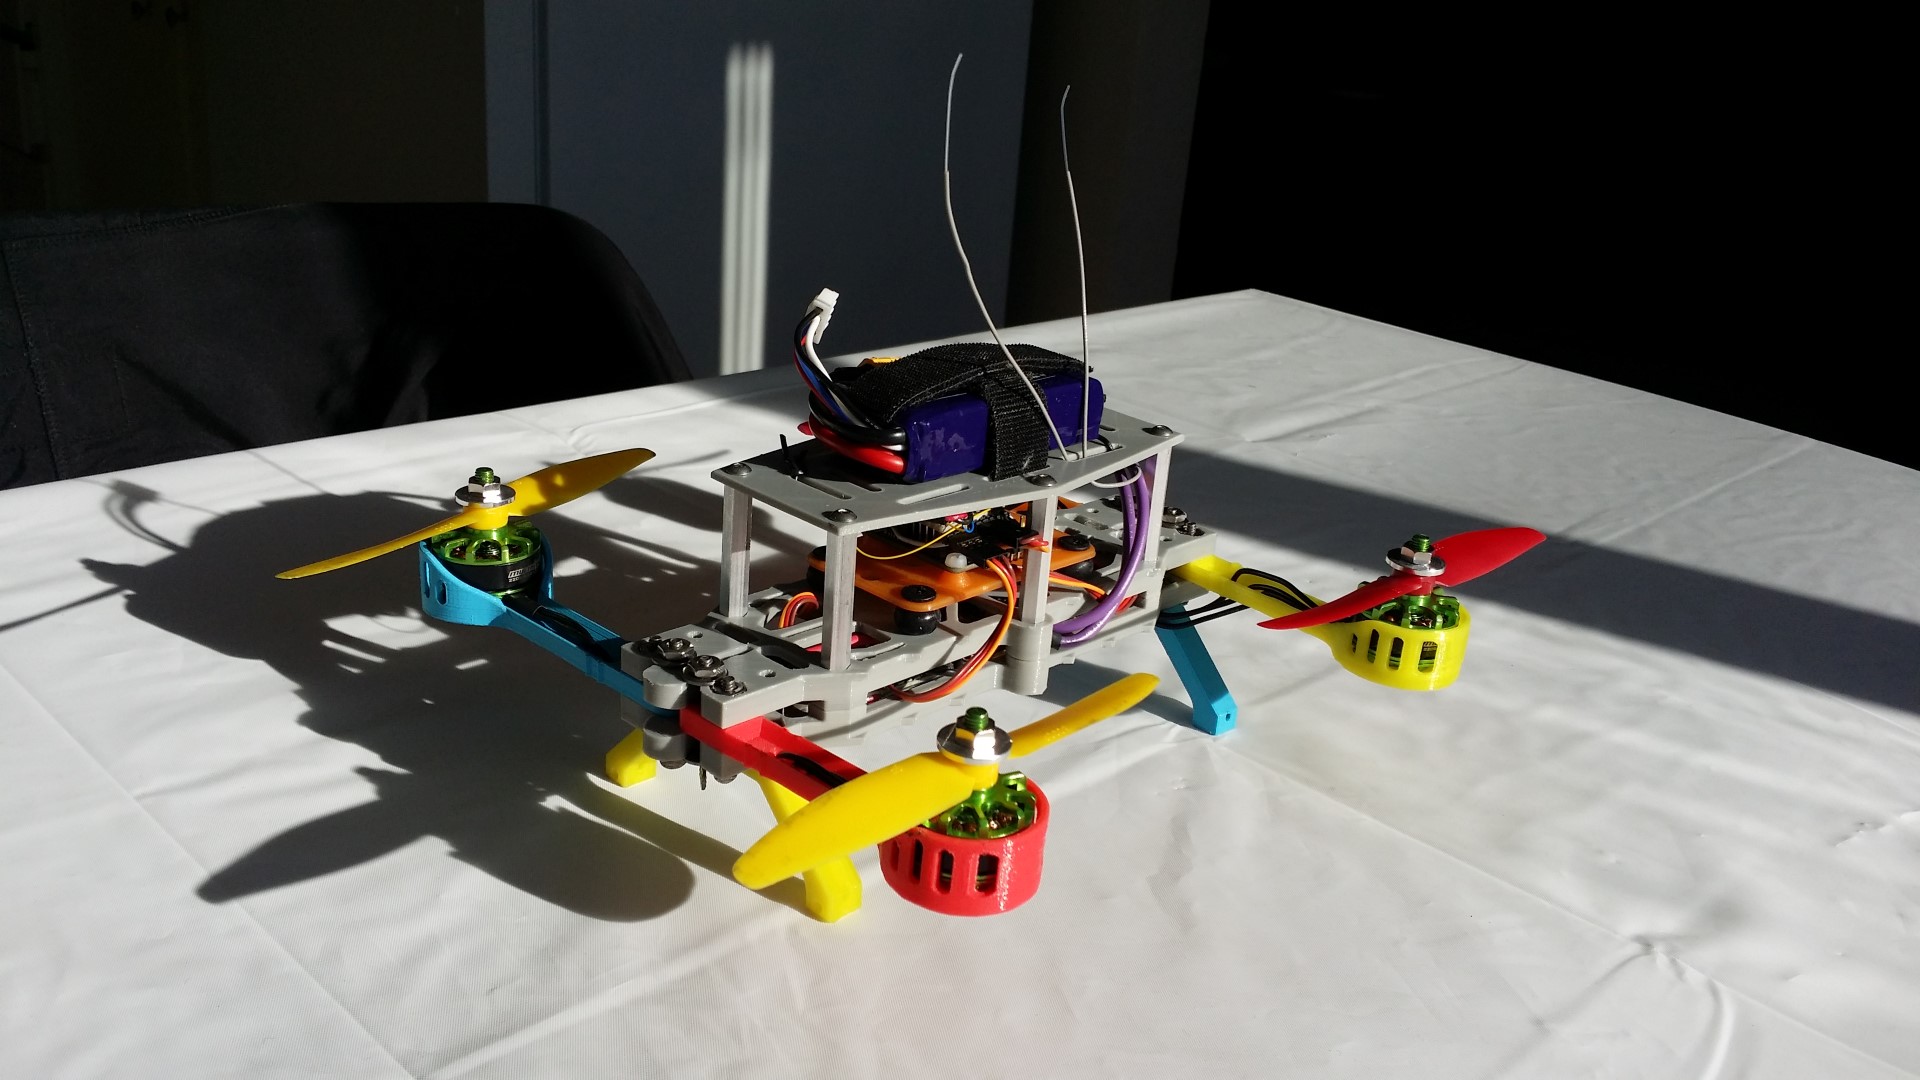
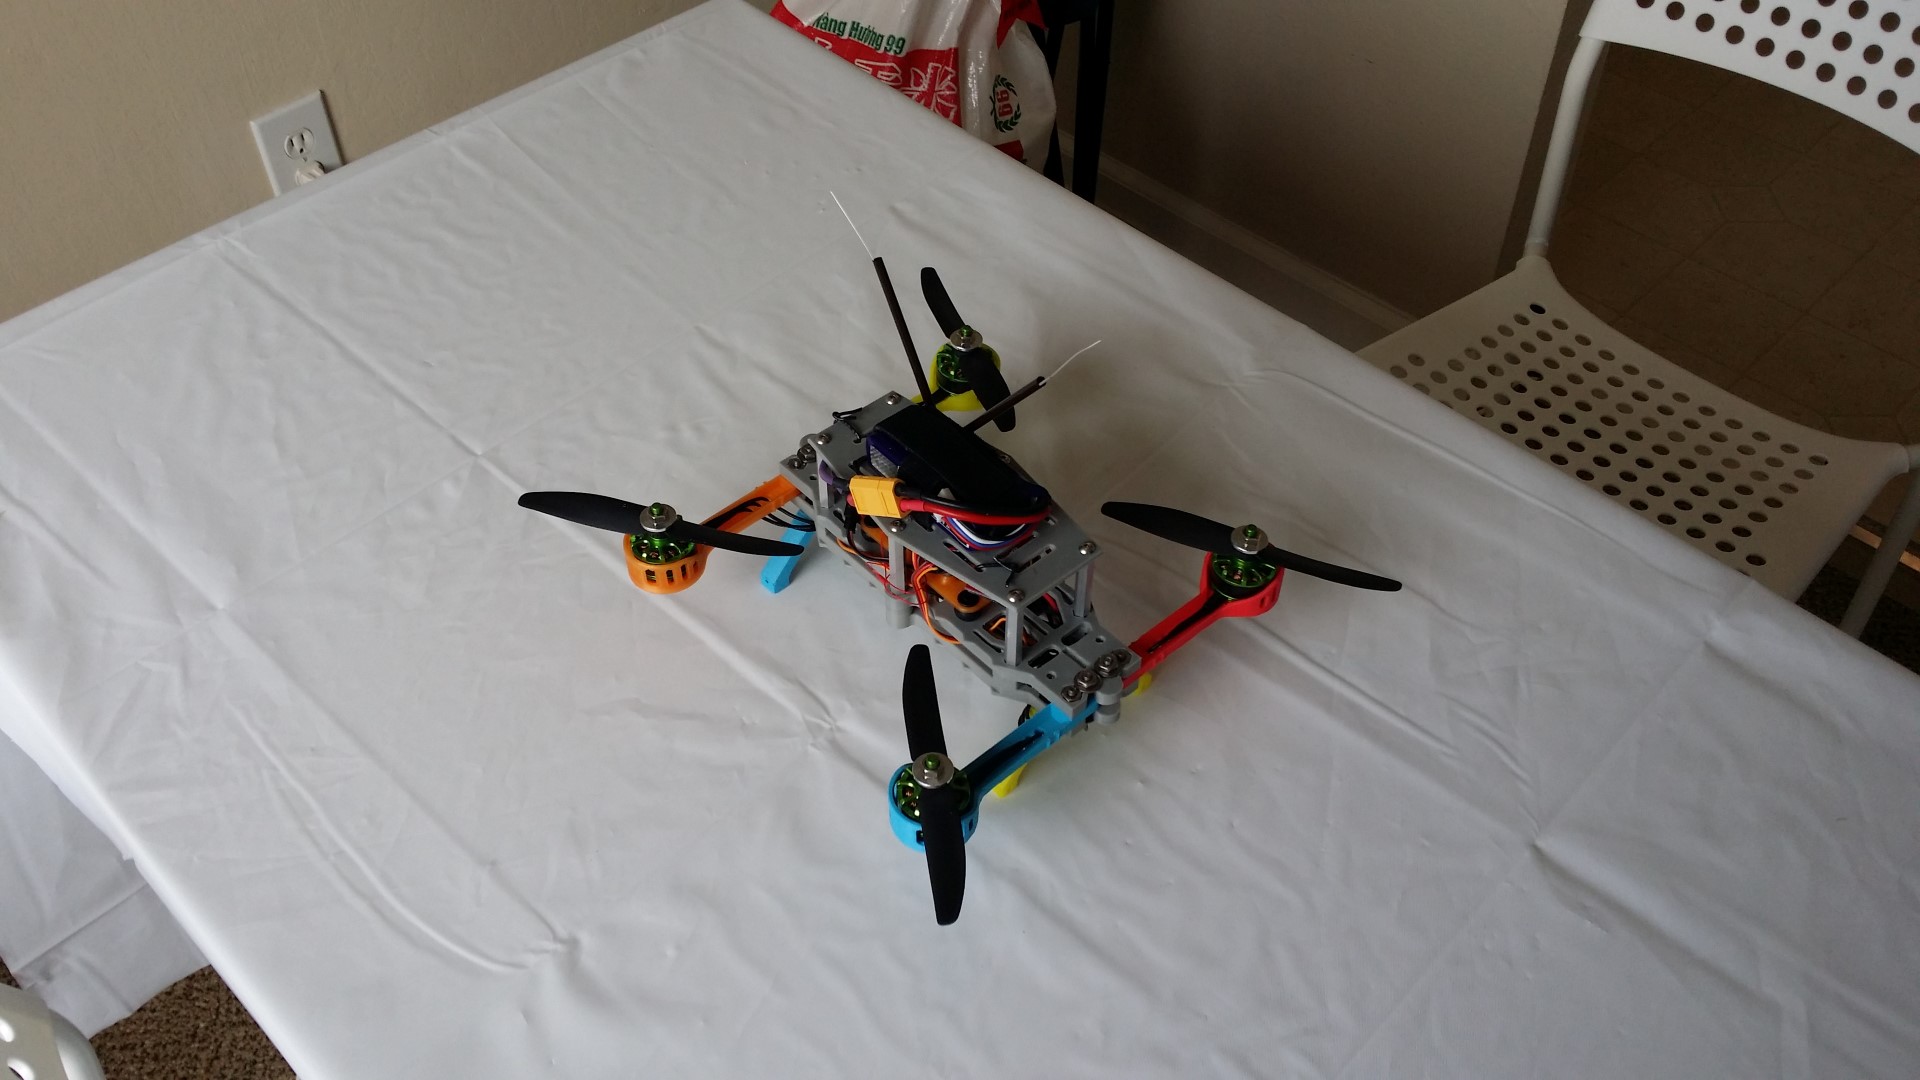
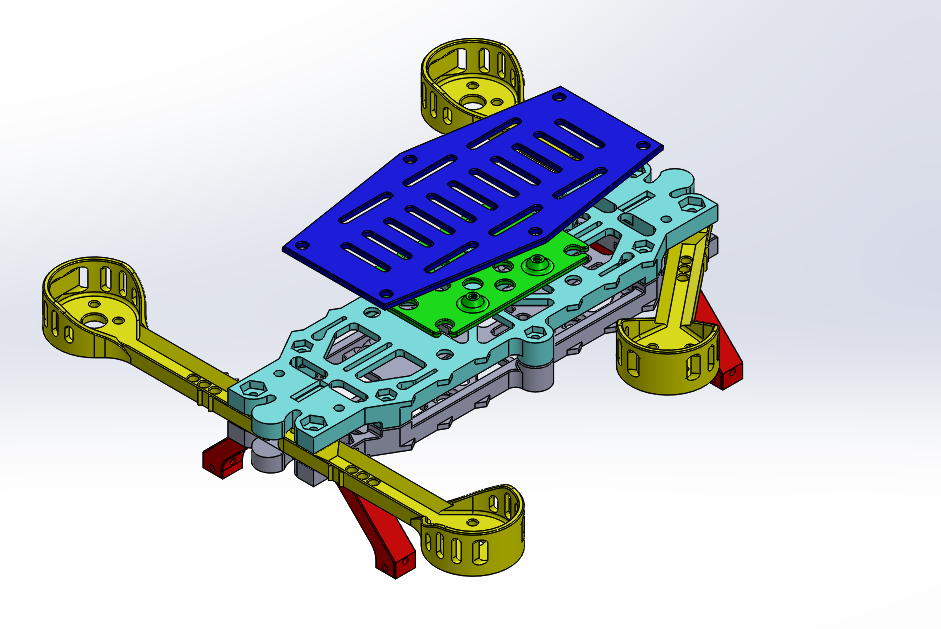
3D printed using my Ultimaker2 and many colors of PLA plastic at 100% in-fill. It is my first design, featuring folding arms, tucked away electronics, and anti-vibration mounted flight controller. It is designed to be friendly with FDM 3D printers, employing some special techniques. The frame is extremely strong.
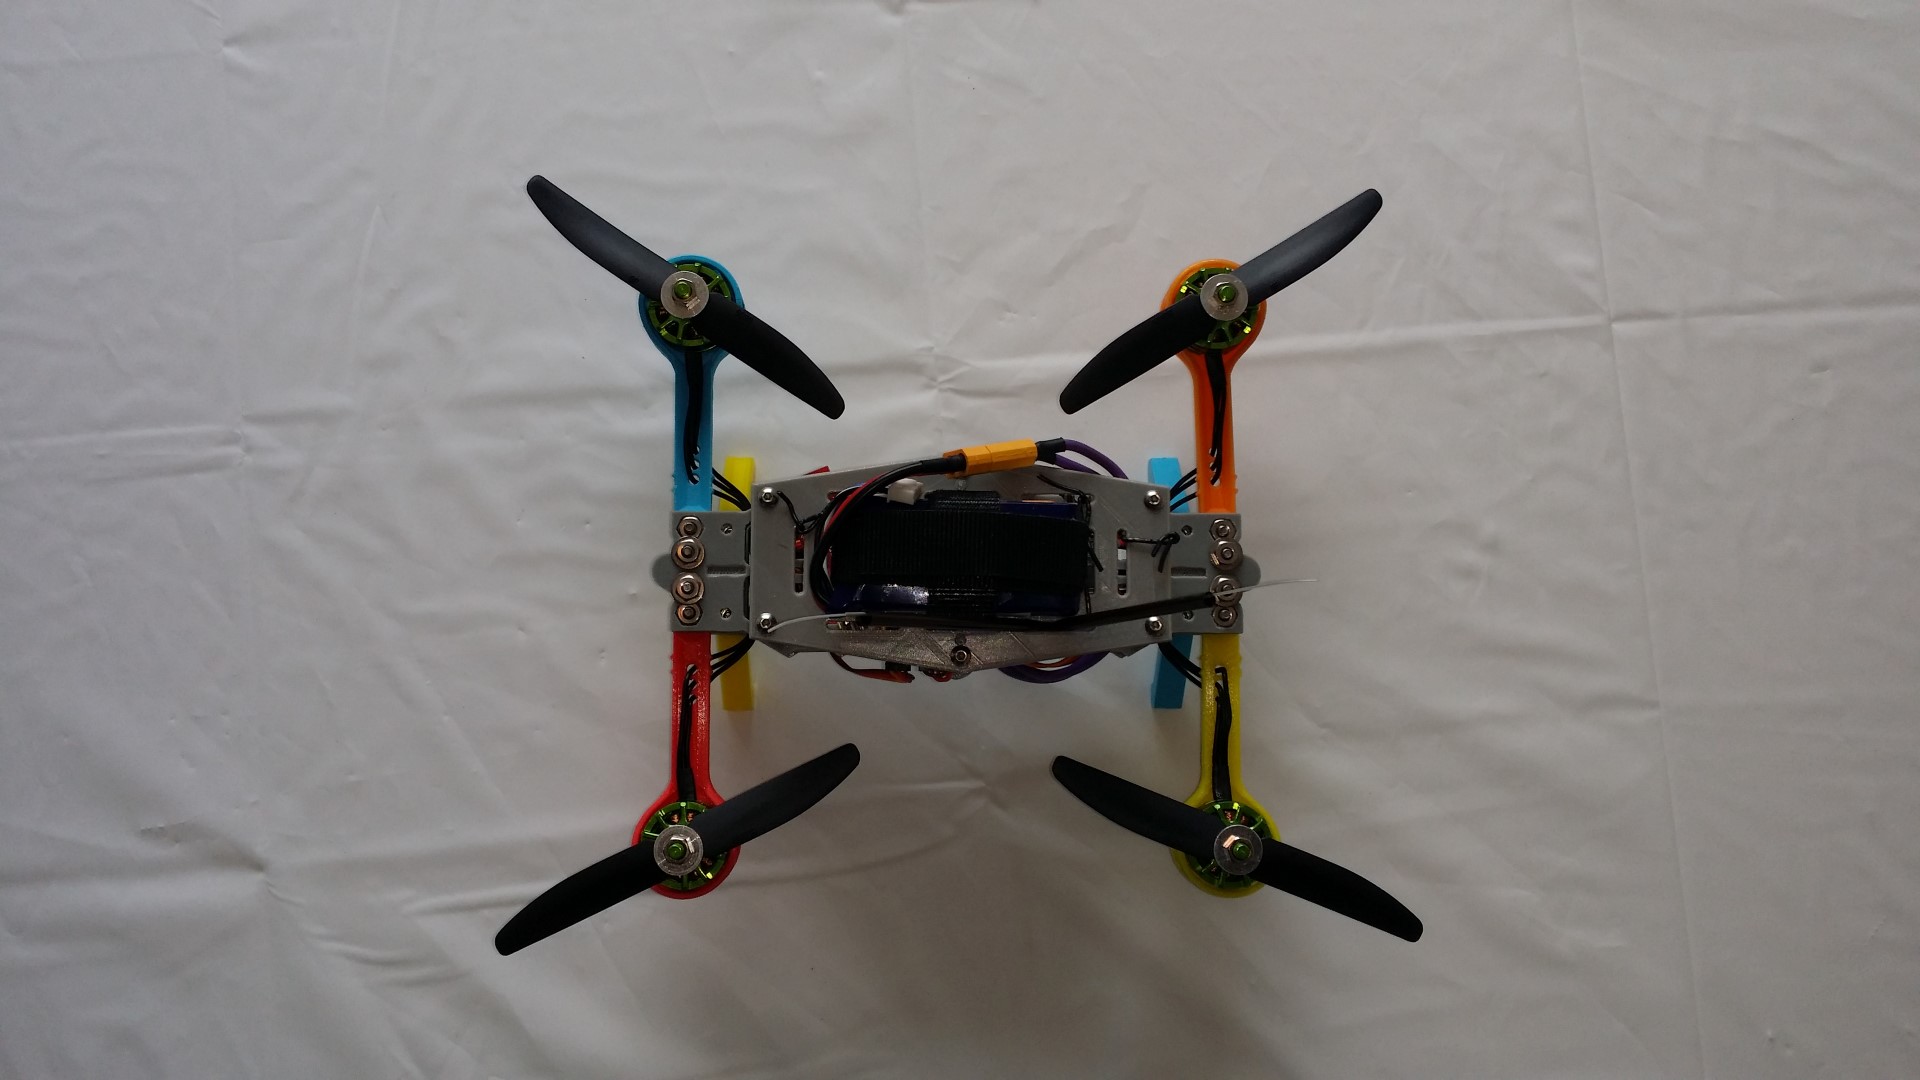
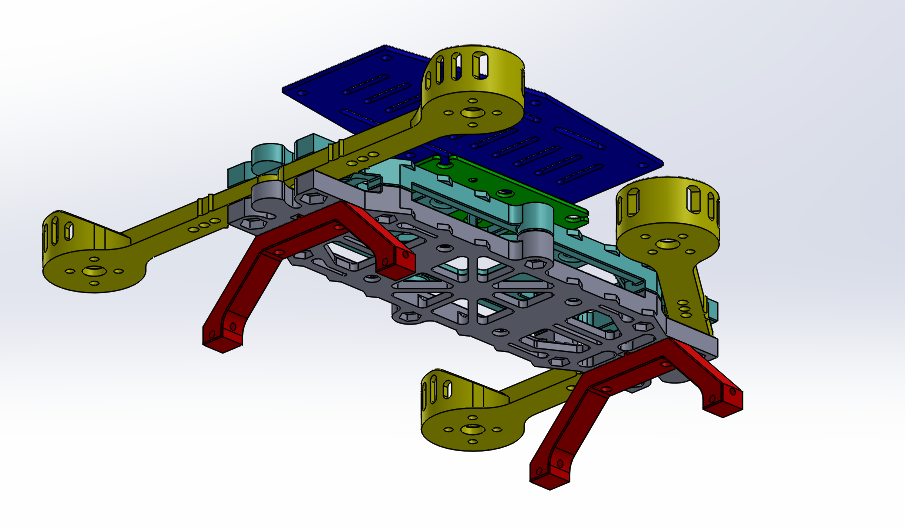
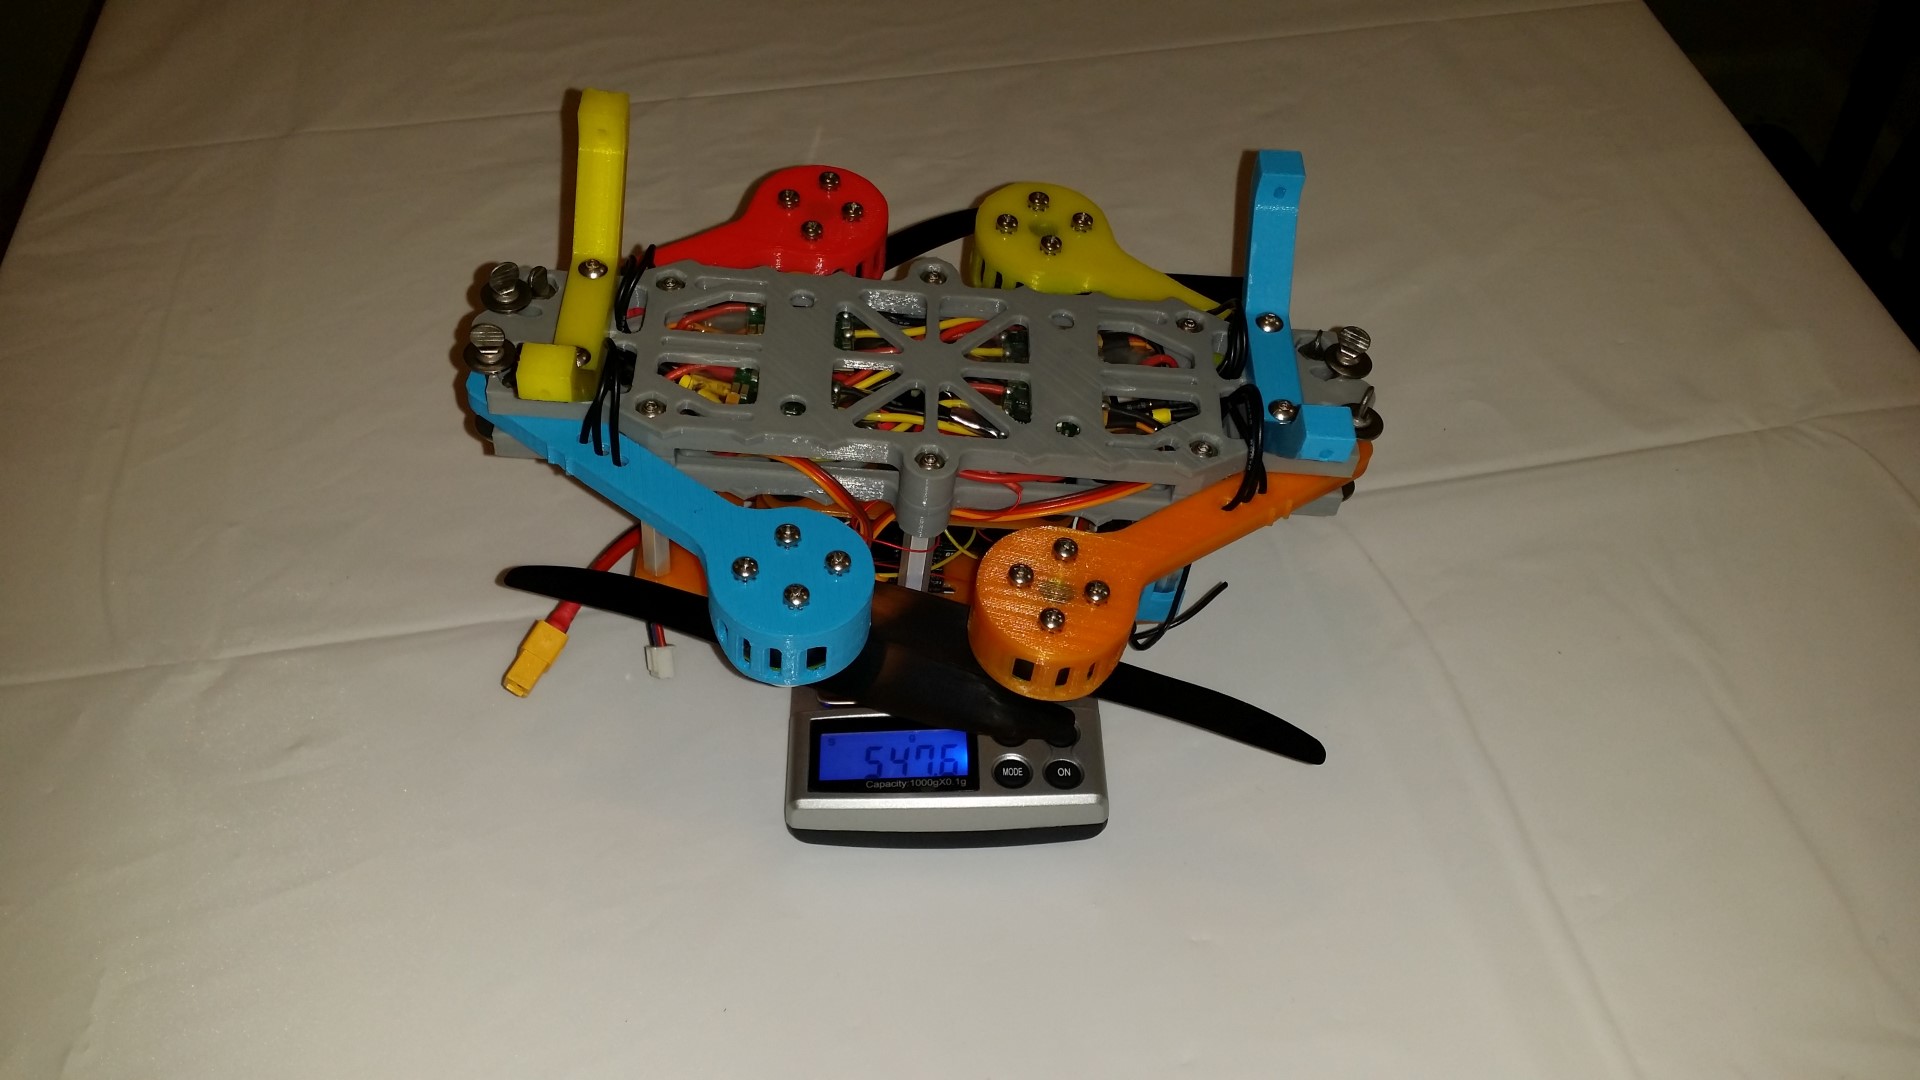
I need more practice. I need to buy a few more propellers and few more batteries as well so I can practice for longer.
Flight controller is a Continue reading
Continuing from my previous FrSky X4R-SB hack (read for some context), I really wanted Smart Port telemetry to work with Naze32. I forked the original baseflight firmware and added two key new functionalities:
please read my fork’s wiki, at this time, I can only test with my limited hardware, more help testing/coding would be appreciated.
Update 10/26/2014: I was asked to make the same contribution to Cleanflight, which I have done today.
The new forked firmware requires a circuit modification on both the X4R-SB and Naze32, see pictures: Continue reading
I am building a quadcopter using a FrSky Taranis X9D radio. It came with a FrSky X8R receiver. I wanted to keep my wiring clean by using the S.BUS feature on the FrSky receivers, I purchased a smaller FrSky X4R-SB receiver. The X8R has 8 PWM channel pins and the X4R-SB has 3 PWM channel pins, but if I use S.BUS (which is serial, not PWM), I can access 16 channels using only 1 pin, on both X8R and X4R-SB. The X4R-SB is much smaller, making it more ideal. (do not confuse the X4R-SB with the D4R-II, this is important, D4R-II uses CPPM, not S.BUS)
(update 10/25/2014: a follow up hack for Smart Port)
I want to use a Naze32 flight controller, which is open source and does have code to interpret S.BUS protocol. S.BUS is UART communication but it is inverted and the Naze32’s UART cannot accept inverted input. Continue reading
There is a law of the universe which states that if you own a Raspberry Pi and a 3D printer, you must print a case for it.
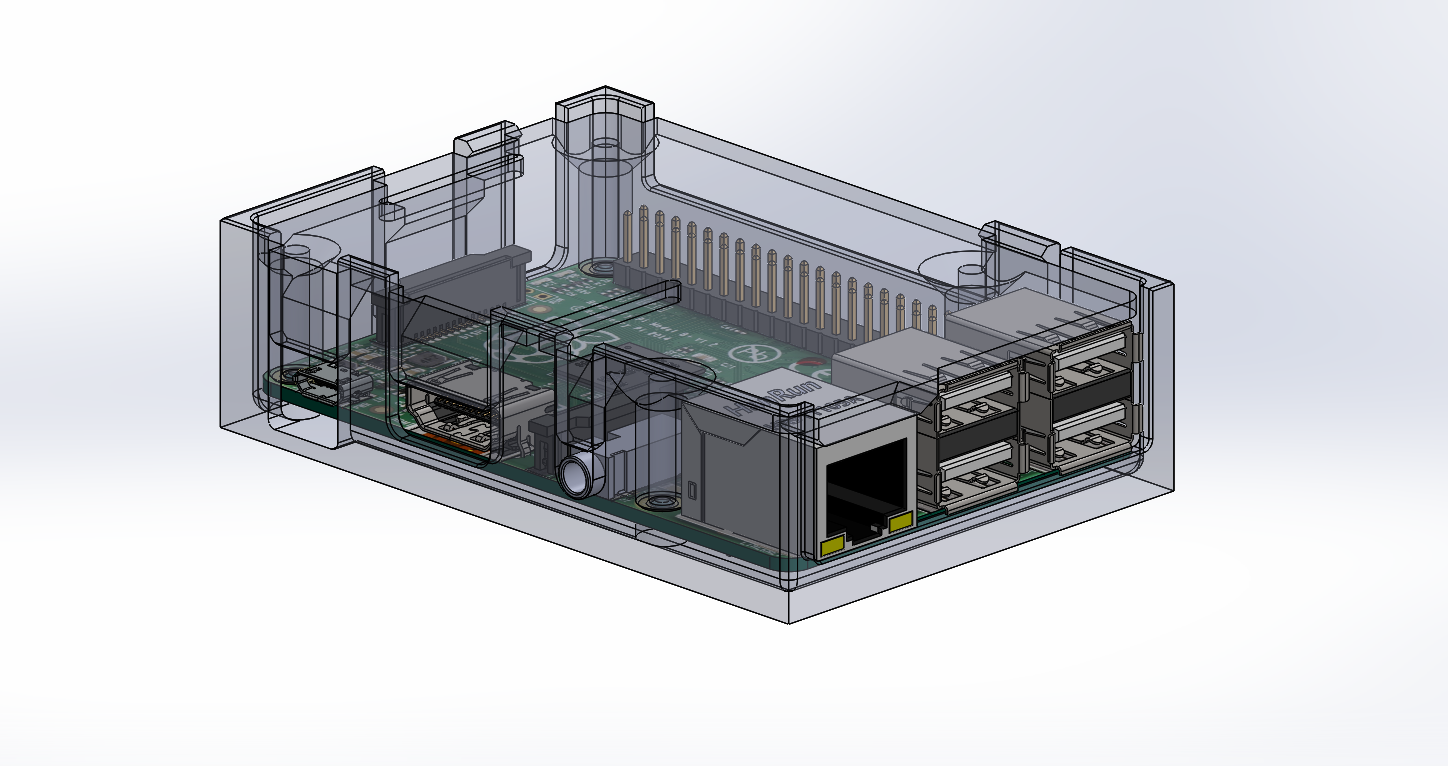
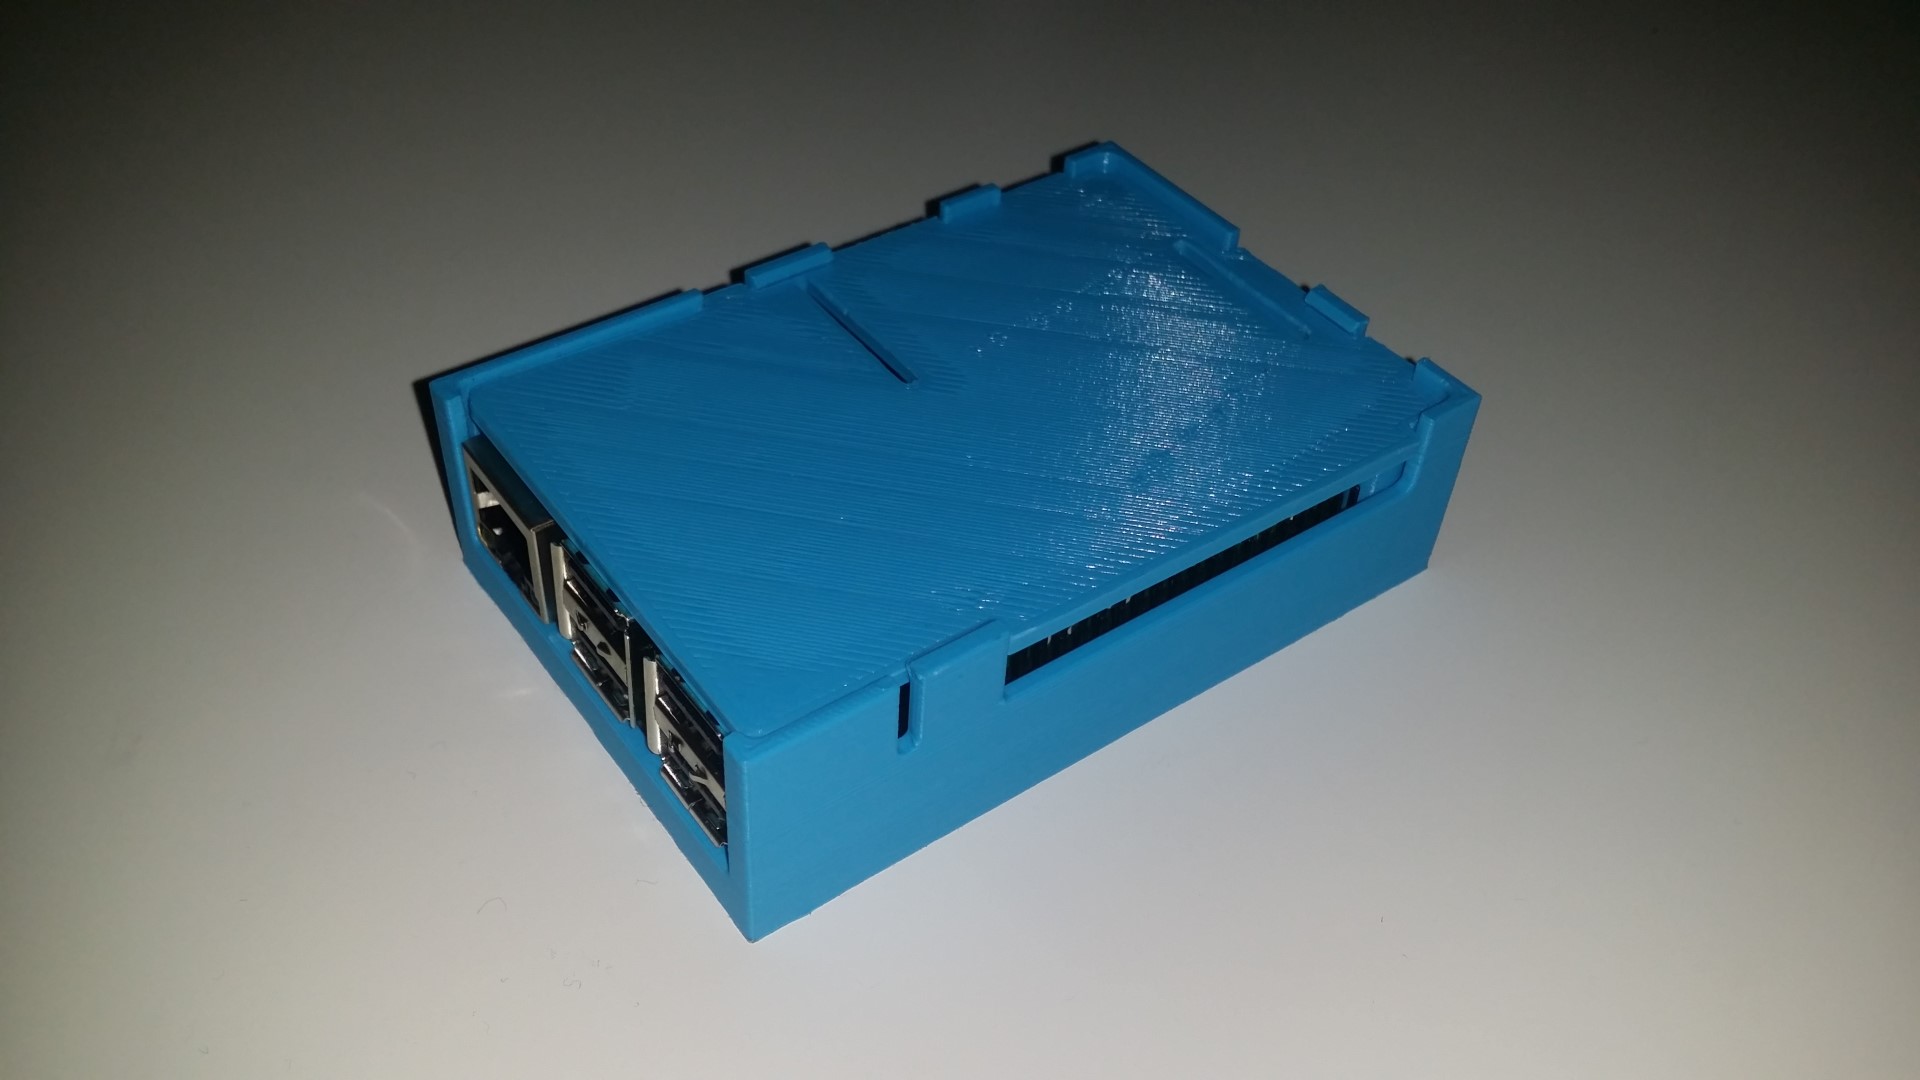
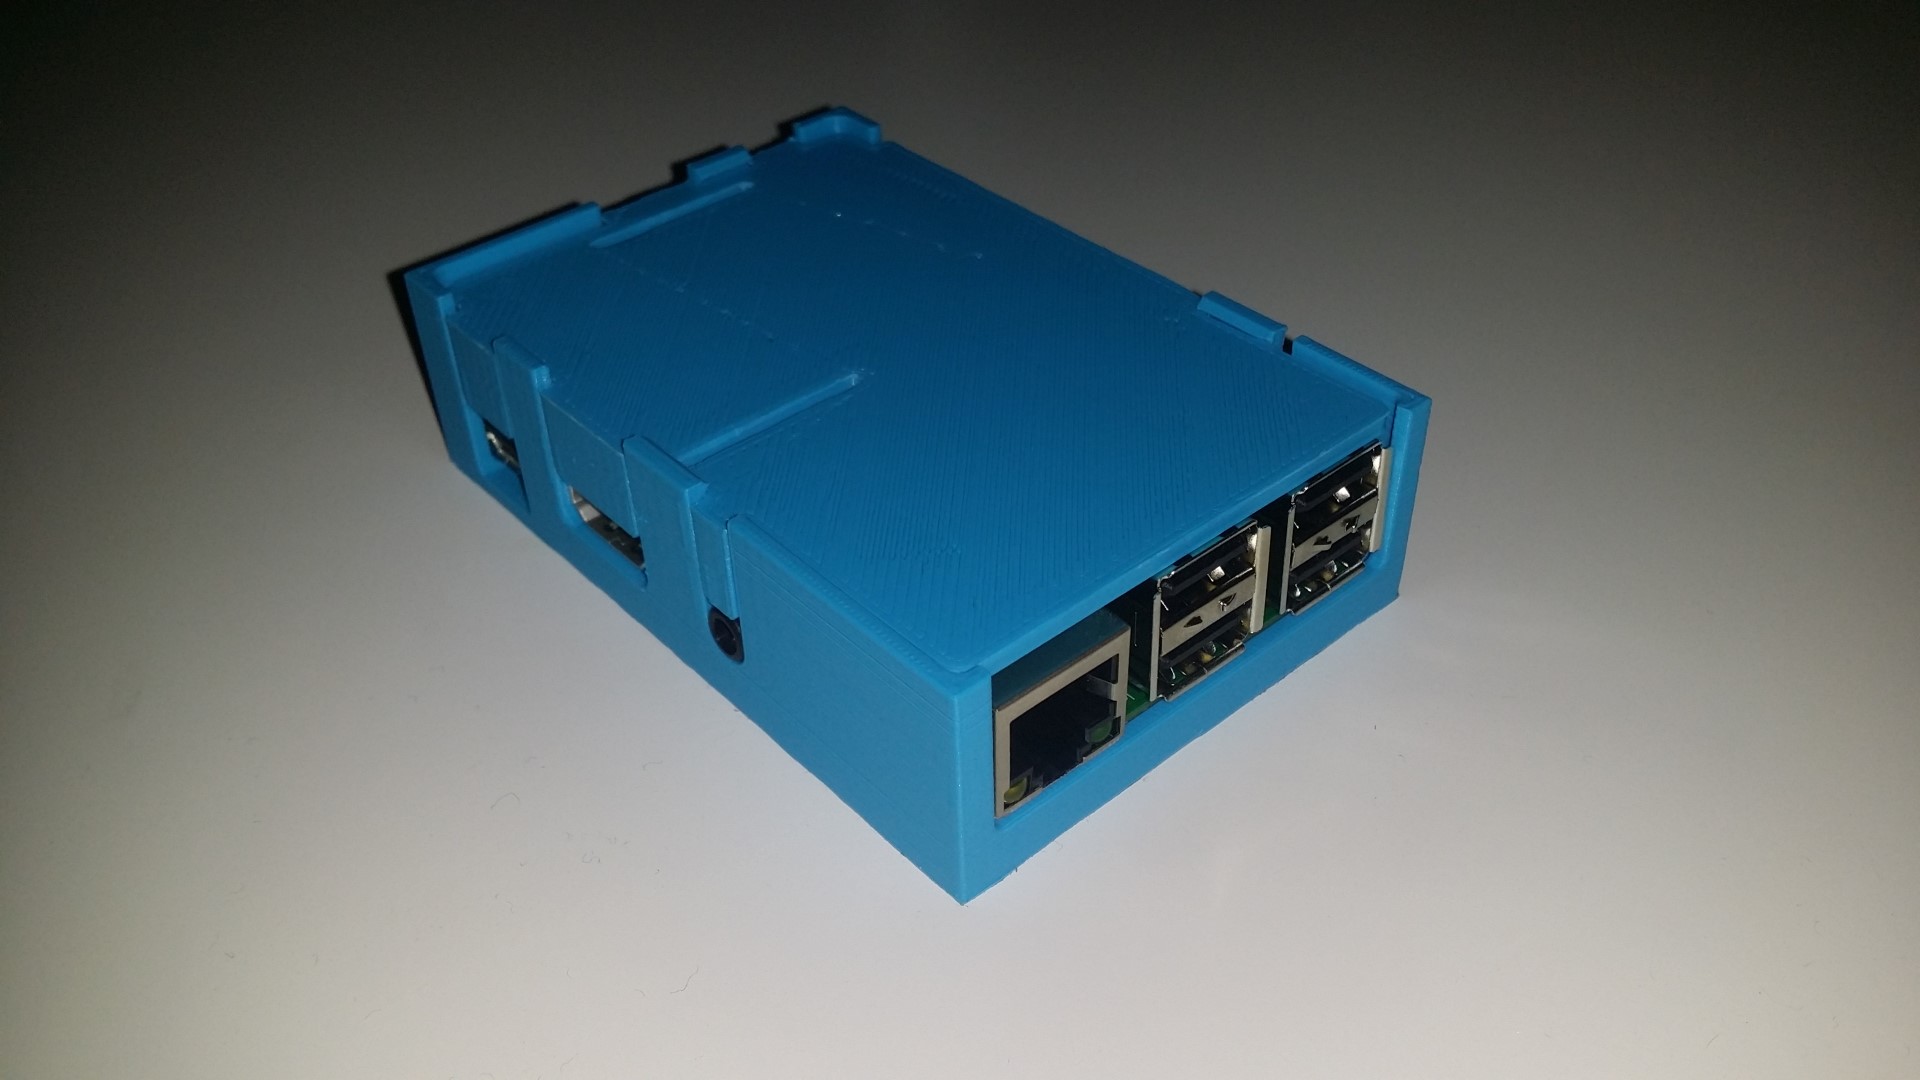
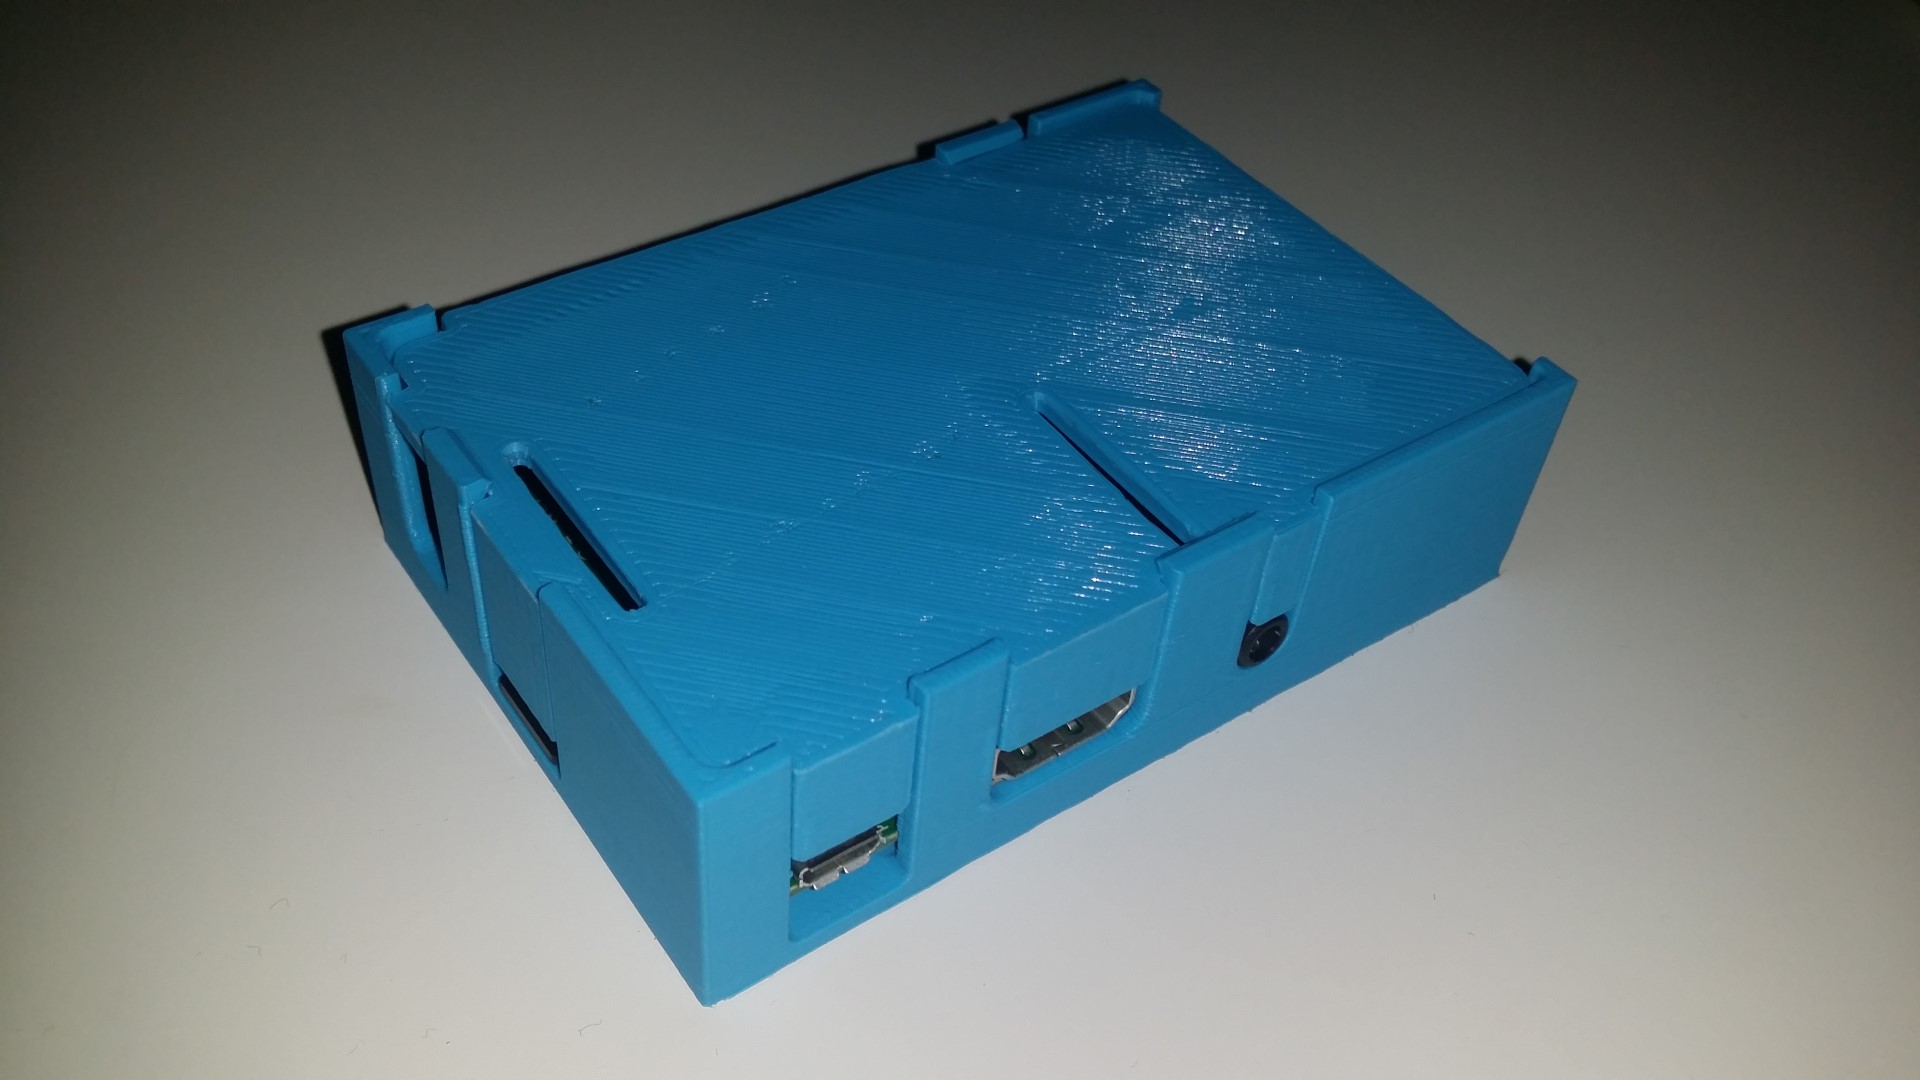
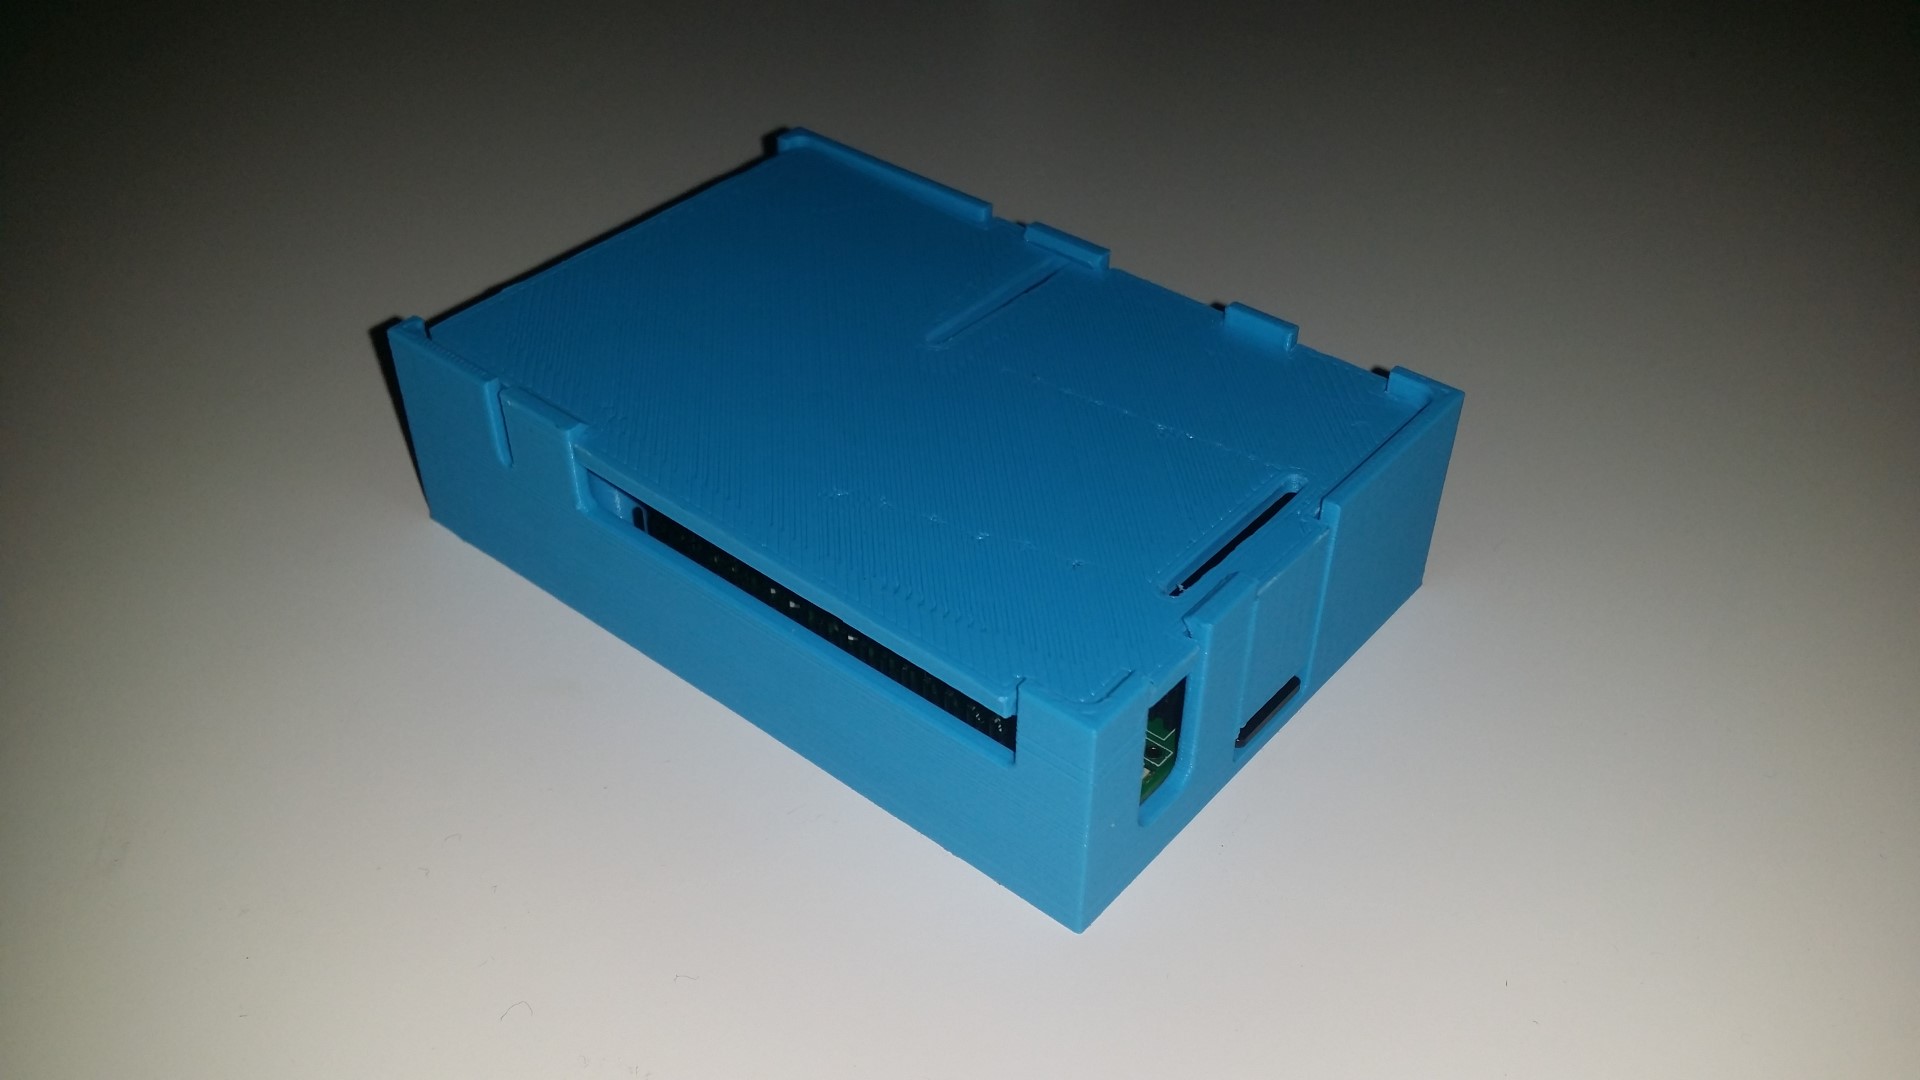
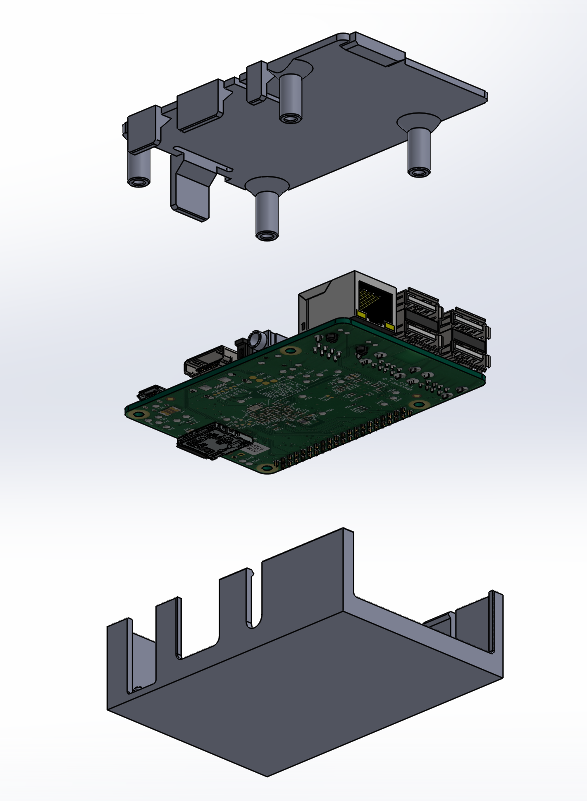
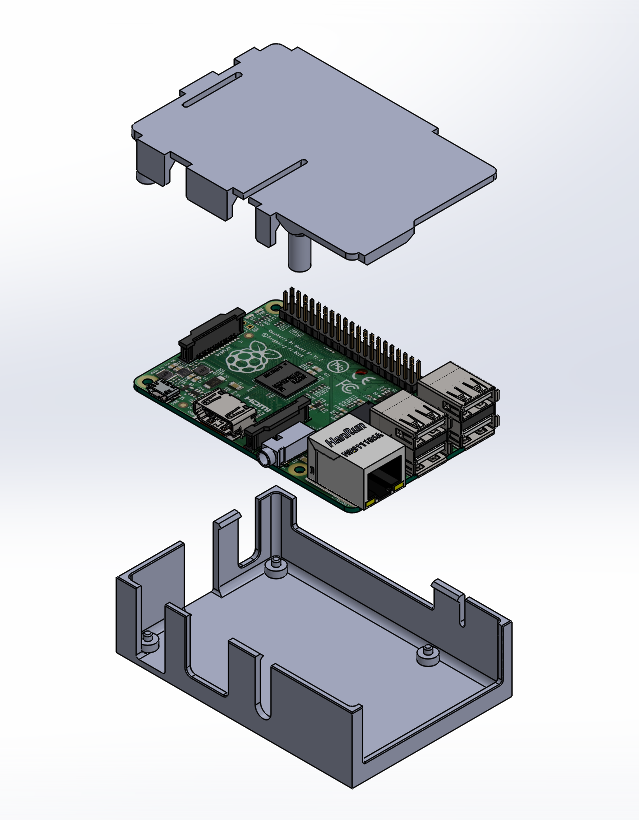
There are plenty of case designs for the original R-Pi Model B, and some for the R-Pi Model B+, but there are a few minor annoyances I noticed about them. Plus I really like DIY my own designs, so I designed my own case to suit my own needs.
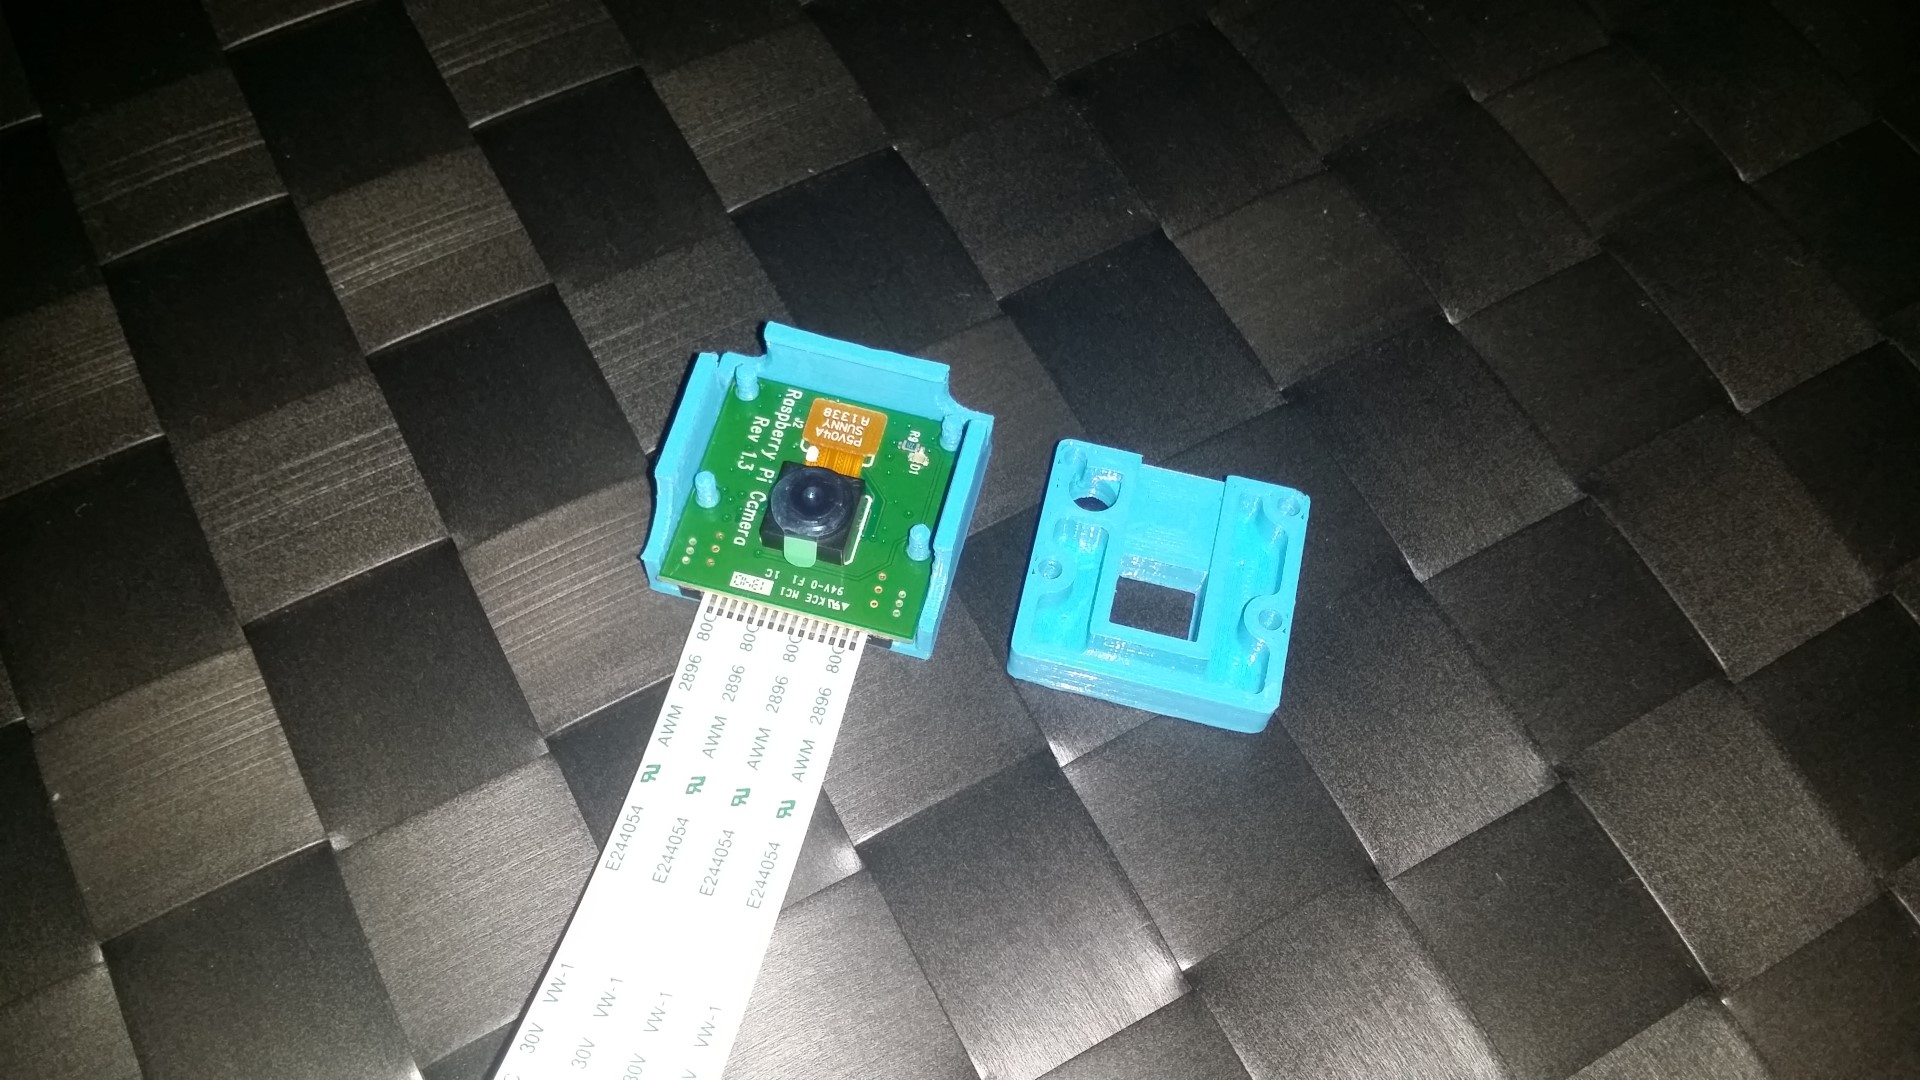
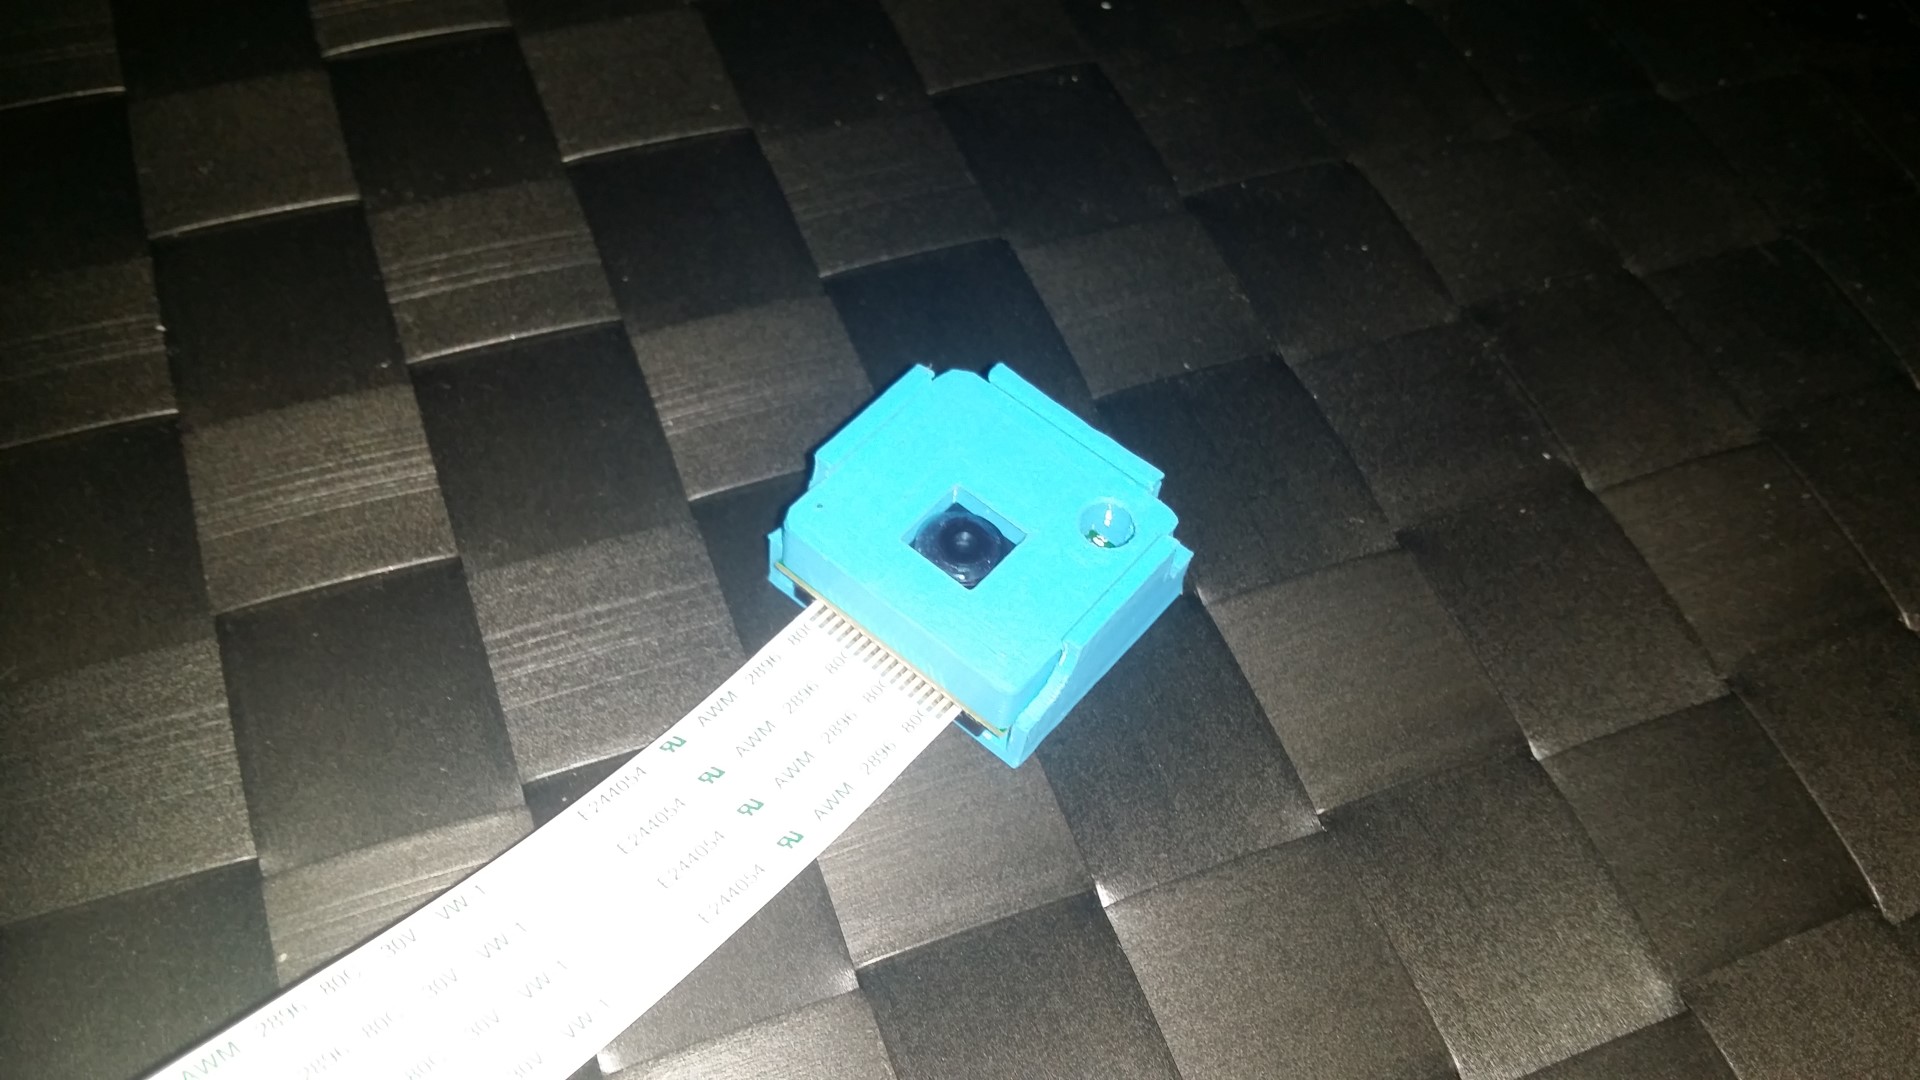
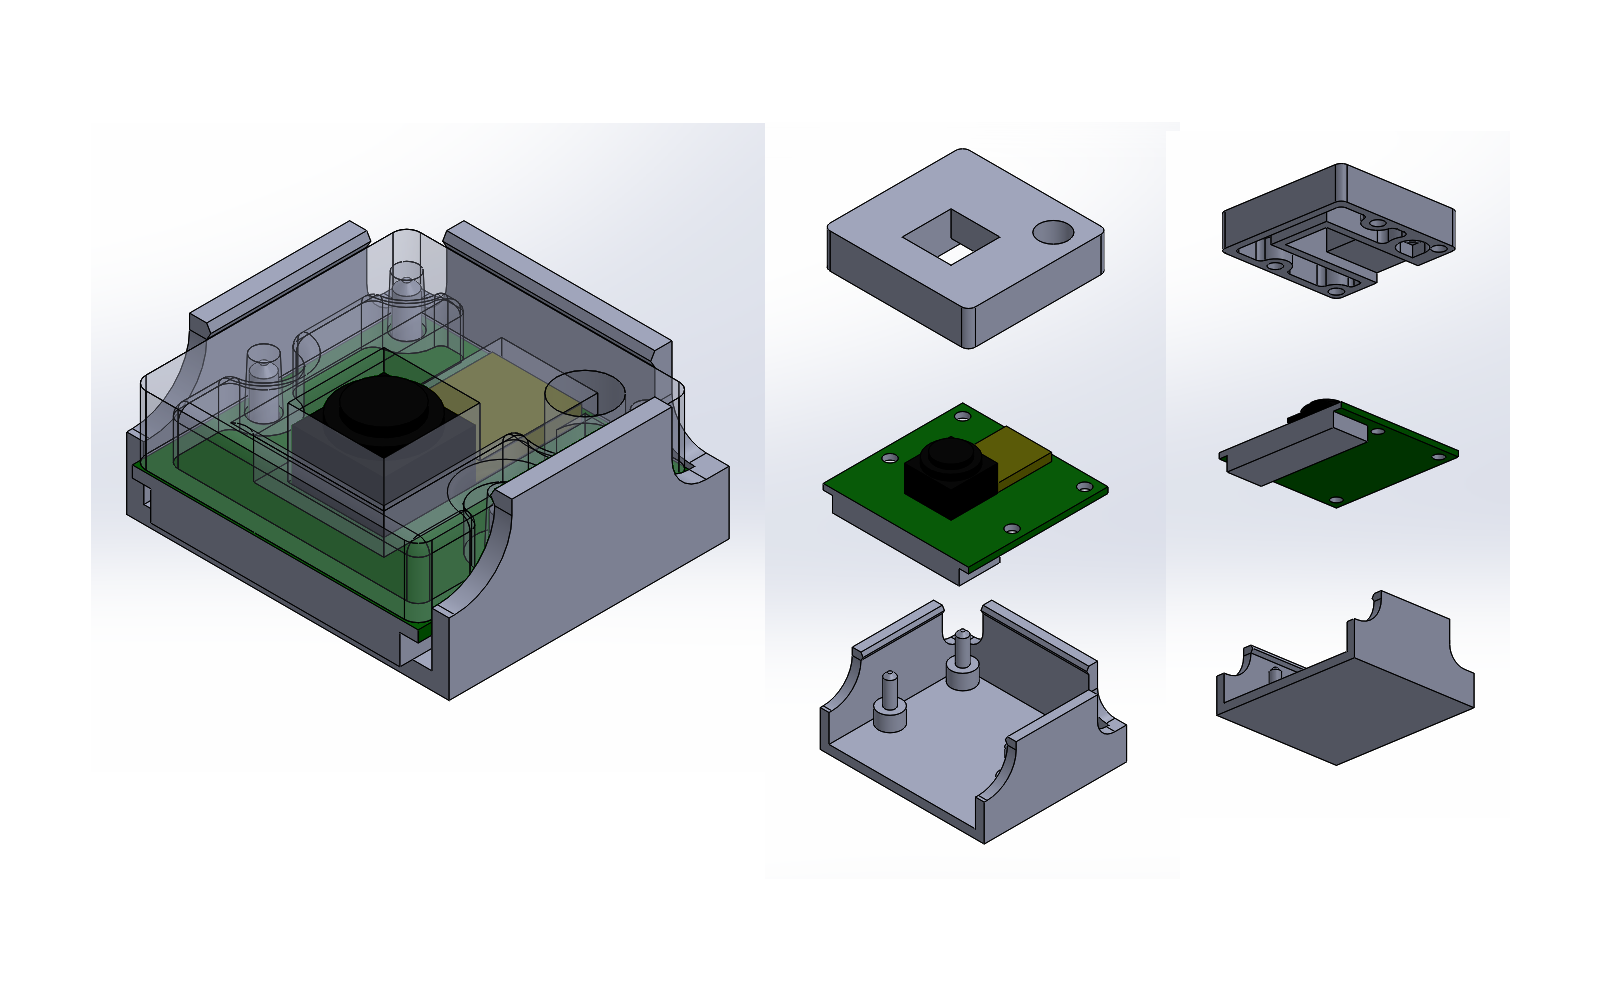
These parts are because I am going to set up a web server for my 3D printer, running OctoPrint and also serving live video through the camera. I also setup a cron job to take a picture periodically and upload it to this server. I can also stream video to my Ustream channel. (neither of these servers are 24/7)
I am sharing all of the source files for the models, not just STL files. It is very annoying when people only share STL files, because STL are not import or editing friendly. With my SLDPRT file, you can change one height dimension inside and it will re-adjust the entire case, maybe if you need more clearance on the bottom for screws.

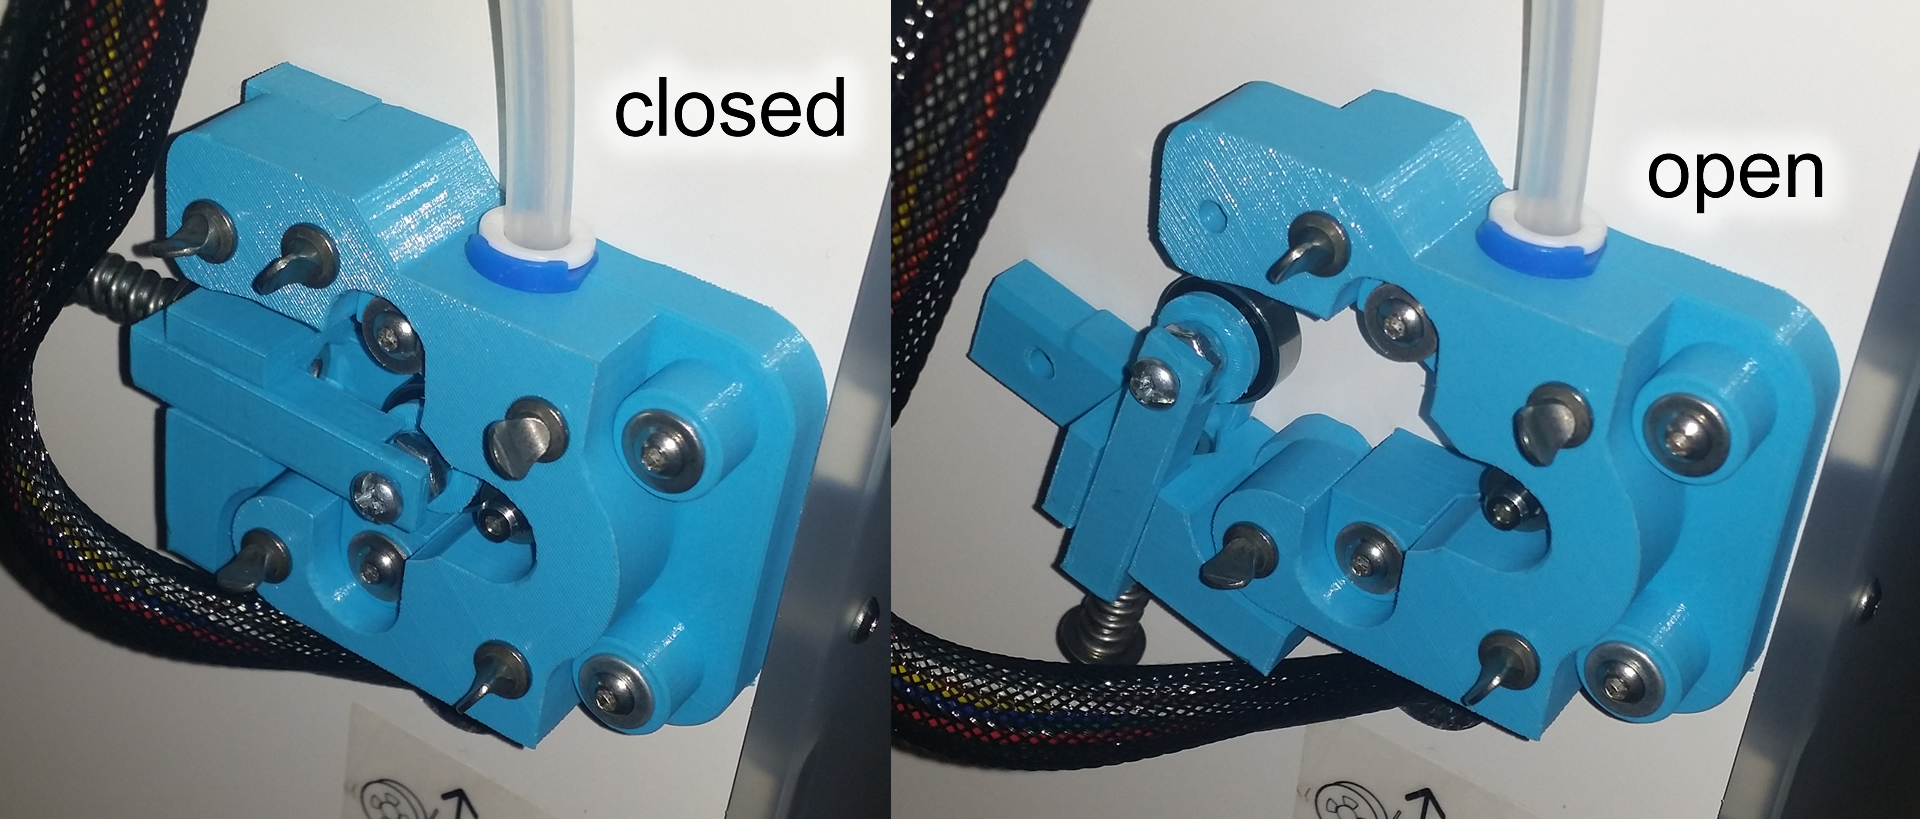
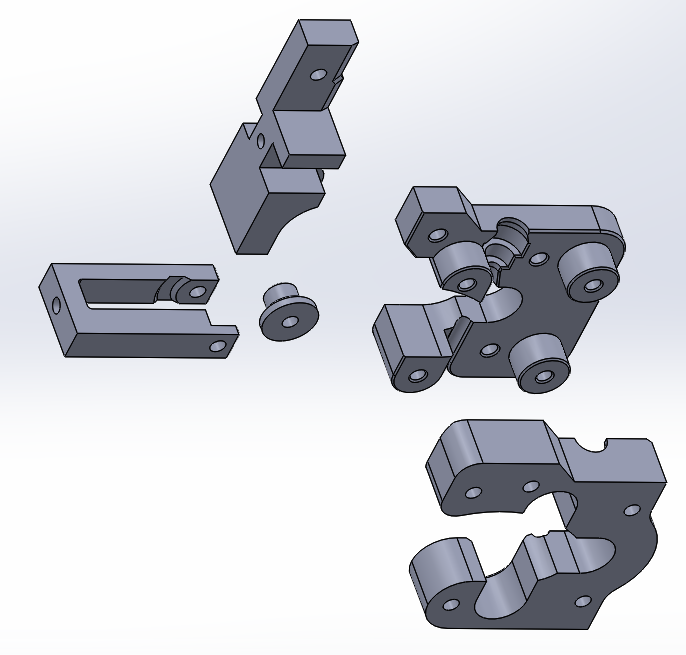
The Ultimaker2 3D printer has a problematic filament feeder mechanism assembly. When the filament is stuck and the feeder motor turns, it can grind away the filament, causing a gouge in the filament. The gouge makes the problem worse since the tensioner bearing will force the gouge into the feeder’s knurled wheel more, causing even more grinding. This jam happens frequently because sometimes even if the temperature sensor reports that the print head hot end has heated up, the plastic hasn’t melted yet and can’t move yet.
The Ultimaker2’s feeder design is both beautiful and disappointing. It is beautiful in the sense that is is symmetrical and compact. If you had a dual extruder, you can use the same feeder mechanism for both feeders, cutting down on manufacturing costs. But it is impossible to disassemble without removing the stepper motor because the same 4 screws that holds the feeder together also holds the stepper motor in place. If you attempt to open the feeder mechanism to clear a jam, the motor will fall off. The motor is also covered by a metal casing so you need to remove the casing as well. This is very annoying.
There is no other way to move the tensioner bearing because the design is so compact and the spring is tight. There is no other way to remove the feed tube either.
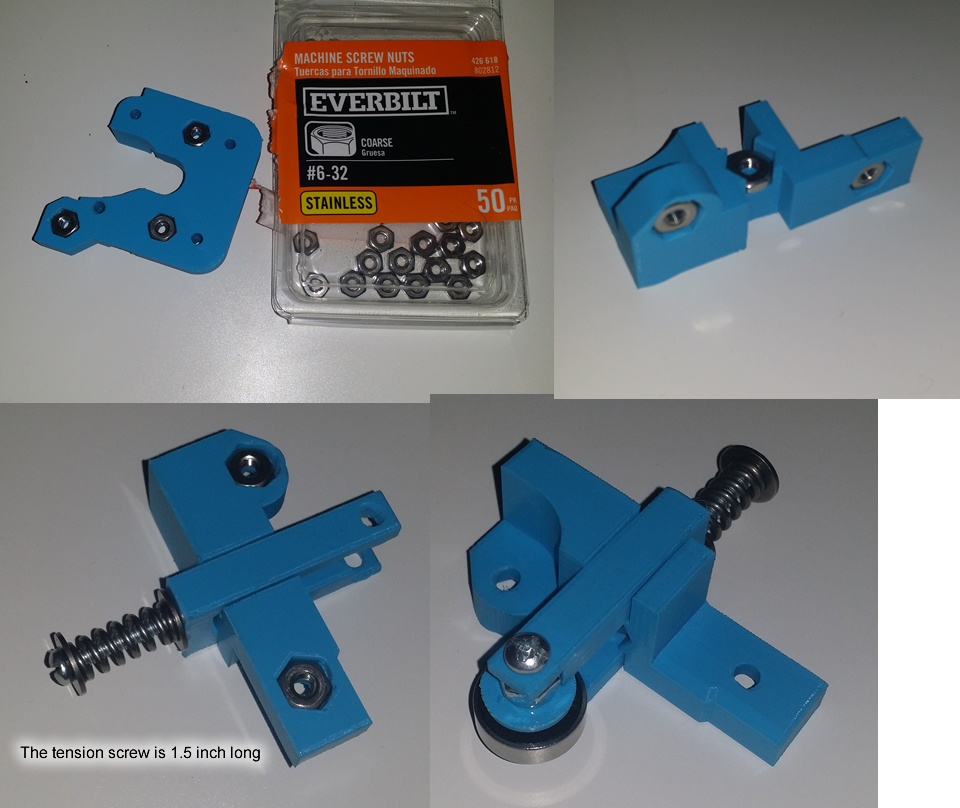
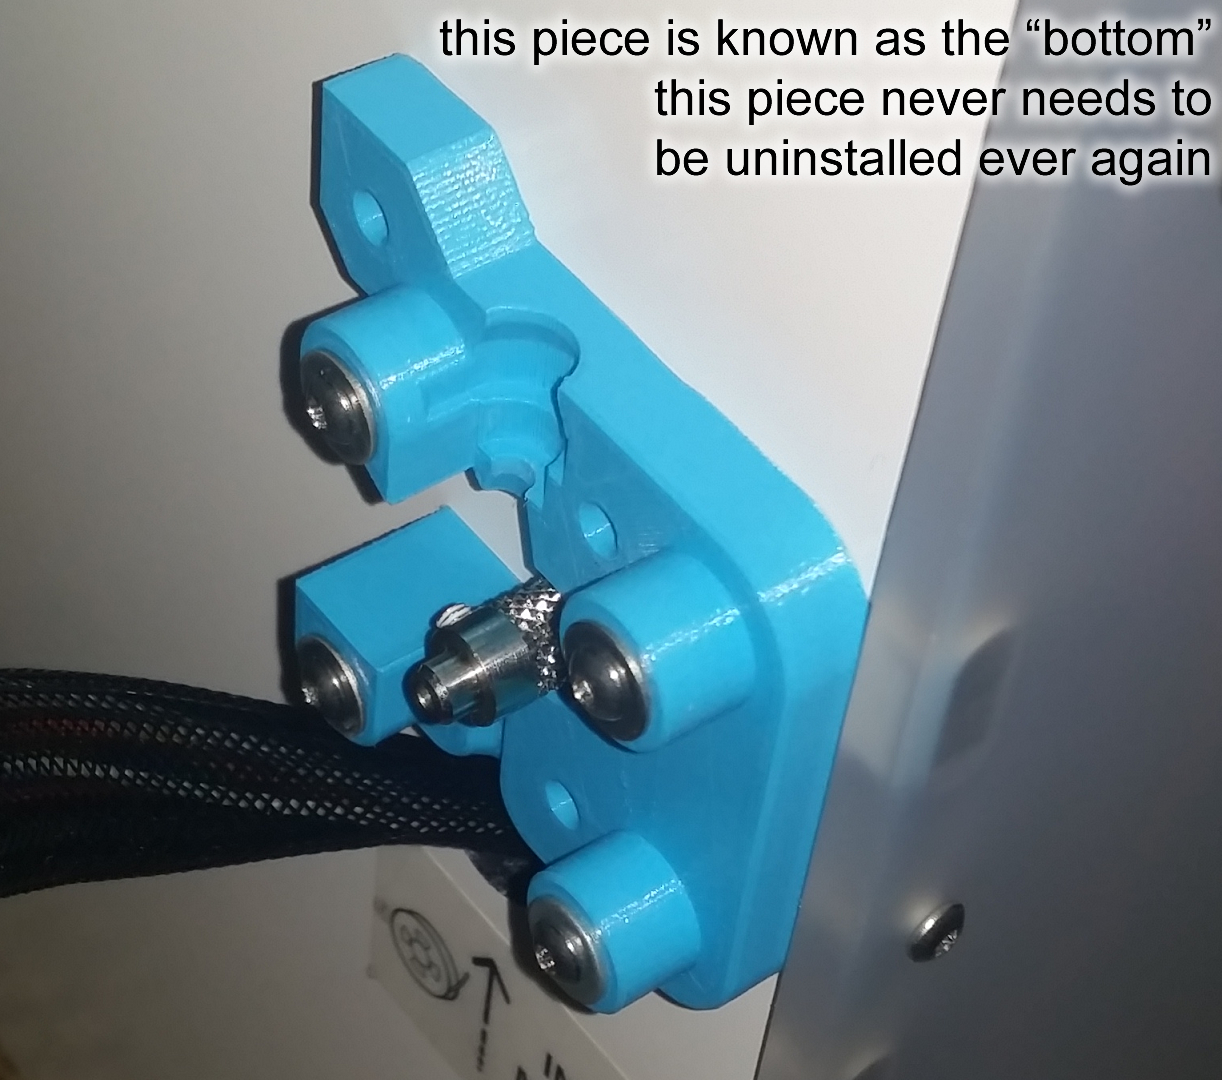
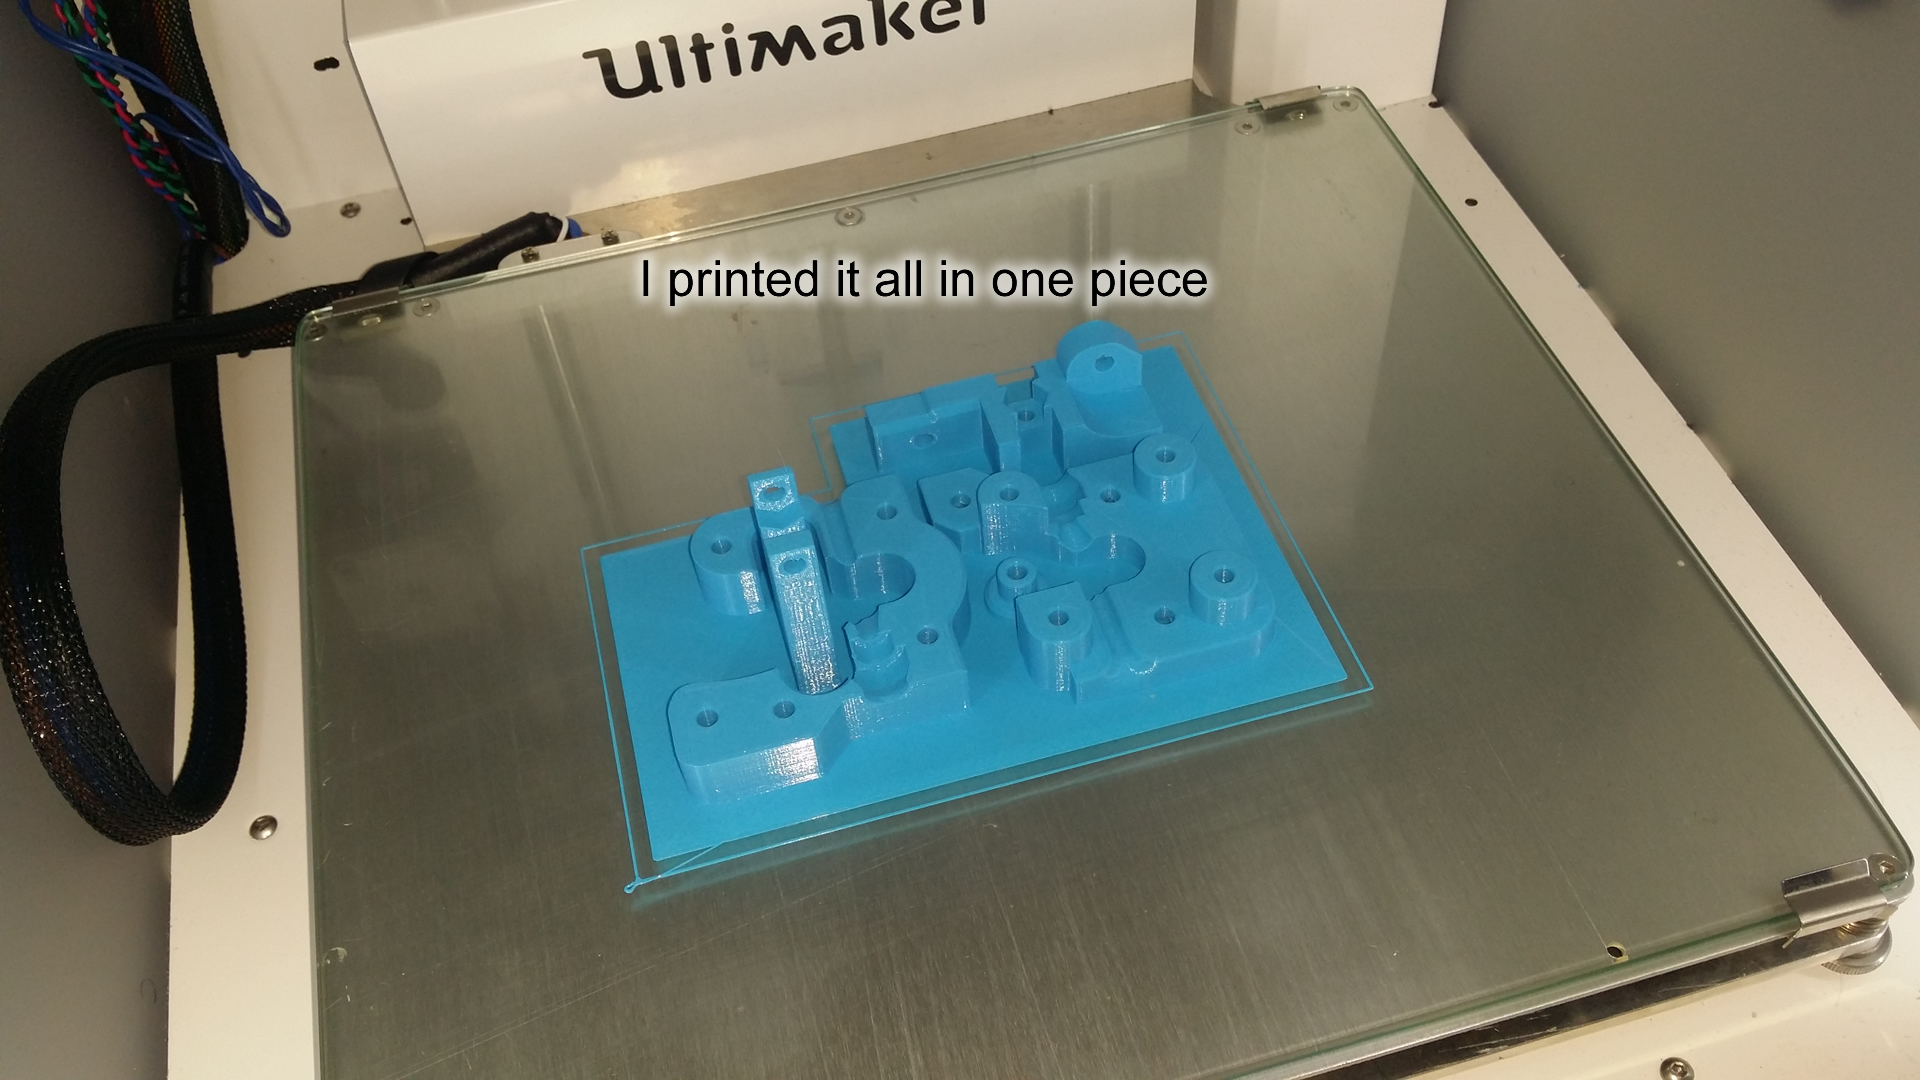
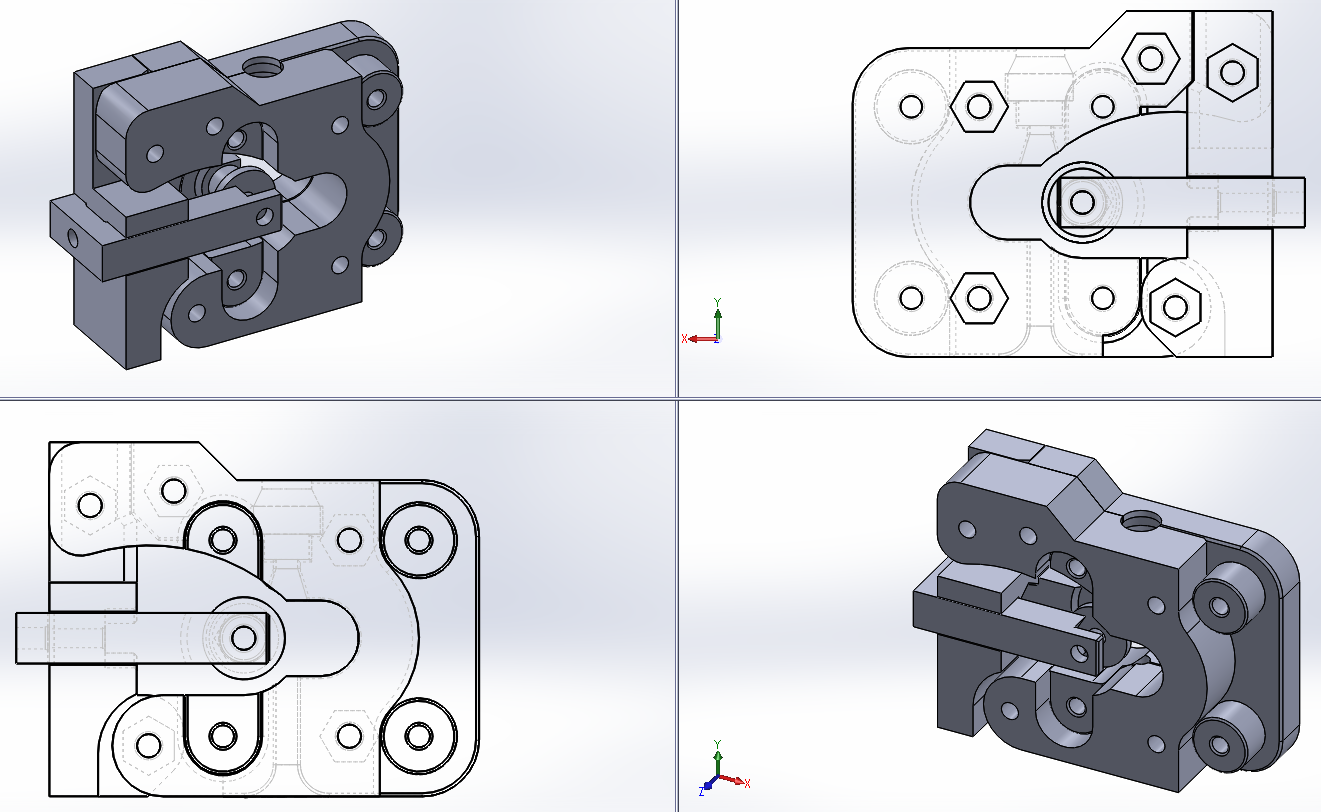
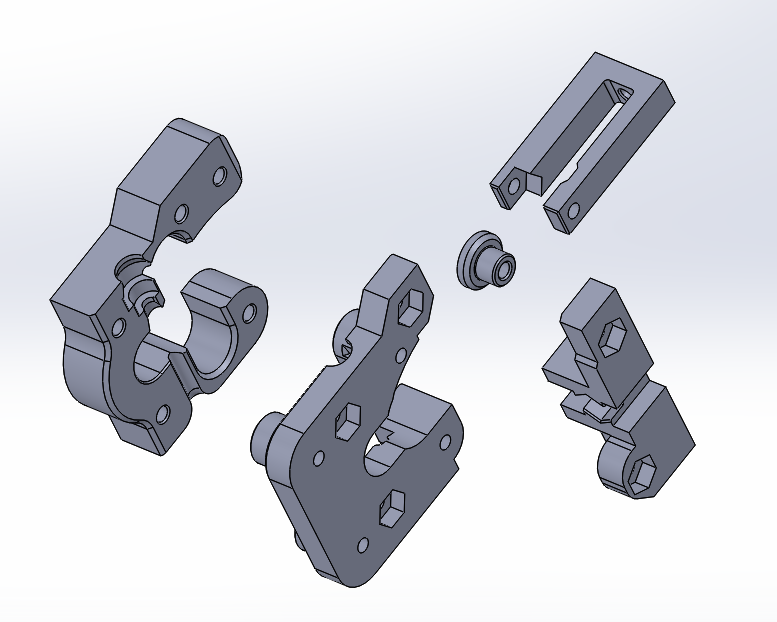
What I needed was a feeder mechanism that can be opened up without removing the stepper motor, and also allow the tensioner bearing to be moved out of the way easily. I came up with the following design:
I have 3D printed many things recently. Here are two items that you will find interesting (they are interesting to me because I am experimenting with certain design techniques). One is a box to hold delicate drill bits. The other is a filament spool holder for my Ultimaker.
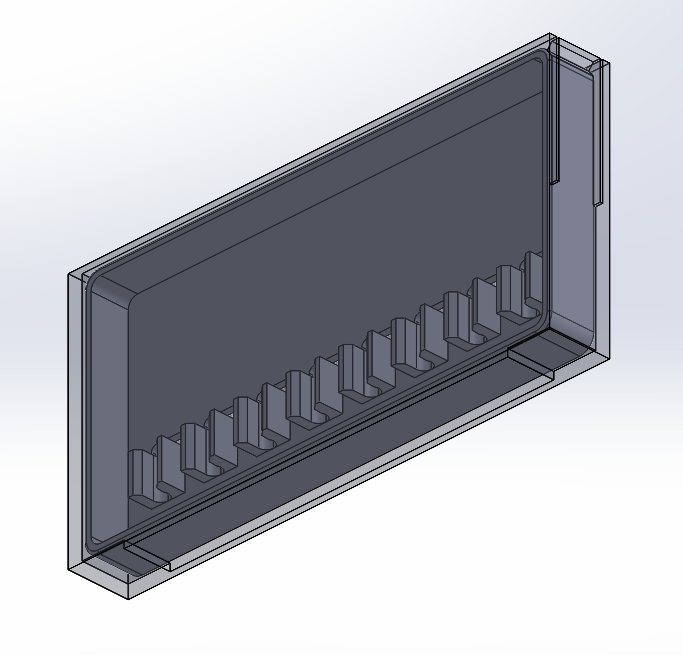
Please continue reading.
Continue reading
I purchased the Ultimaker2 recently and I’ve been heavily using it.
Before I begin, here are some of this weekend’s prints:

Now for the review…
Continue reading
I got a new 3D printer, a Ultimaker 2. After testing it out with some small test prints, I printed my first own custom design on this printer. (I’ve only designed for SLT printing previously and not extrusion printing before, this is my first design for extrusion printing).
It’s an adapter that holds my smartphone (Samsung Galaxy Note 3 with a wireless charging S-View flip cover case) and has threads (a 1/4″-20 threaded nut) so it can be mounted to a standard camera tripod. This phone has 4K video recording so why not?
The design is very custom because I need to consider the fact that I have a S-View flip cover case.
(I know I could also use threaded metal inserts, but nuts are easier to buy at the local Home Depot)
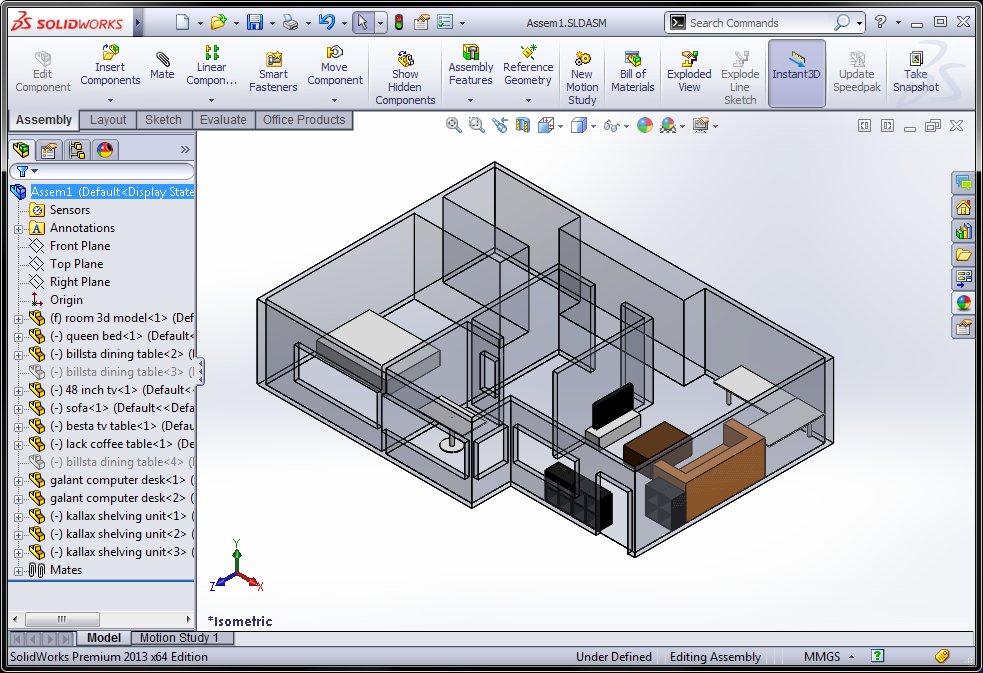
Nothing geeky to talk about. I managed to rent a 1 BR apartment in San Mateo for about $1725/month in a pretty good spot (but whoever built the place did not seem to own a ruler and whoever painted it didn’t own masking tape). Here’s me planning the layout using SolidWorks and Ikea’s catalog.
More reviews/ranting (I am still in temporary housing, I can’t do much fun DIY stuff, but I have been buying things)… Continue reading